Following the tenth part of the OPC Router tutorial, I’m presenting how to interact with industrial automation systems via the Microsoft Teams communication platform. Remember, we’re configuring and running a project for “Papín”, a fictional potato bread factory.
Why an OPC Router tutorial with Teams?
Because “learning by doing” with examples is fun. Also, this functionality can provide us with a modern use case: the versatility to receive events notifications to your corporate chat group via the Teams application, which is an excellent option when we want to add a business messaging system to manage your production data environment better. See below a list of posts that complete this tutorial:
- Getting Started with OPC Router
- Connect an OPC DA server to Microsoft SQL Server
- Connect an MQTT data source to InfluxDB Cloud
- Perform multiple calculations within OPC Router
- Run an OPC Router application with Linux and Docker
- Build a process data simulator with Python, CSV and OPC Router
- Explore basic RESTful web services within OPC Router
- Build a Telegram basic interaction within OPC Router
- Build an SMS basic interaction within OPC Router
- Build a WhatsApp basic interaction within OPC Router
- Build a Teams basic interaction within OPC Router (this post)
- Explore advanced RESTful web services within OPC Router
- Run an OPC Router application with Portainer
Considerations
From this point on, we must download and install OPC Router v4.27.5016.75 or later to make this feature work appropriately. Also, OPC Router Config was renamed to OPC Router Management.
Prerequisites
Firstly, you’ll need:
- A Microsoft account 🧾
- Microsoft Teams desktop application 💬
- FactoryTalk Linx Gateway as OPC DA server 🛤️
- ControlLogix 1756-L61 as Programmable Automation Controller (PAC) 🤖
- An Internet connection 🌐
- Schematic diagram 📝
- OPC Router Management application 💻
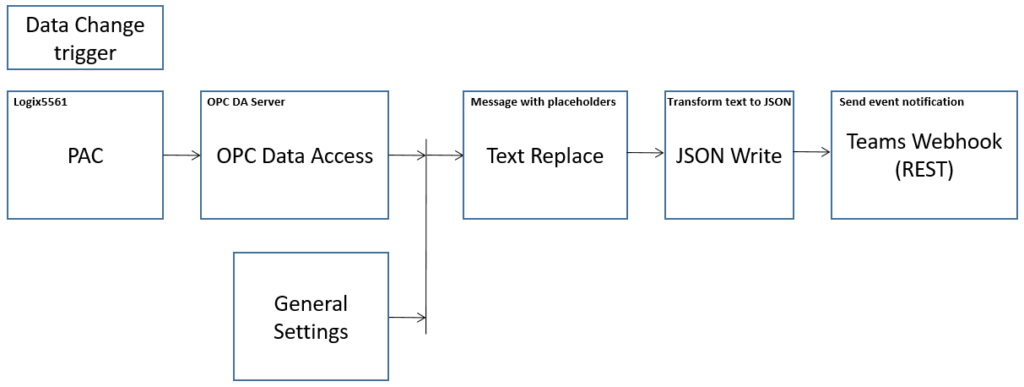
Schematic Diagram
To illustrate this idea better, look at this:
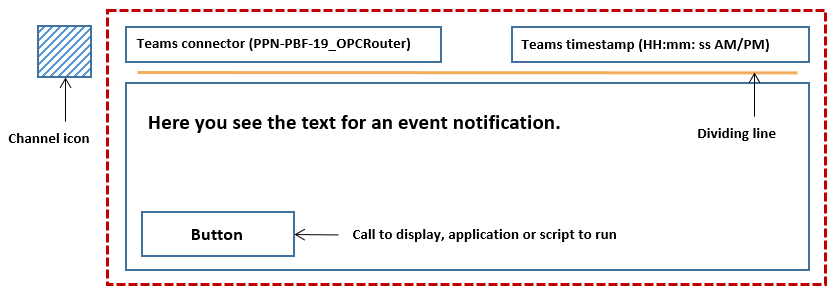
Every event notification will look like a “message card” in Teams:
What is Teams?
Microsoft Teams is a proprietary business communication platform developed by Microsoft as part of the Microsoft 365 family of products. It’s a workspace for real-time collaboration, meetings, application sharing, and more. In Teams, teamwork and communication happen in channels. A channel is a single place for a team to share messages, tools, and files.
Working with Microsoft Teams
Creating a Teams channel
- Initially, run the Microsoft Teams application on your computer.
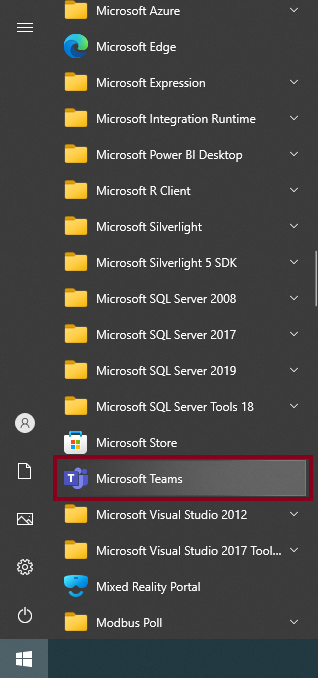
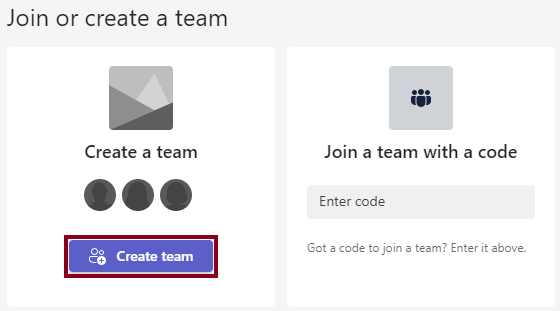
- Click “Teams” and then, “Join or create a team” to start the creation of a new team.


- Following this, press the “Create team” button.
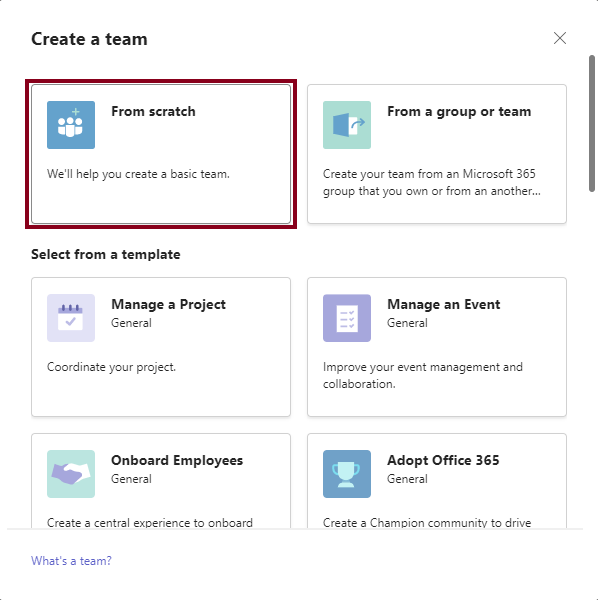
- Then, choose “From scratch” to create a basic team.
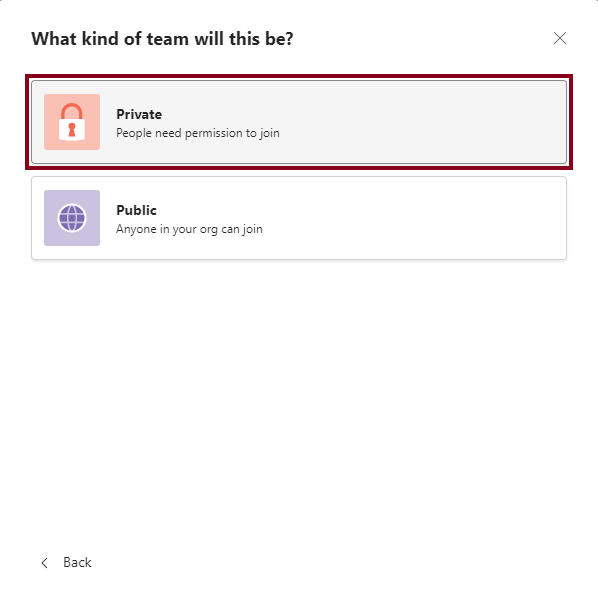
- After that, select “Private” for people to need permission to join.
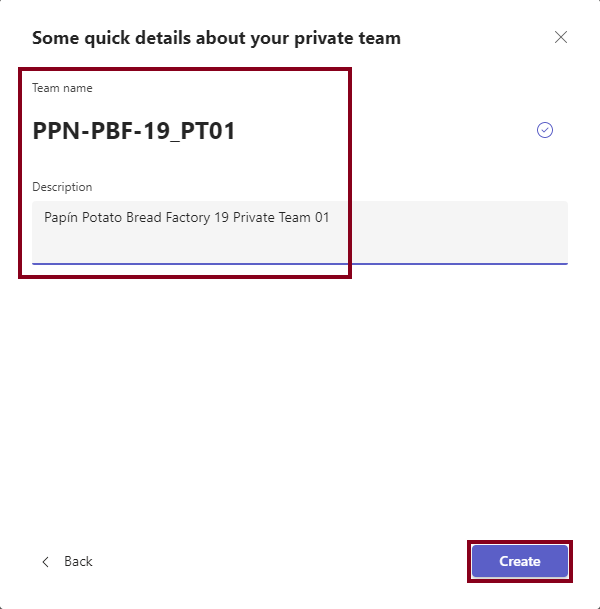
- At this point, enter your team name and description.
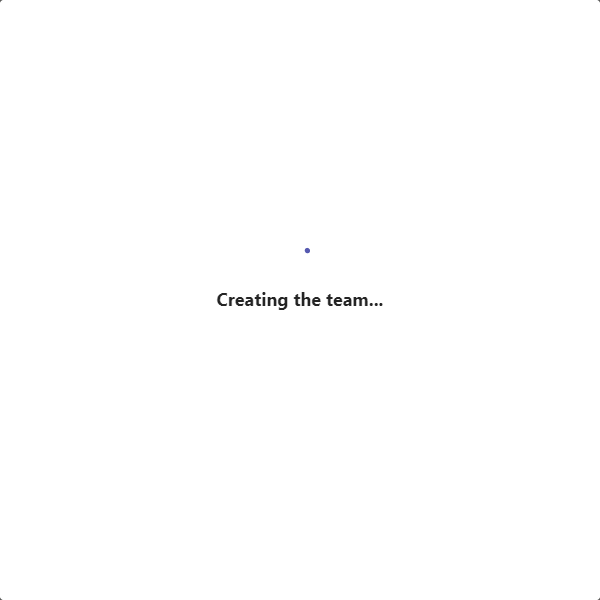
- Wait until the team is created.
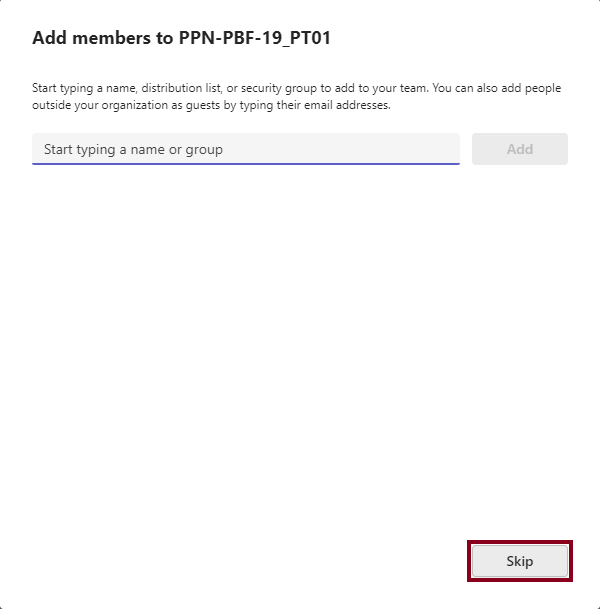
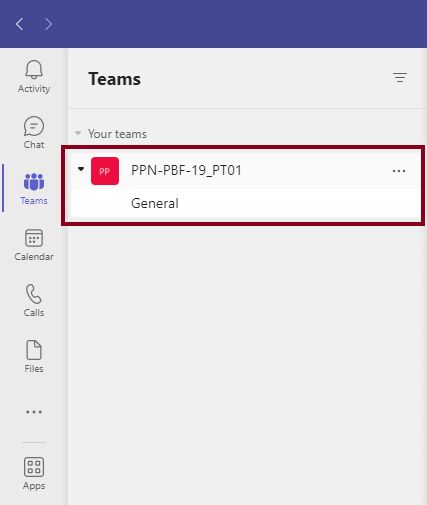
- Add members to the group later.
- You should see the new private team and the “General” channel.
Add and configure a Teams connector
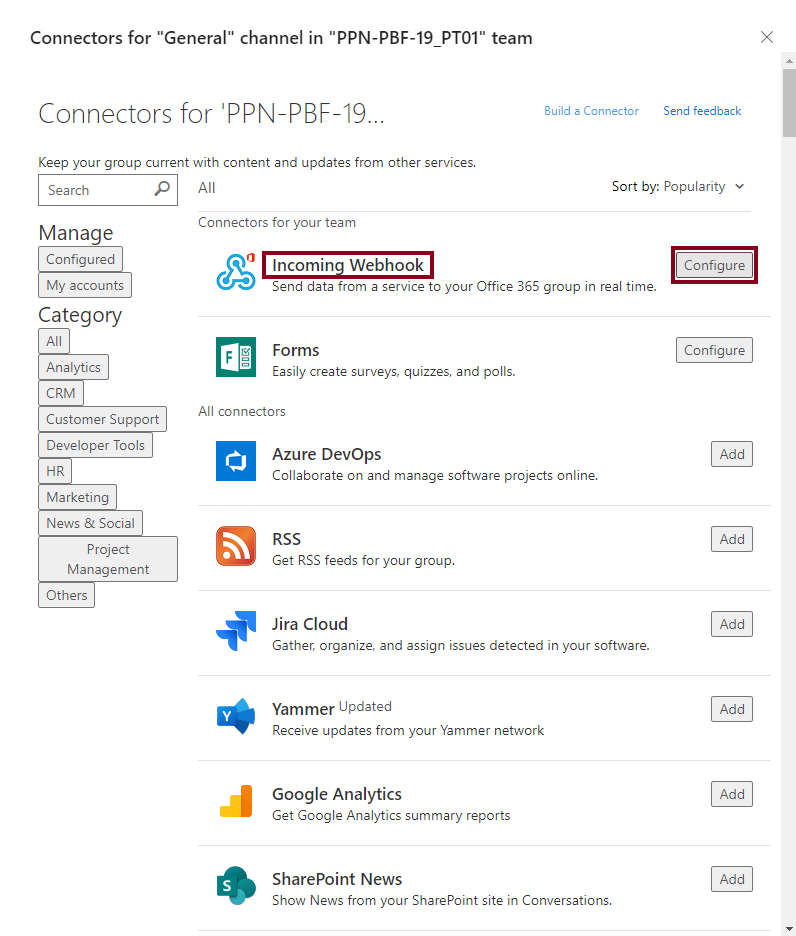
- In the contextual menu for “General”, click the “Connectors” entry.
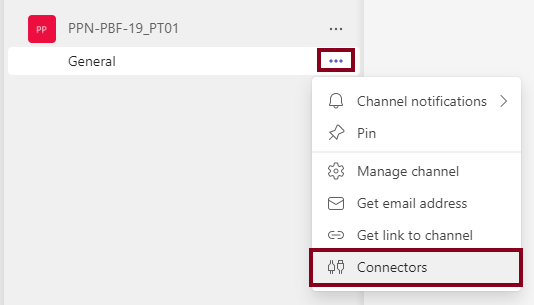
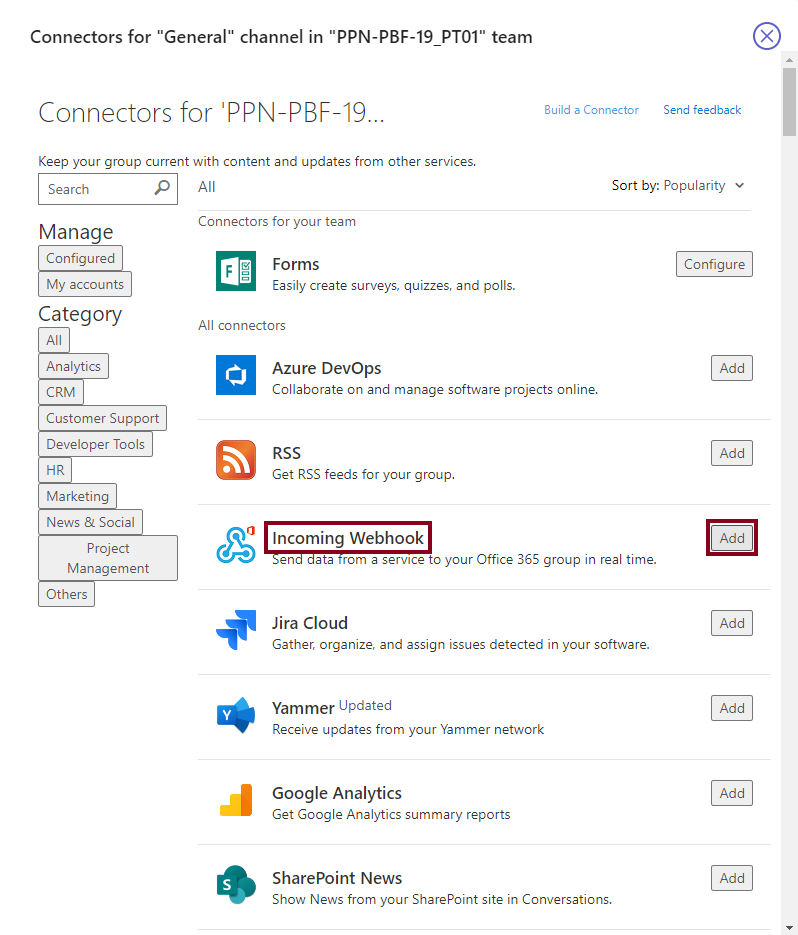
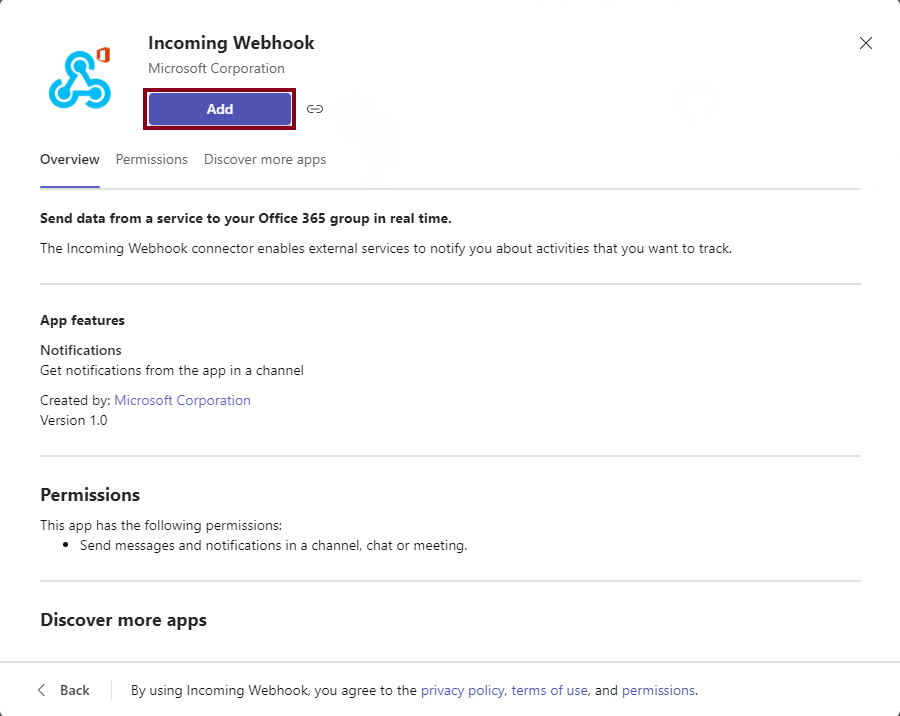
- Add the “Incoming Webhook” connector to the channel.
- Complete the process by clicking the second “Add” button.
- At this instant, go back and click the “Connectors” entry.
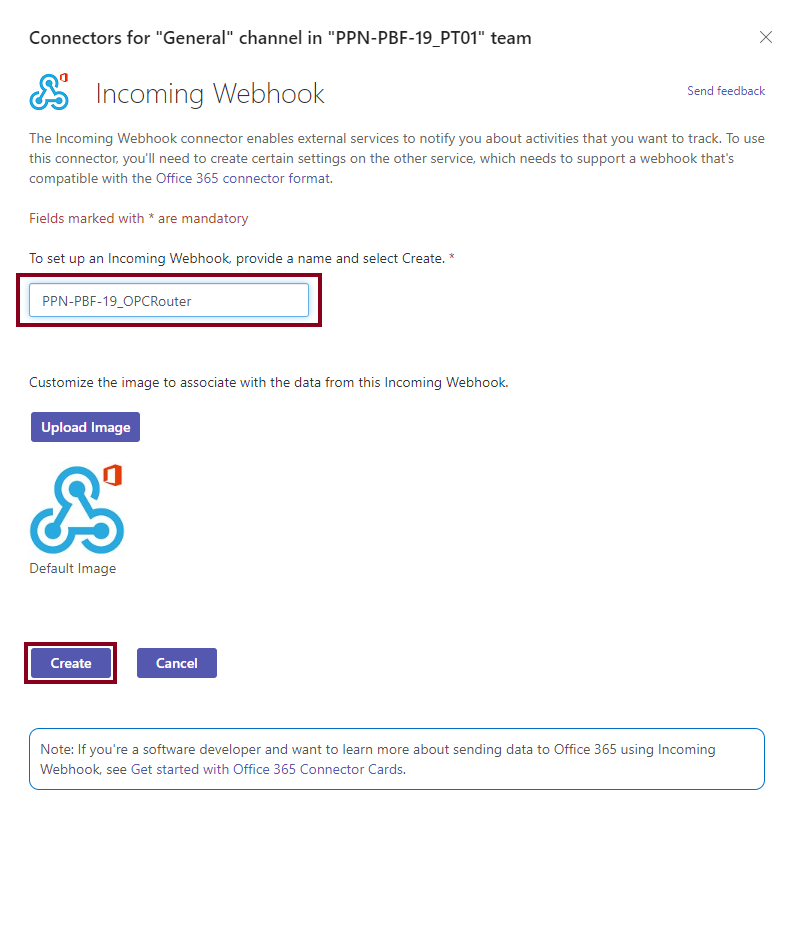
- Then, start to configure the “Incoming Webhook” connector.
- Provide a name and click the “Create” button.
- Copy the URL to the clipboard for the service that receives data in Teams and click “Done” to finish the process.

- Paste from the clipboard and notice the URL has this form:
https://3leautomation.webhook.office.com/webhookb2/ec2adf...1bce8@f80b5f...b394/IncomingWebhook/09f7e8...d007/5324c1...7096- For our application, you’ll need to identify two main fields (“Host-URL” and “URL-Endpoint”):
Host-URL:
https://3leautomation.webhook.office.com/

URL-Endpoint:
webhookb2/ec2adf...1bce8@f80b5f...b394/IncomingWebhook/09f7e8...d007/5324c1...7096- Close the “Connectors” window.
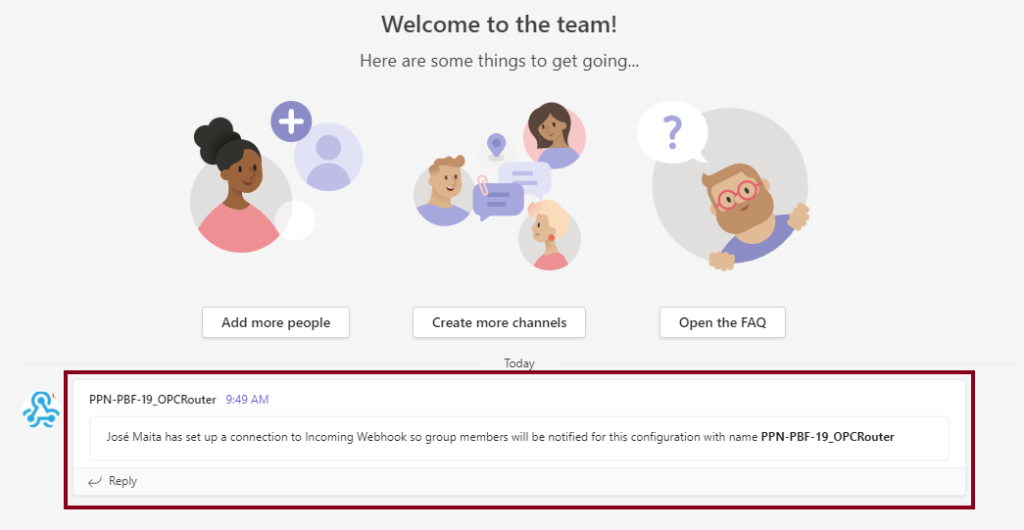
- Finally, watch the initial status message for the team.
Check your main data channel
- Make sure to check OPC topic “P_PBF19_PA01” for 1756-L61 controller through Factory Talk Linx Gateway OPC DA interface.
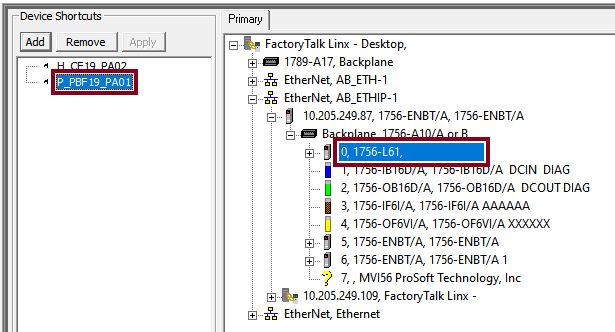
- Monitor variable within “Controller Tags” tab:
Working with OPC Router, OPC Classic and REST
Knowing your Plugins
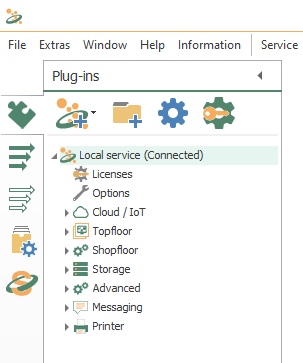
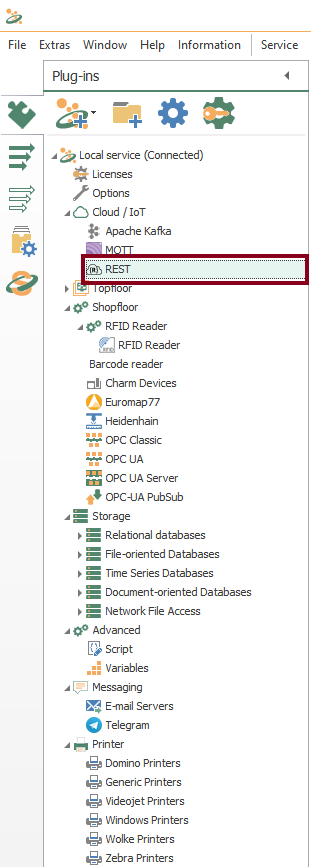
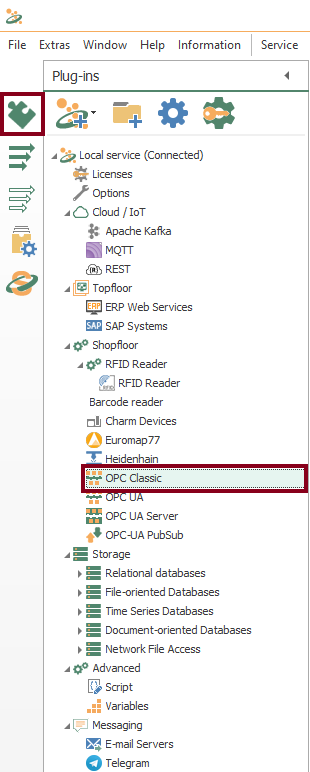
- To begin with, the configuration of OPC Router starts with your licensed plugins. There are several categories such as “Cloud / IoT”, “Topfloor”, “Shopfloor”, “Storage”, “Advanced”, “Messaging” and “Printer”.
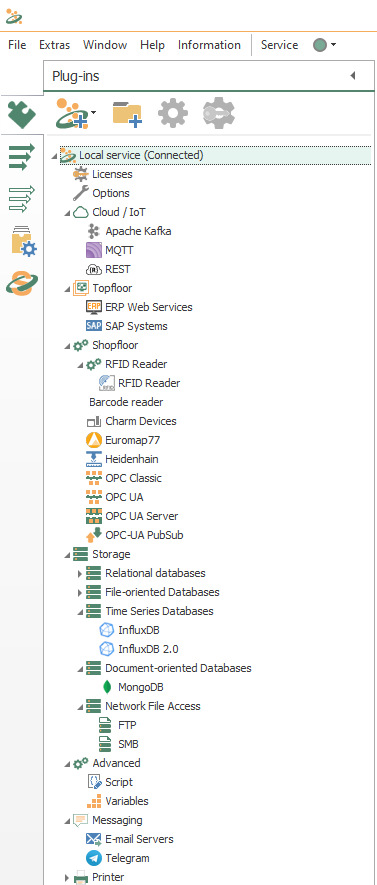
- Make sure to notice OPC Classic and REST.
Knowing your Transfer Objects
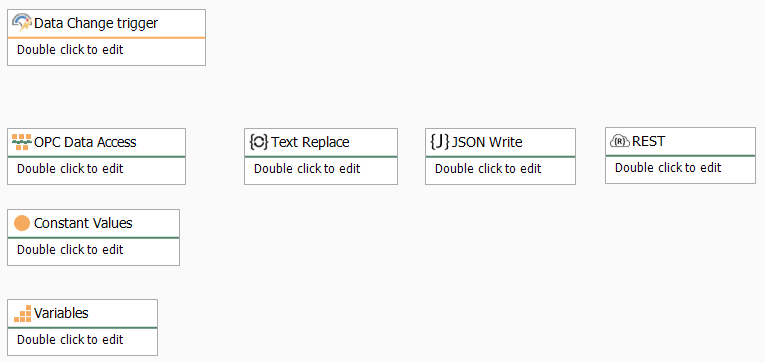
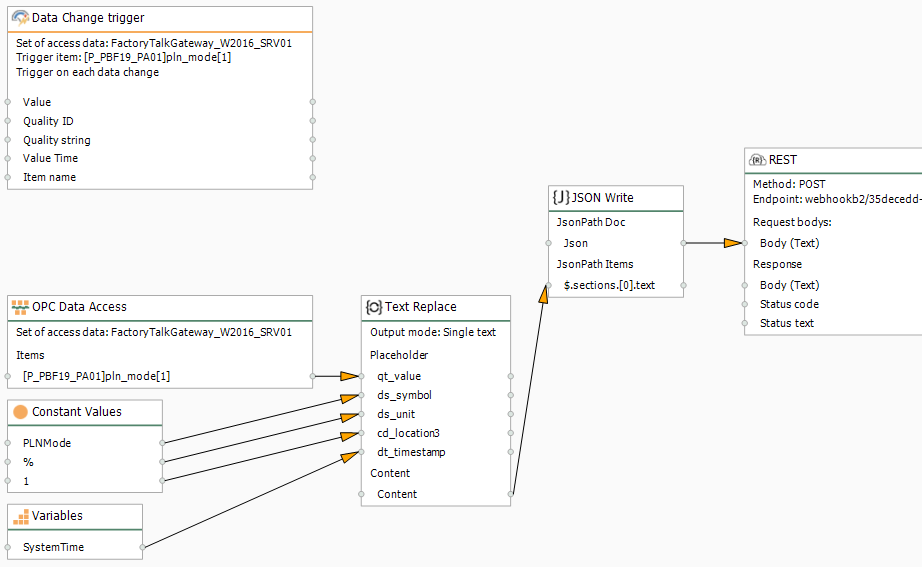
- At this point, we’re going to need seven (7) transfer objects to solve our use case:
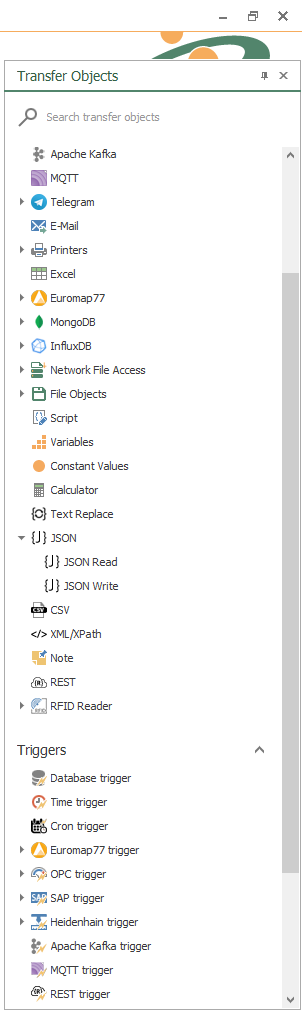
- Specifically, make sure to notice OPC Data Access, Data Change trigger, Variables, Constant Values, Text Replace, JSON Write and REST.
Configuring your Plugins
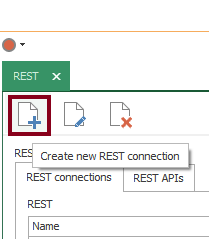
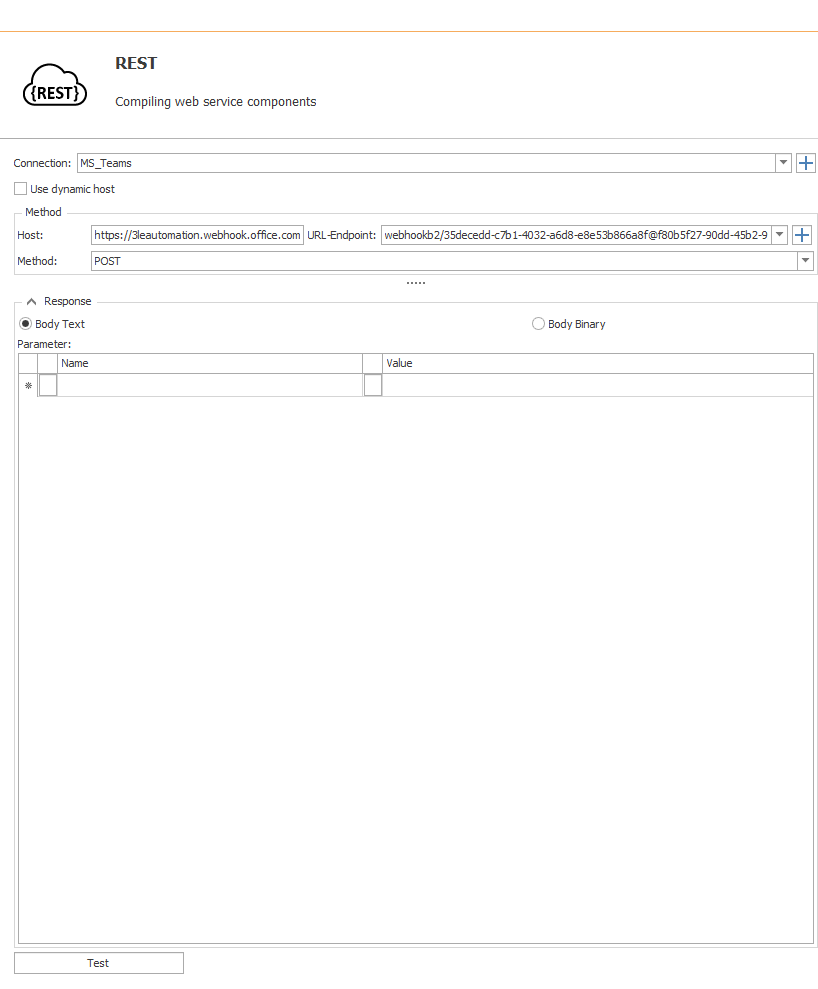
- Following identification, OPC Router needs to configure every licensed plugin. Let’s start creating a new plug-in instance with REST (double click on the object) and the REST connections tab:
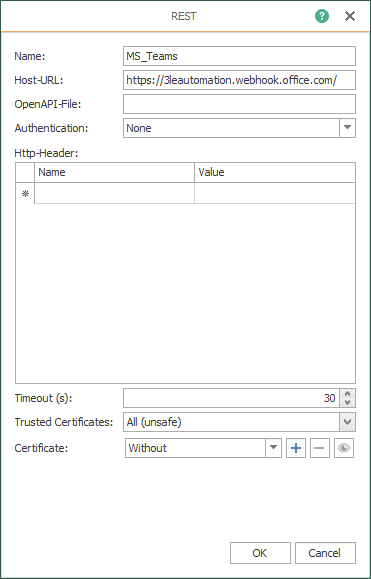
- Make sure to copy the beginning part of your own host URL for Teams:
https://3leautomation.webhook.office.com/- At this time, define a new REST connection for our system:
- Download the plugin and run the service:
Checking your Plugins
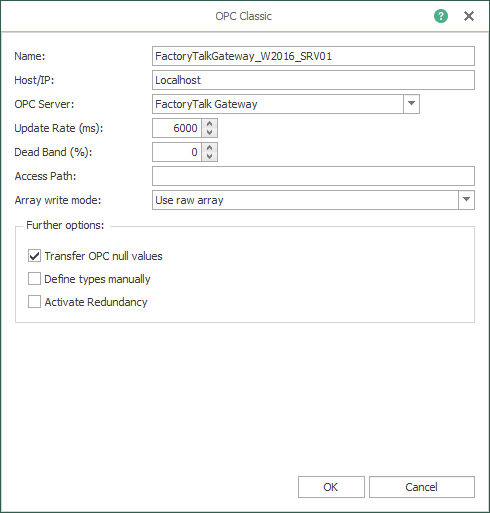
- Following identification, OPC Router needs to configure every licensed plugin. Let’s check the plug-in instance with OPC Classic (double click on the object):
- At this point, check a local OPC Classic connection using a Factory Talk Linx Gateway OPC DA server, with an update rate of 6 seconds.
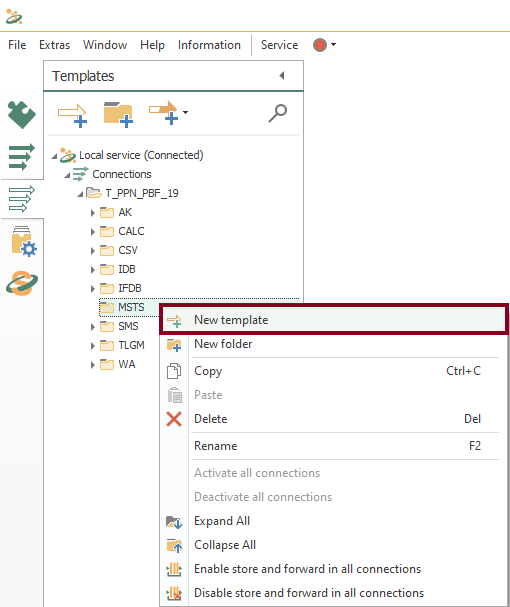
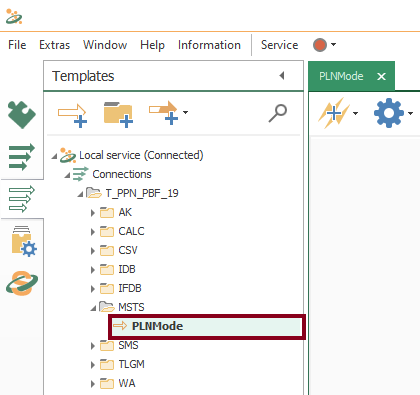
Creating your Ninth Template
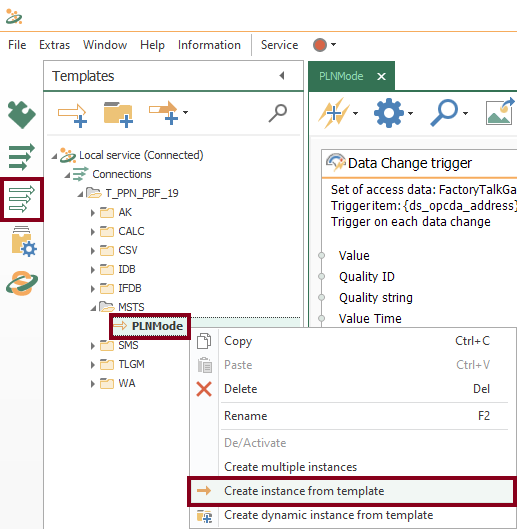
- In similar fashion to the tenth part of the tutorial, a template is the correct approach once again. Let’s create a new Microsoft Teams messaging template PLNMode within MSTS folder (production line mode):
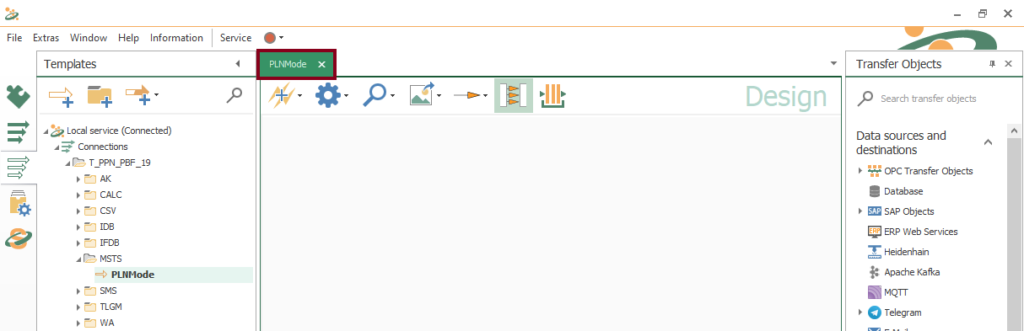
- Watch an empty design panel so you can start building your template:
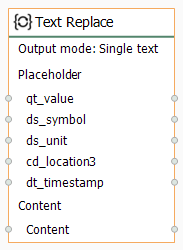
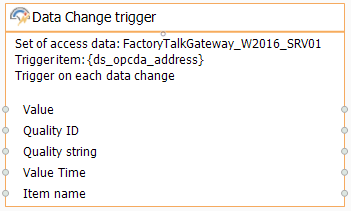
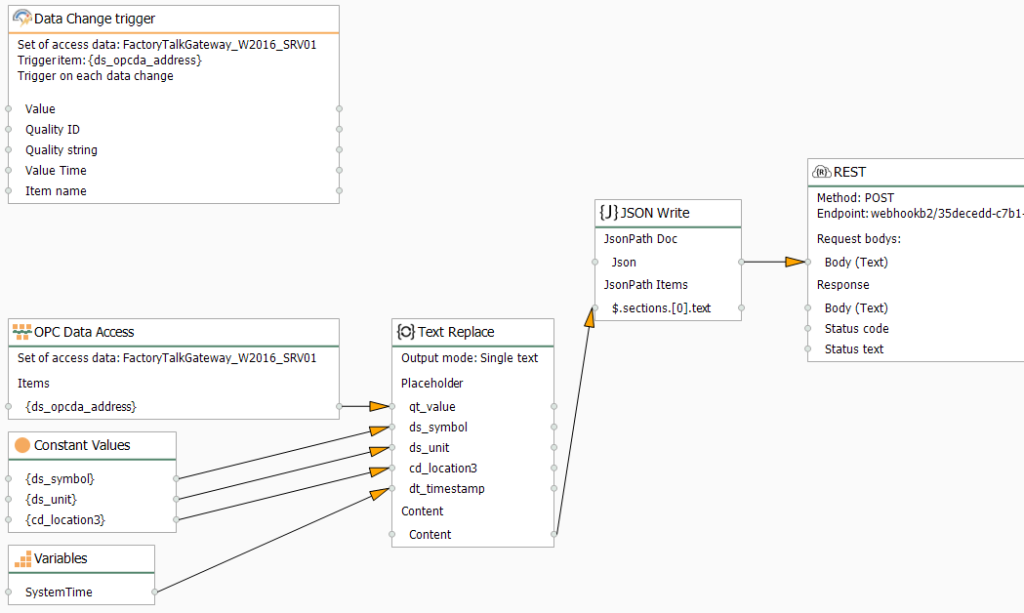
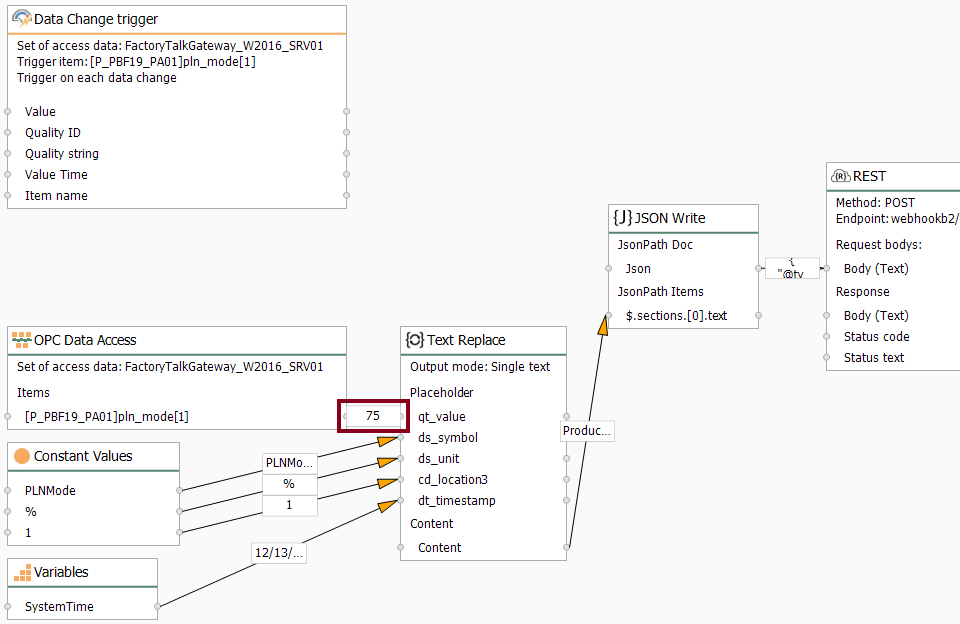
- Then, drag and drop these seven blocks as shown here:
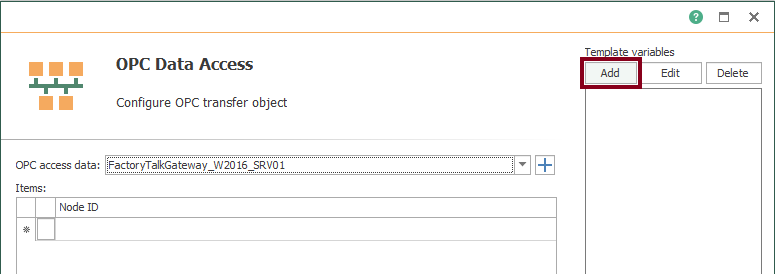
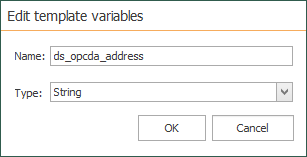
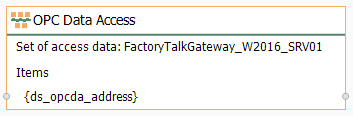
- Edit the OPC Data Access block and add a template variable:
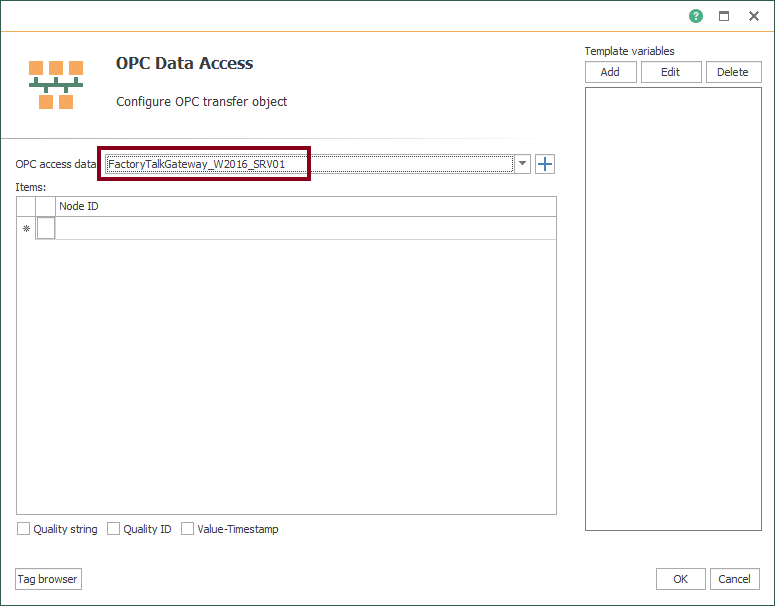
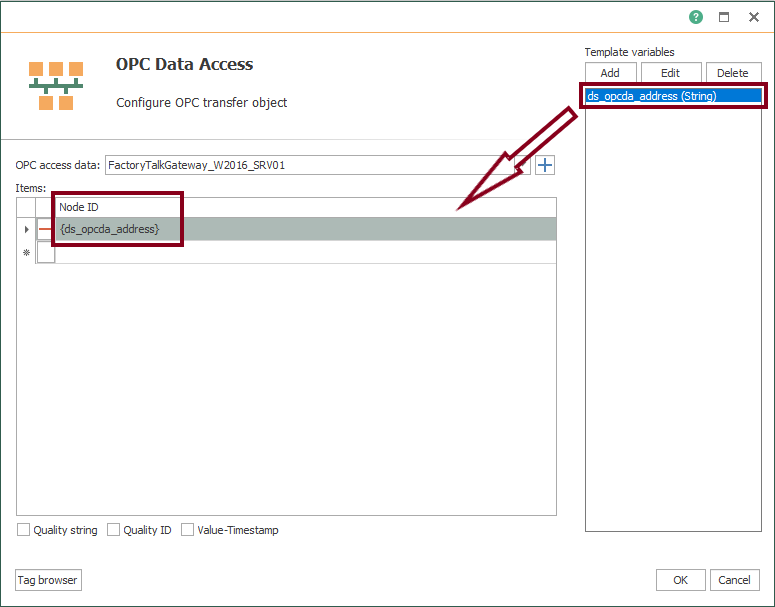
- Confirm the configured OPC Data Access block:
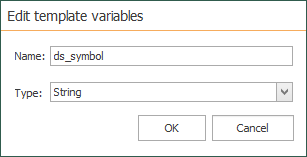
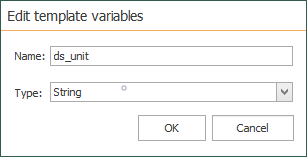
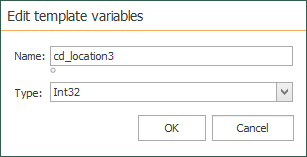
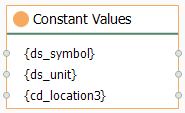
- Edit the Constant Values block to have template variables for the symbol and unit of the variable, and the physical location:
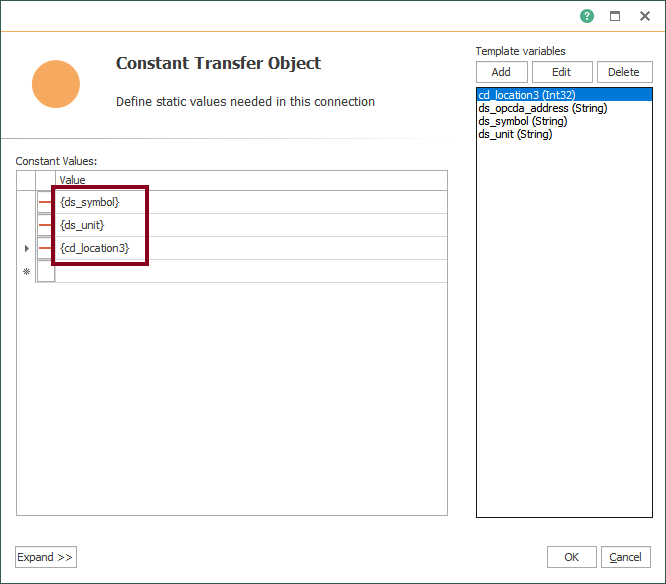
- Confirm the configured Constant Values block:
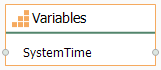
- Edit the Variables block and choose the global variable “SystemTime”:
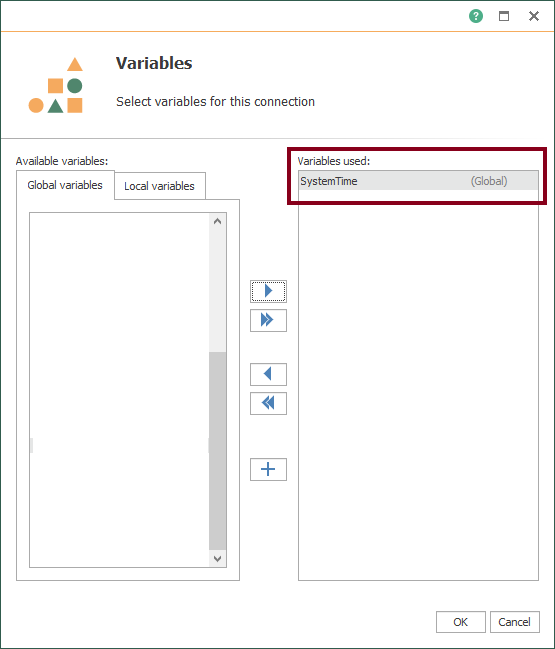
- Confirm the configured Variables block:
- Edit the Text Replace block to start preparing the format of the message to send:
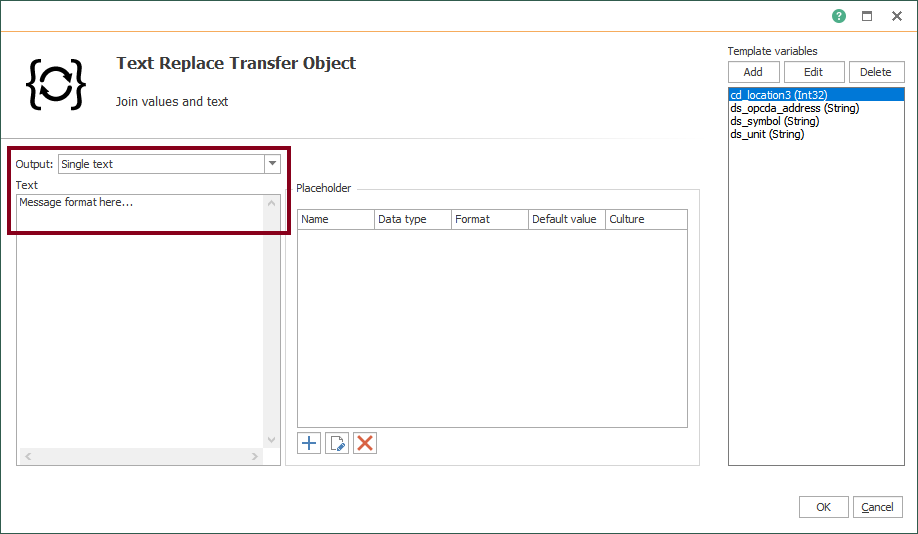
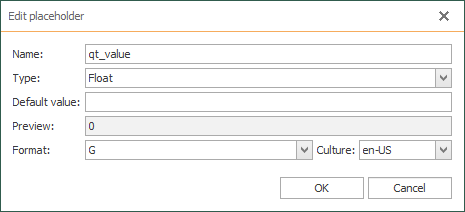
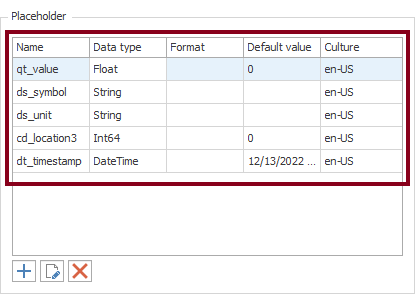
- Start creating placeholders:
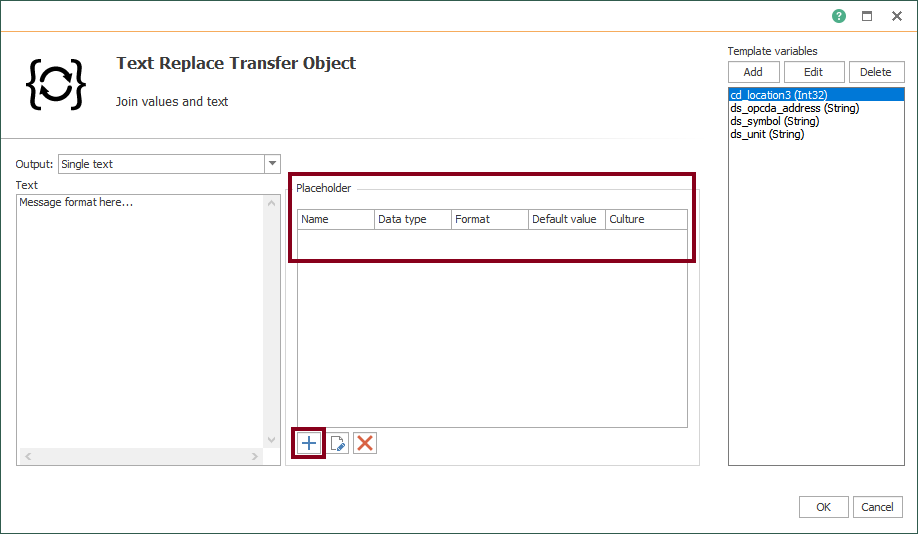

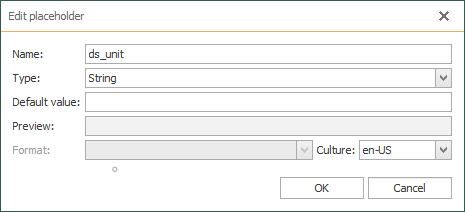
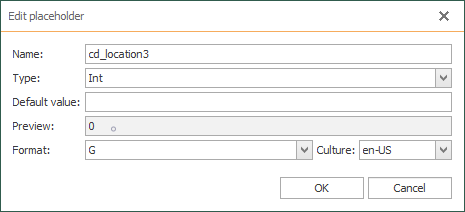
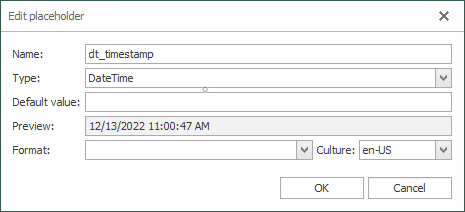
- Also, verify placeholders:
- Give the desired format to the Microsoft Teams message you want to send:
Production capacity {ds_symbol} at PLN0{cd_location3} changed to {qt_value} {ds_unit} | Date/Time: {dt_timestamp}.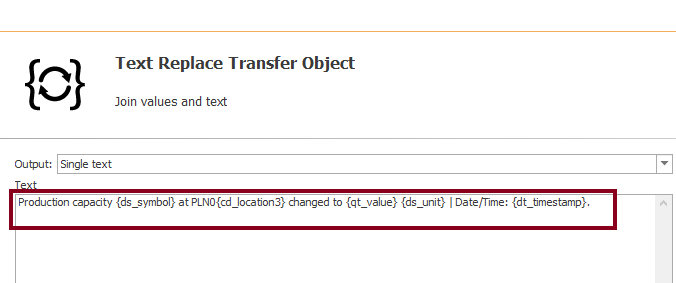
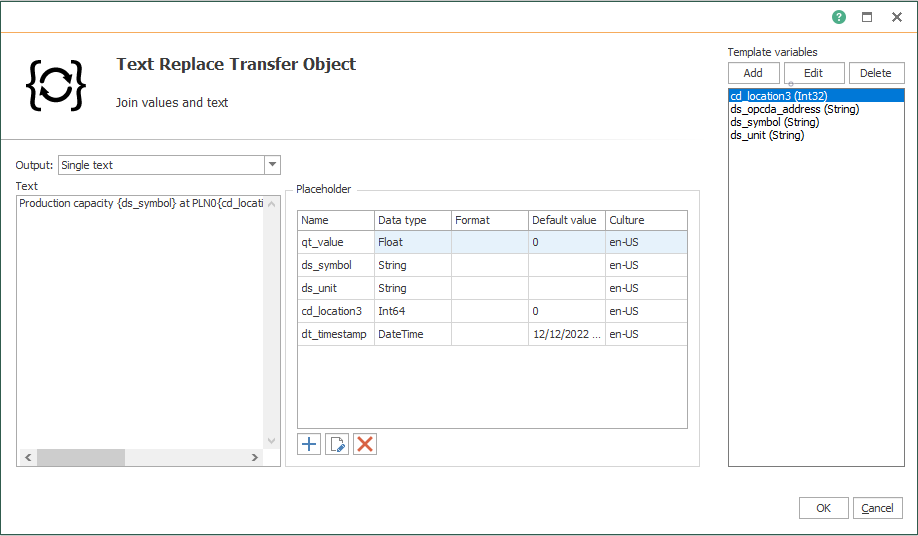
- Confirm the configured Text Replace block:
- Edit the Data Change trigger block to detect any value change for PLNMode (production line mode):
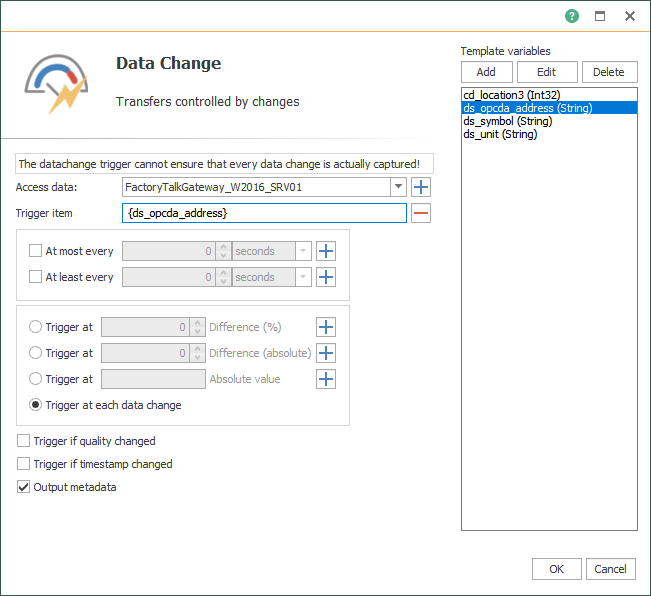
- Confirm the configured Data Change trigger block:
- Edit the JSON Write block to transform the text to a JSON structure. Start by clicking the “Edit” button:
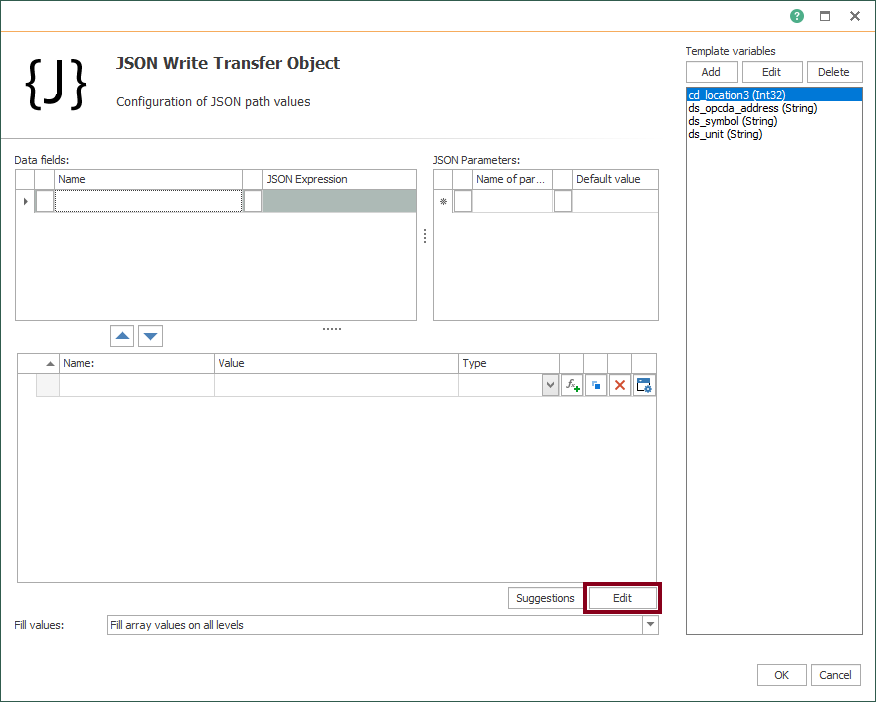
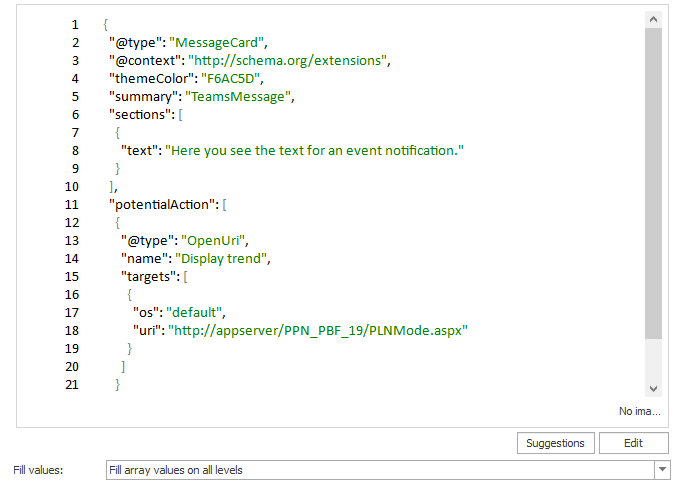
- Notice the JSON file to use:
{
  "@type": "MessageCard",
  "@context": "http://schema.org/extensions",
  "themeColor": "F6AC5D",
  "summary": "TeamsMessage",
  "sections": [
    {
      "text": "Here you see the text for an event notification."
    }
  ],
  "potentialAction": [
    {
      "@type": "OpenUri",
      "name": "Display trend",
      "targets": [
        {
          "os": "default",
          "uri": "http://appserver/PPN_PBF_19/PLNMode.aspx"
        }
      ]
    }
  ]
}
- Copy and paste the JSON file in the edit window:
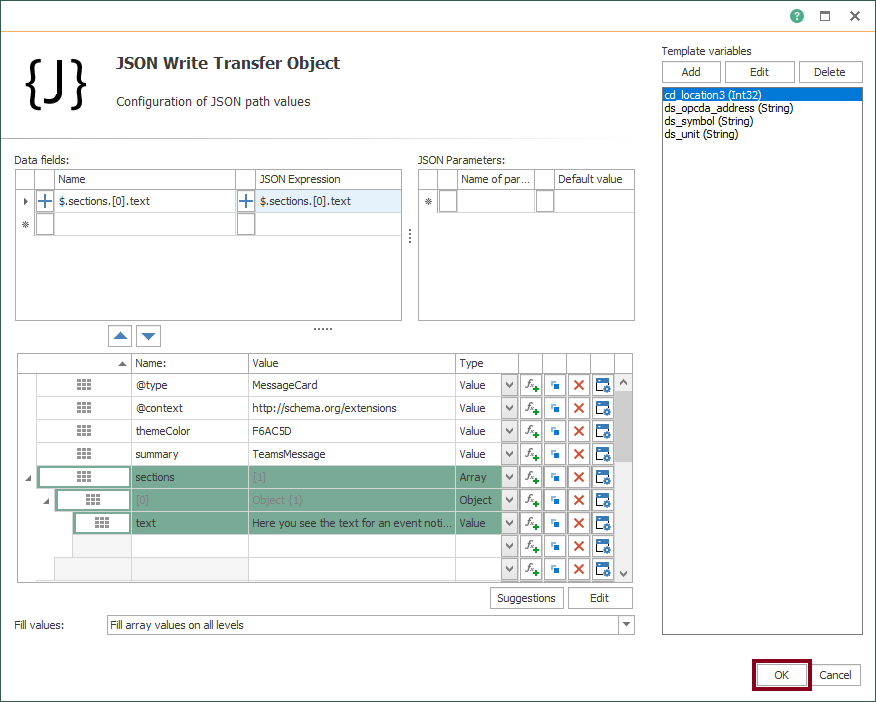
- Click the “Edit” button again and then, press the “Add expression to data field” button for the “text” attribute:

- Make sure the expression is visible in the data fields:

- Save changes by pressing the “OK” button.
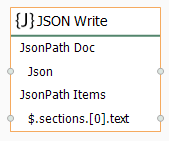
- Confirm the configured JSON Write block:
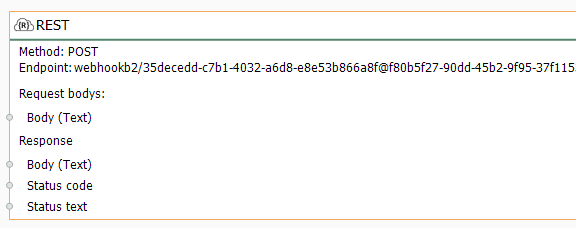
- Edit the REST block to set the Microsoft Teams connection:
- Make sure to choose this format for the request:
application/json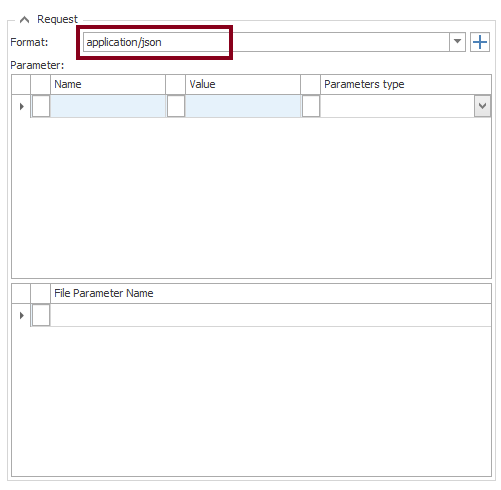
- Confirm the configured REST block:
- Finally, make sure to link blocks as shown here:
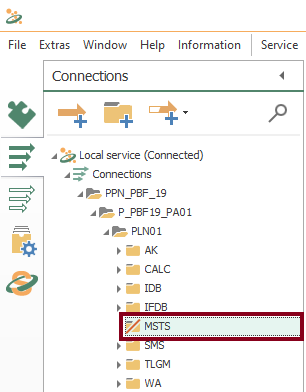
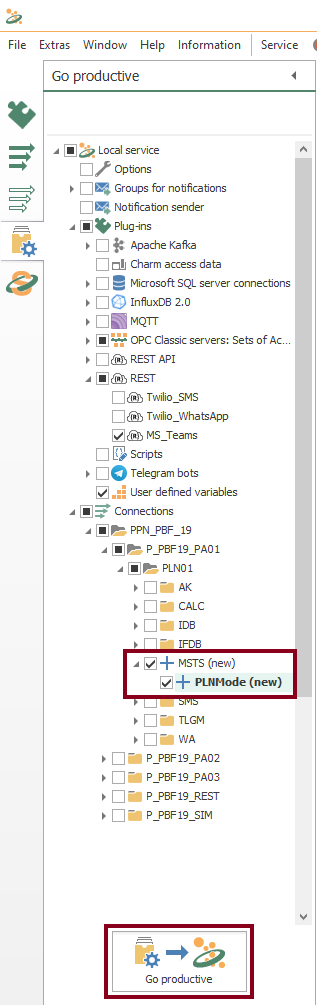
- Additionally, create the connections folder “MSTS” within “PLN01”:
Working with Instances from Templates
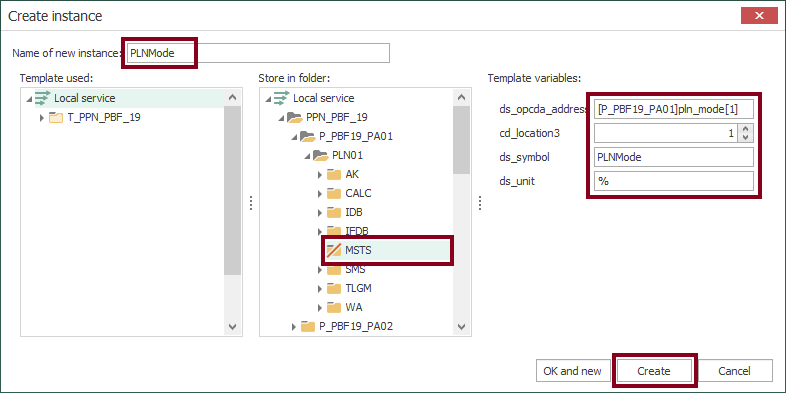
- With your ninth template, a new instance is required now. Start creating it by using the contextual menu:
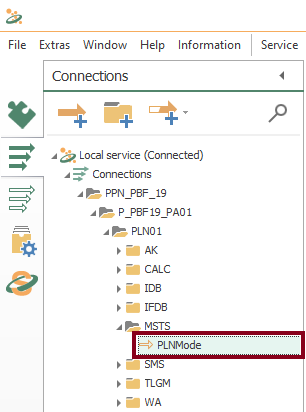
- At this time, check the new instance:
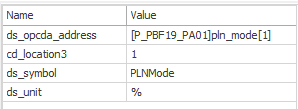
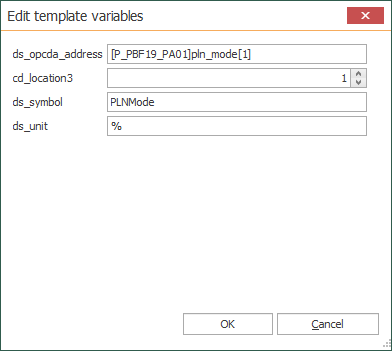
- In the design panel, double click to verify values in template variables according to actual OPC item, physical location, symbol and unit:
Compile, Save and Publish your OPC Router Project Configuration with Teams
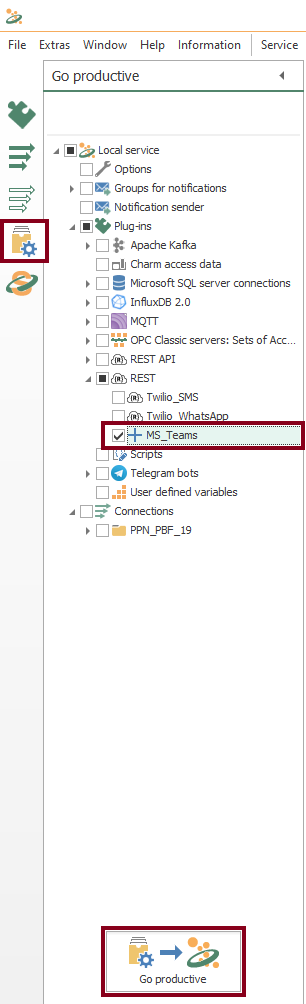
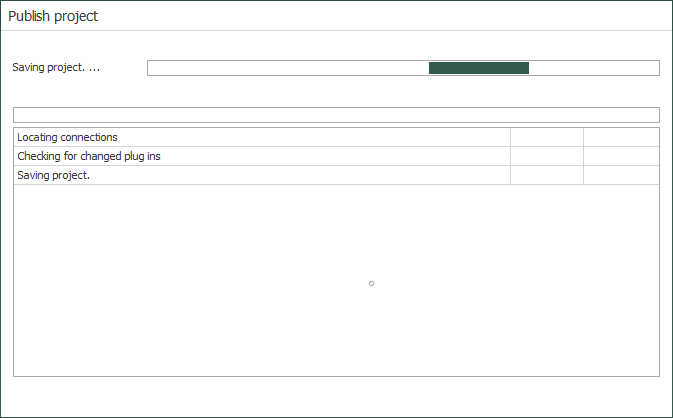
- At this time, you need to compile, save and publish the connection you just created by clicking the “Go productive” button:

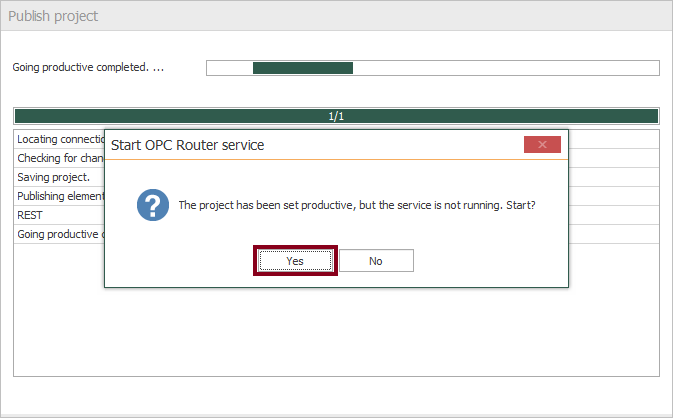
- Meanwhile, the project is saved and published:
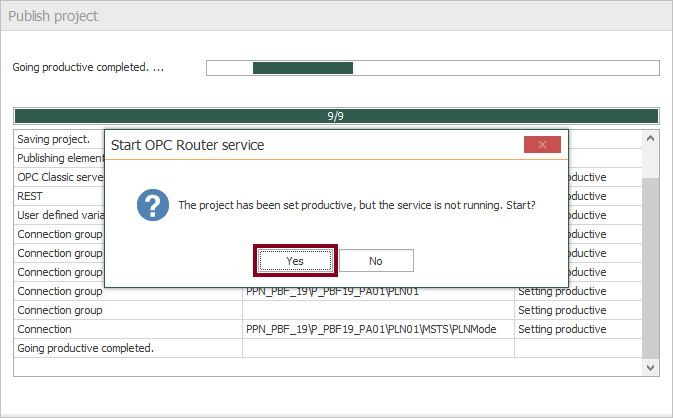
- After that, press the “Yes” button to start the OPC Router service and run your application:
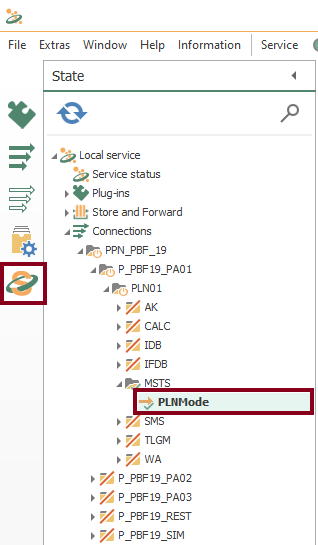
- Lastly, watch both the initial and operational connection states:

Visualize Online Data in PAC
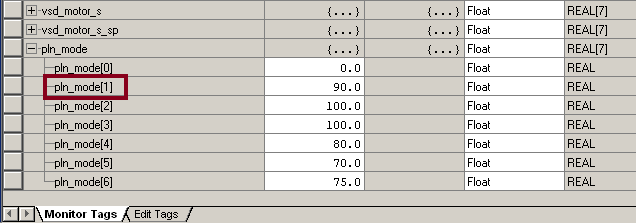
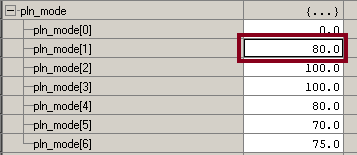
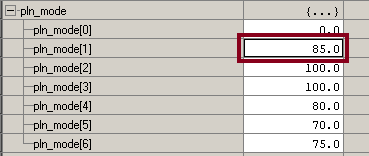
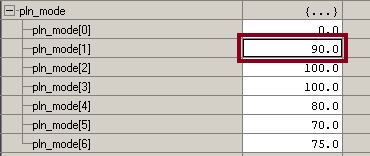
- Make sure to notice normal PLNMode values:
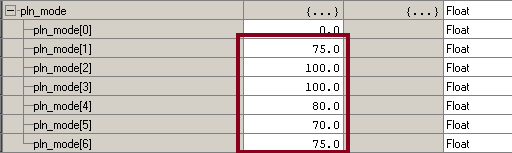
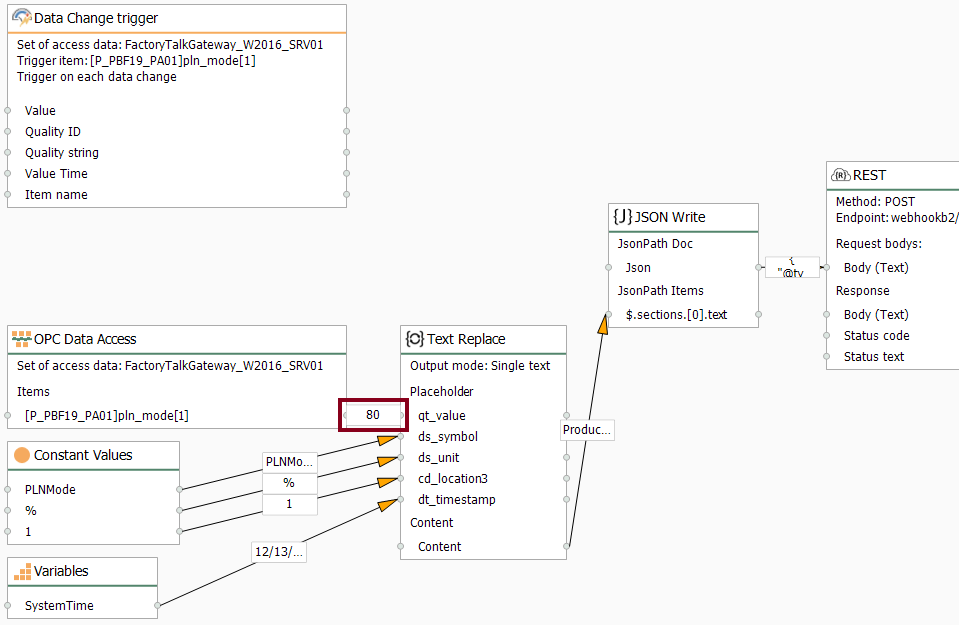
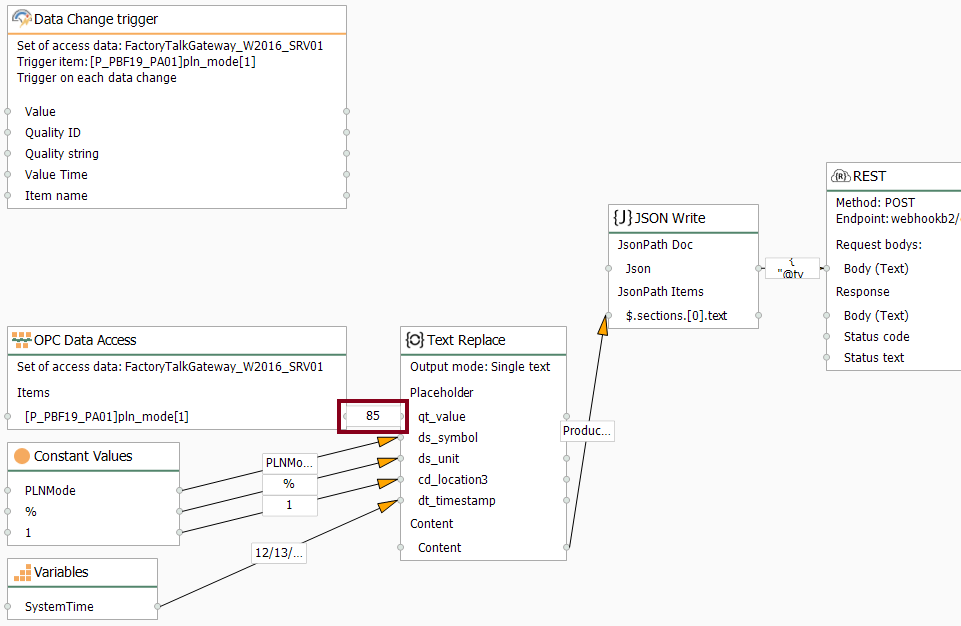
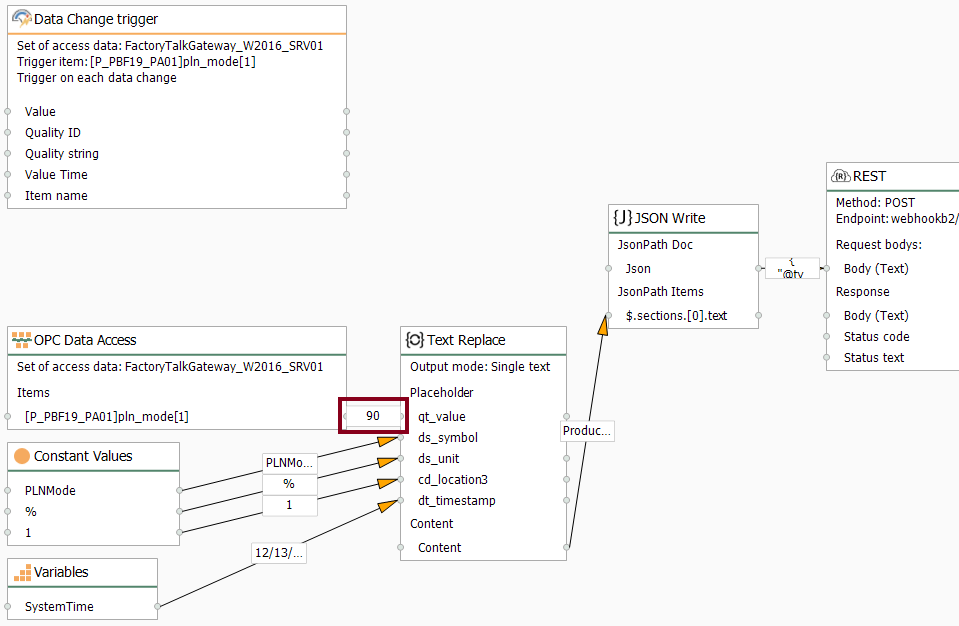
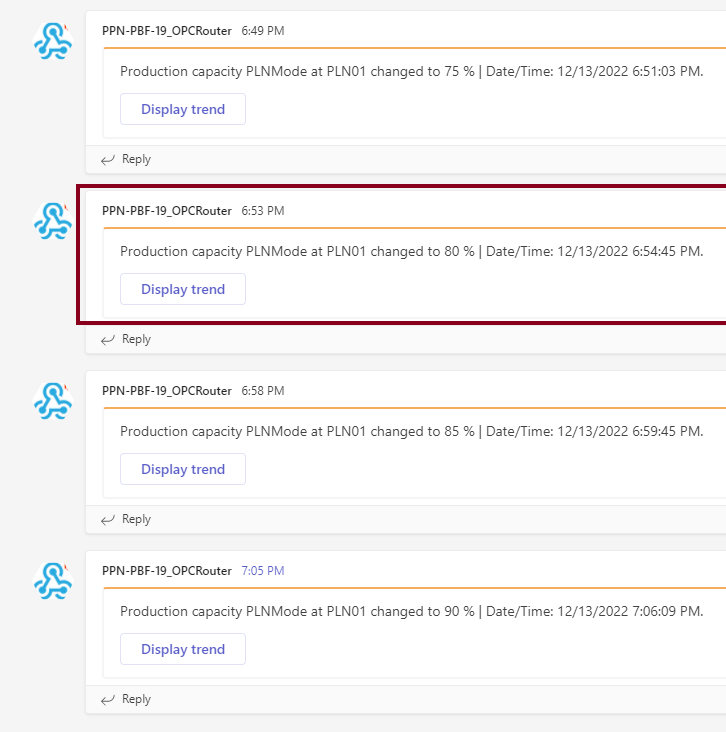
- Then, watch how the production line capacity (PLNMode) changes three times: 80%, 85% and 90%. Each time, a data change trigger the event notification:
Visualize Online Data in OPC Router
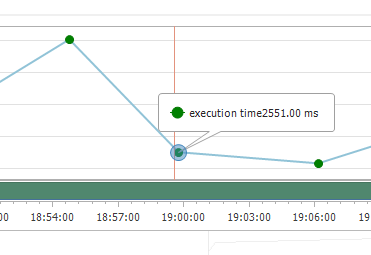
- Also, you can watch live values here:
- At this point, you should notice an execution time visually:
Verify Message Transfer to Microsoft Teams
- Notice an event notification on the Microsoft Teams application of a desktop computer:

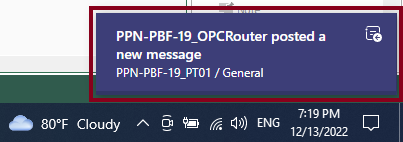
- Finally, watch how the OPC Router tutorial allows us to send Microsoft Teams messages to a channel every time a data change for PLNMode is triggered, with a button for a potential action:
Did you enjoy this OPC Router tutorial with Teams? I’d love to hear from you.
Stay tuned and follow part 12 of this tutorial! 😎
For other articles like this one in English, click here. To see them in Spanish, click here.