Following the fourth part of the OPC Router tutorial, I’m presenting how to run an OPC Router application in a Linux operating system with Docker on a Raspberry Pi 4. Remember, we’re configuring and running a project for “Papín”, a fictional potato bread factory.
Why an OPC Router tutorial with Linux?
Because “learning by doing” with examples is fun. Also, this particular functionality can bring us an exciting use case: the possibility of running data acquisition applications in operating systems other than Windows, which could result in better performance, fewer resources to consume, and less expensive hardware. See below a list of posts that complete this tutorial:
- Getting Started with OPC Router
- Connect an OPC DA server to Microsoft SQL Server
- Connect an MQTT data source to InfluxDB Cloud
- Perform multiple calculations within OPC Router
- Run an OPC Router application with Linux and Docker (this post)
- Build a process data simulator with Python, CSV and OPC Router
- Explore basic RESTful web services within OPC Router
- Build a Telegram basic interaction within OPC Router
- Build an SMS basic interaction within OPC Router
- Build a WhatsApp basic interaction within OPC Router
- Build a Teams basic interaction within OPC Router
- Explore advanced RESTful web services within OPC Router
- Run an OPC Router application with Portainer
Prerequisites
Firstly, you’ll need:
- Raspberry Pi 4 🍇
- Ethernet network ➿
- Schematic diagram 📝
- Installation of Ubuntu Server on a Raspberry Pi post with Docker 📓
- OPC Router Config application 💻
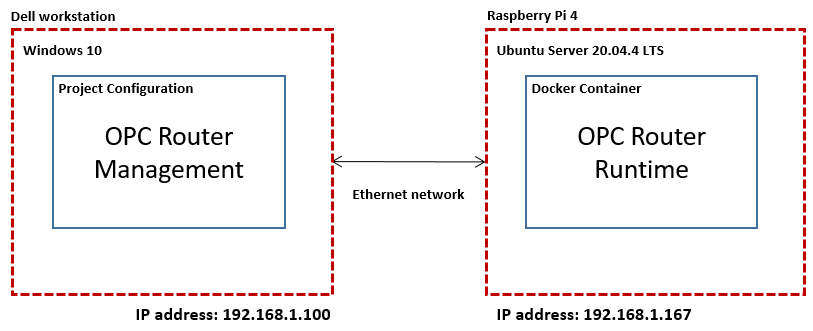
Schematic Diagram
To illustrate this idea better, look at this:
Getting Started
- First, run OPC Router Config.

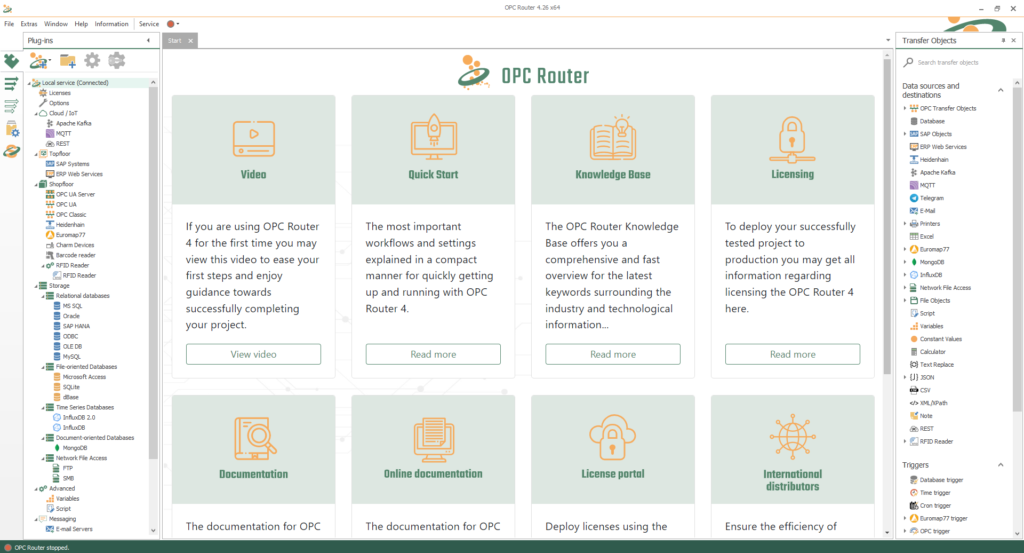
- Wait for the OPC Router 4 GUI to load.
- Then, you should see something like this in the Start tab:
Configure OPC Router service for Docker
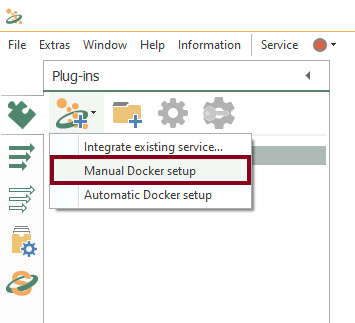
- To begin with, go to the “Plug-ins” section to configure the OPC Router service.

- Following this, choose “Manual Docker setup”.
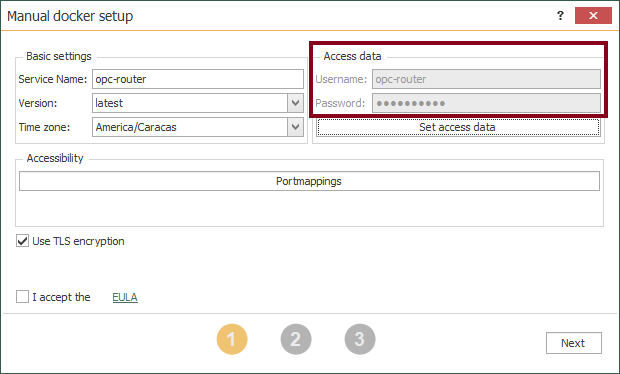
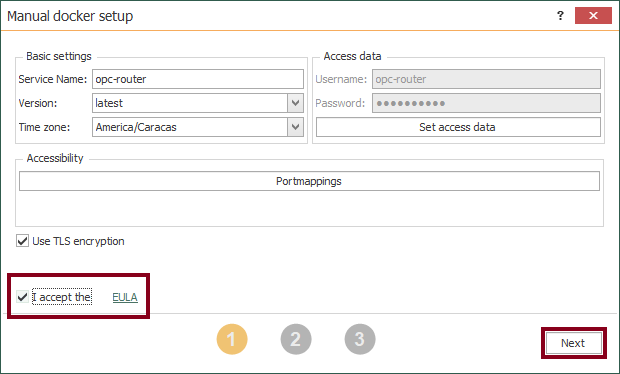
- In “Basic settings”, set your “Service Name” as the name of your Docker container.
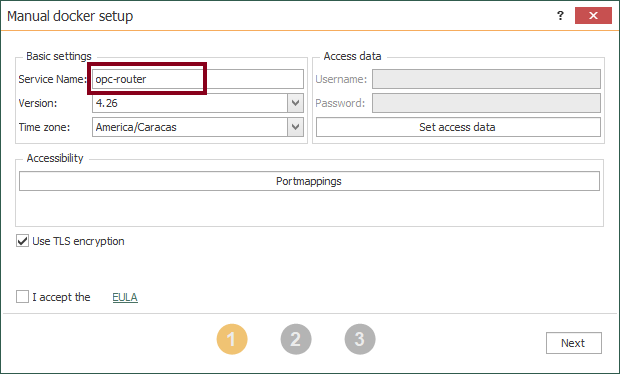
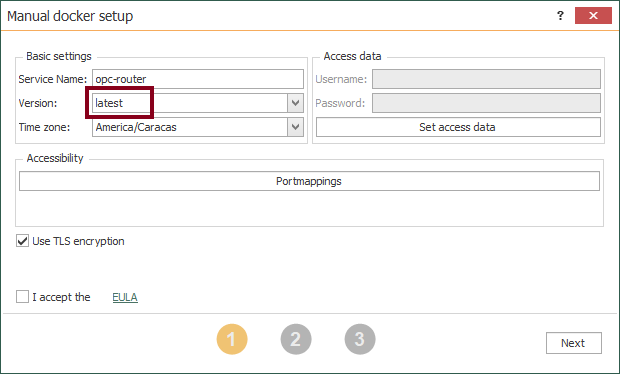
- After that, set your “Version” as the name of the latest runtime Docker container available and keep your desired timezone.
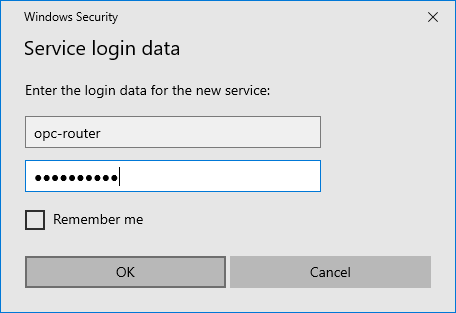
- Also, press the “Set access data” button to specify authentication details to your Docker container.
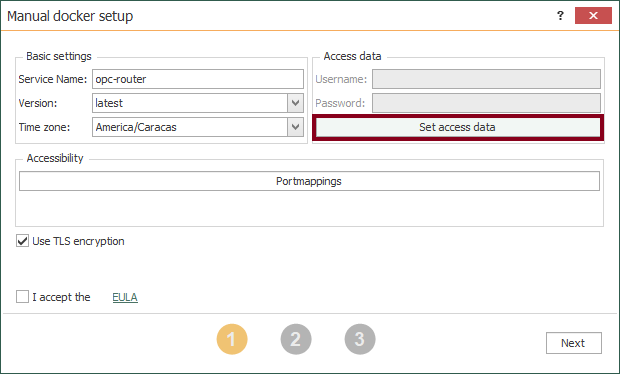
- Enter your username and password.
- At this point, watch your user credentials in “Access data”.
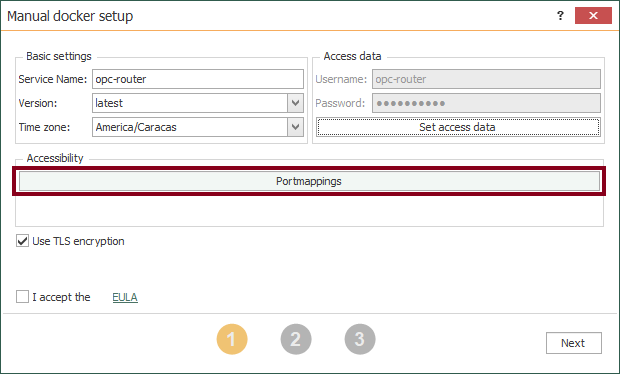
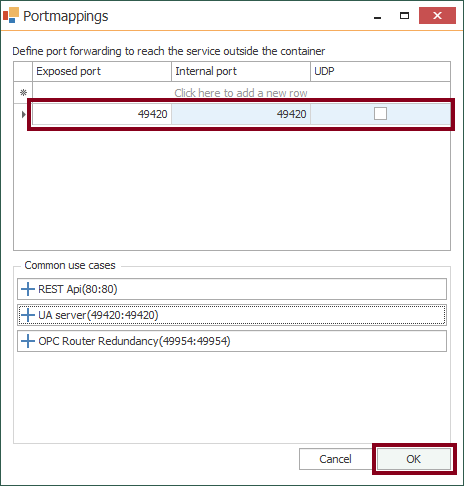
- Press the “Portmappings” button to start exposing desired ports to reach.
- Select “UA server(49420:49420)” for this use case.
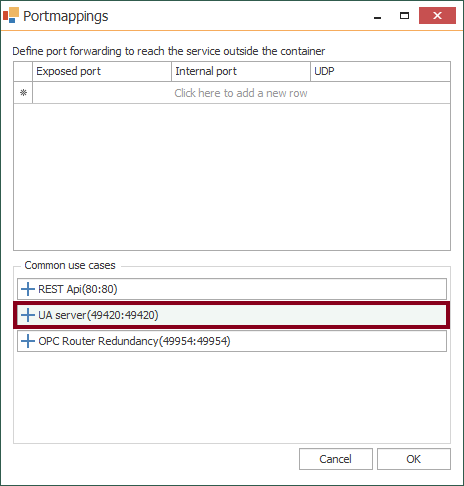
- Press the “OK” button to save changes.
- Accept the End User License Agreement (EULA) and press the “Next” button.
- Watch the command that will create and run your OPC Router Docker container.
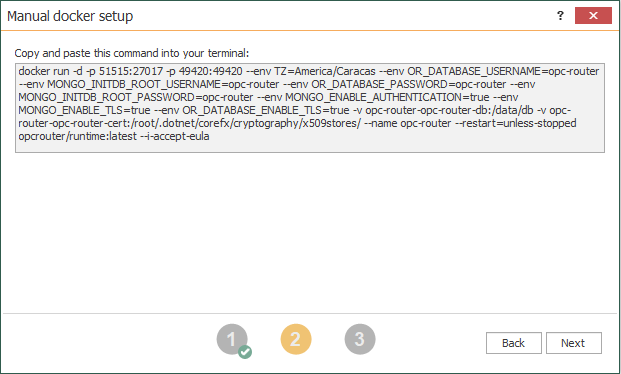
- Copy and paste this command:
docker run -d -p 51515:27017 -p 49420:49420 --env TZ=America/Caracas --env OR_DATABASE_USERNAME=opc-router --env MONGO_INITDB_ROOT_USERNAME=opc-router --env OR_DATABASE_PASSWORD=opc-router --env MONGO_INITDB_ROOT_PASSWORD=opc-router --env MONGO_ENABLE_AUTHENTICATION=true --env MONGO_ENABLE_TLS=true --env OR_DATABASE_ENABLE_TLS=true -v opc-router-opc-router-db:/data/db -v opc-router-opc-router-cert:/root/.dotnet/corefx/cryptography/x509stores/ --name opc-router --restart=unless-stopped opcrouter/runtime:latest --i-accept-eula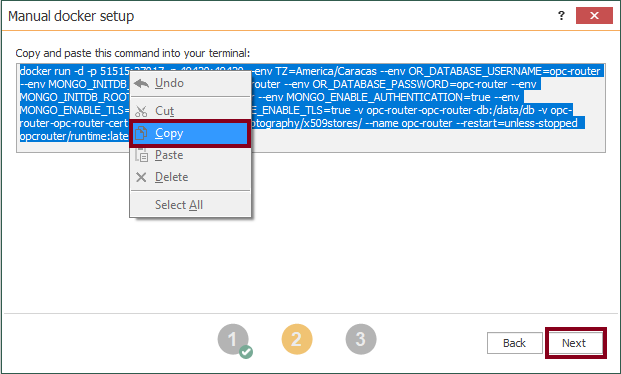
- Connect to the Raspberry Pi using SSH and paste the command to run.

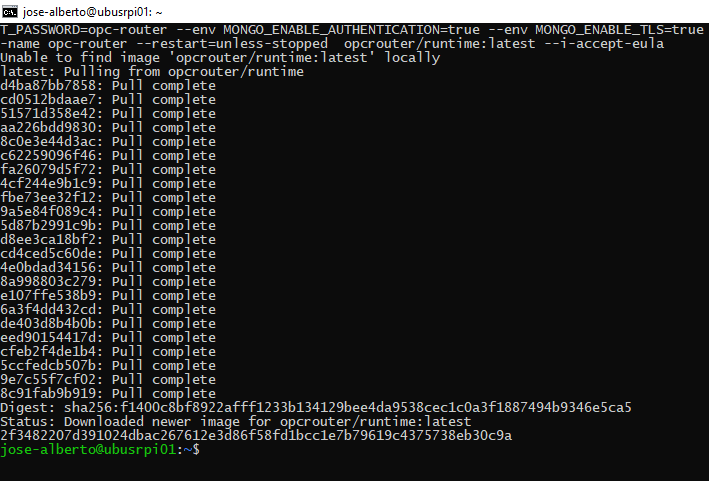
- Then, press <Enter> and wait for the download of the “opcrouter/runtime:latest” Docker image.
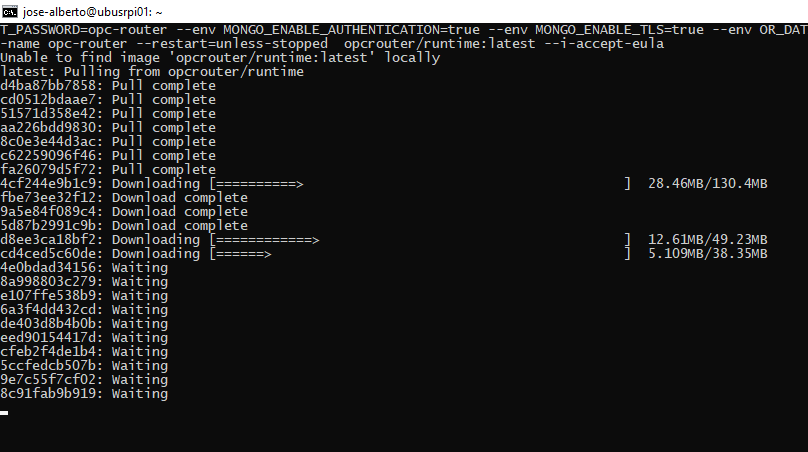
- Watch for the creation of the “opc-router” Docker container.
- Also, monitor your recently created “opc-router” Docker container by running:
$ docker ps

Check your Linux Docker service with OPC Router
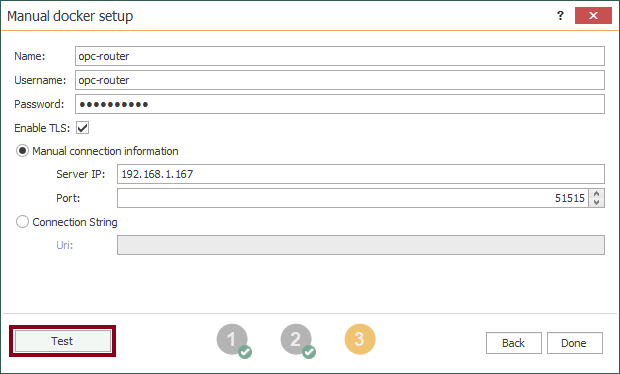
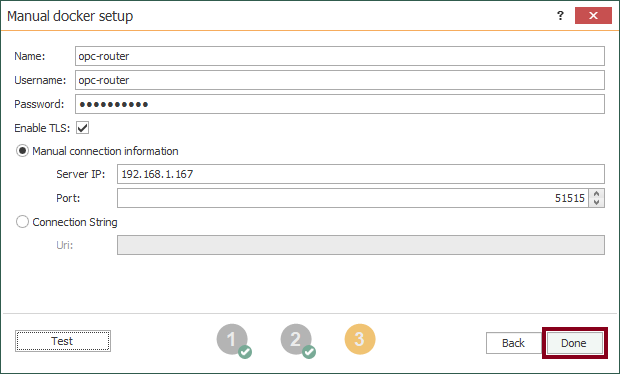
- Go back to OPC Router Config, make sure you have the correct Raspberry Pi IP address and user credentials. Then, press the “Test” button to test connectivity.
- Press the “OK” button to confirm the valid connection.
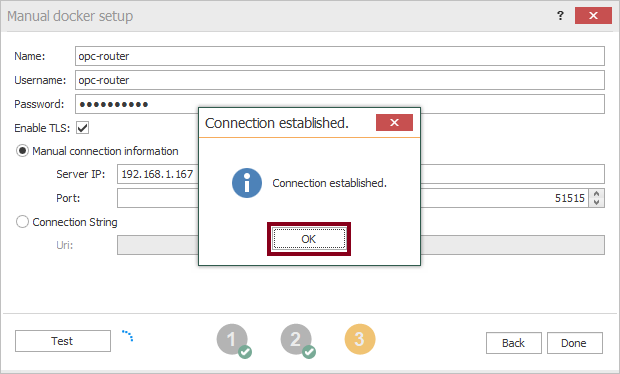
- So, press the “Done” button to to complete this step.
- At this point, see the connection to the newly integrated “opc-router” service.
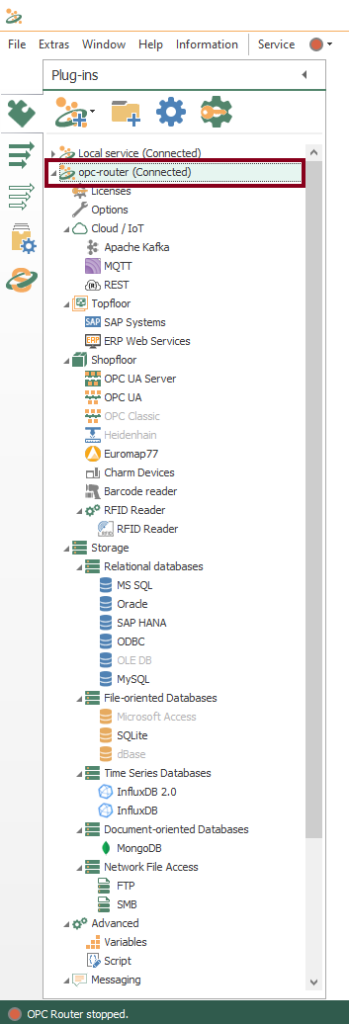
- Finally, you’re ready to add plugins and transfer objects to run on your Raspberry Pi. Notice that some plugins are not supported on the target system because only works on Windows.
Did you enjoy this OPC Router tutorial with Linux? I’d love to hear from you.
Stay tuned and follow part 6 of this tutorial! 😎
For other articles like this one in English, click here. To see them in Spanish, click here.