Following the first part of the OPC Router tutorial, I’m presenting how to connect an OPC DA server to Microsoft SQL Server now. Remember, we’re configuring and running a project for “Papín”, a fictional potato bread factory.
Why an OPC Router tutorial with SQL?
Because “learning by doing” with examples is fun. See below a list of posts that complete this tutorial:
- Getting Started with OPC Router
- Connect an OPC DA server to Microsoft SQL Server (this post)
- Connect an MQTT data source to InfluxDB Cloud
- Perform multiple calculations within OPC Router
- Run an OPC Router application with Linux and Docker
- Build a process data simulator with Python, CSV and OPC Router
- Explore basic RESTful web services within OPC Router
- Build a Telegram basic interaction within OPC Router
- Build an SMS basic interaction within OPC Router
- Build a WhatsApp basic interaction within OPC Router
- Build a Teams basic interaction within OPC Router
- Explore advanced RESTful web services within OPC Router
- Run an OPC Router application with Portainer
Working with OPC Router, OPC Classic, and SQL Server
Knowing your Plugins
- To begin with, the configuration of OPC Router starts with your licensed plugins. There are several categories such as “Cloud / IoT”, “Topfloor”, “Shopfloor”, “Storage”, “Advanced”, “Messaging” and “Printer”.
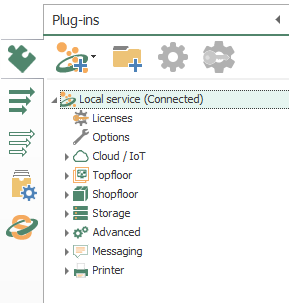

- Make sure to notice OPC Classic and MS SQL.
Checking your Plugins
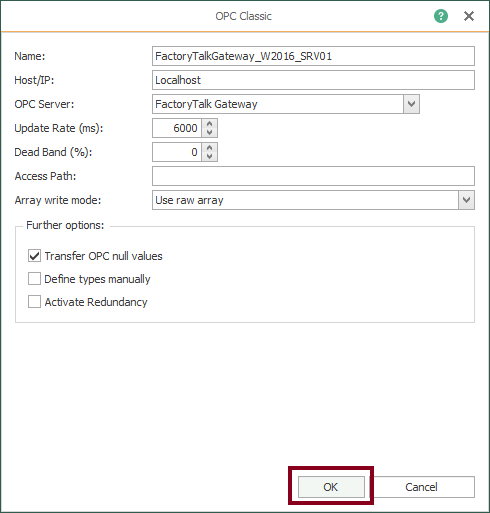
- Following identification, OPC Router needs to configure every licensed plugin. Let’s check the plug-in instance with OPC Classic (double click on the object):
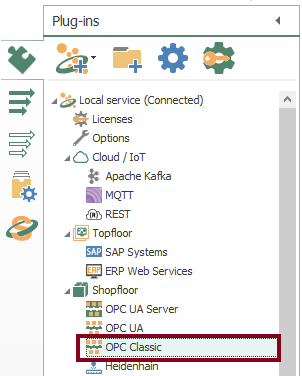
- At this point, check a local OPC Classic connection using a Factory Talk Linx Gateway OPC DA server, with an update rate of 6 seconds.
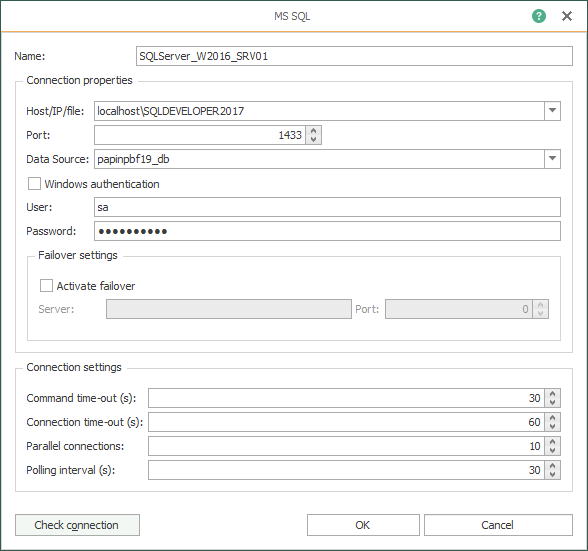
- After that, let’s check the plug-in instance with MS SQL:
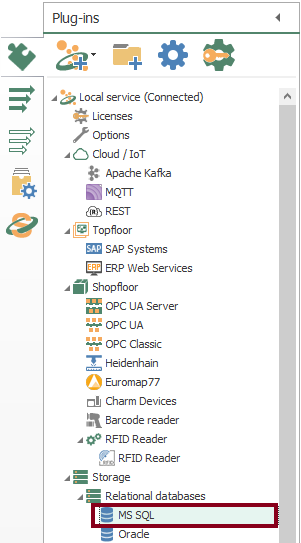
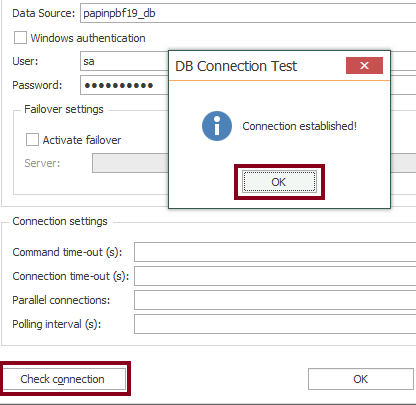
- Then, check the local Microsoft SQL Server database storage and press the “Check connection” button to test connectivity.
Creating your Second Template
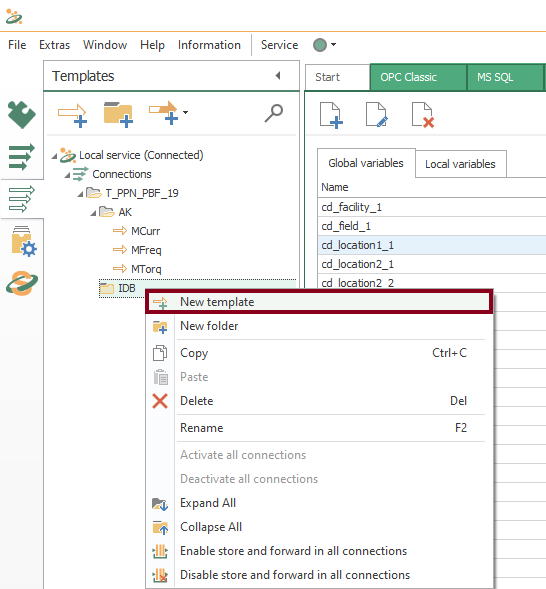
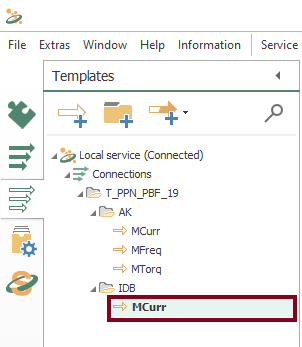
- In similar fashion to the first part of the tutorial, a template is the correct approach once again. Let’s create a new INSERT to database template MCurr within IDB folder (VSD motor current):
- Observe an empty design panel so you can start building your template:

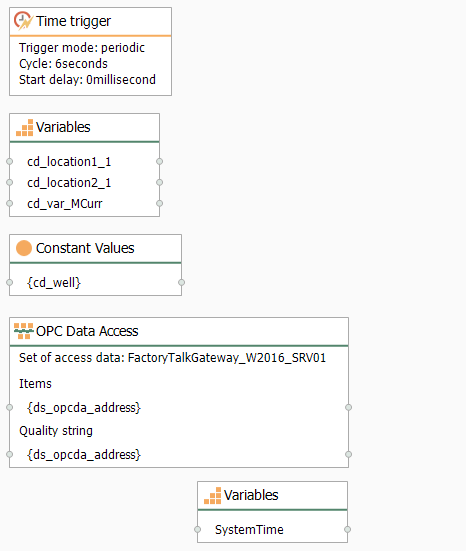
- Drag and drop all blocks as shown here:
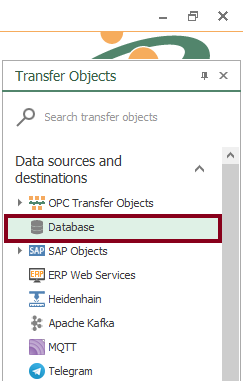
- Insert the Database block:

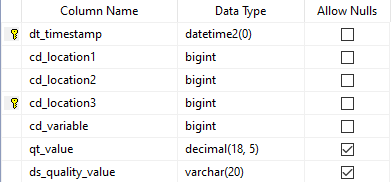
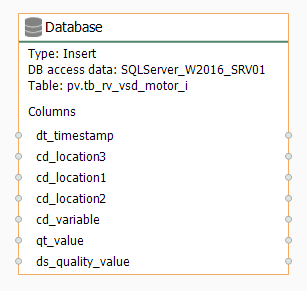
- Make sure your table [pv].[tb_rv_vsd_motor_i] complies with the following design:
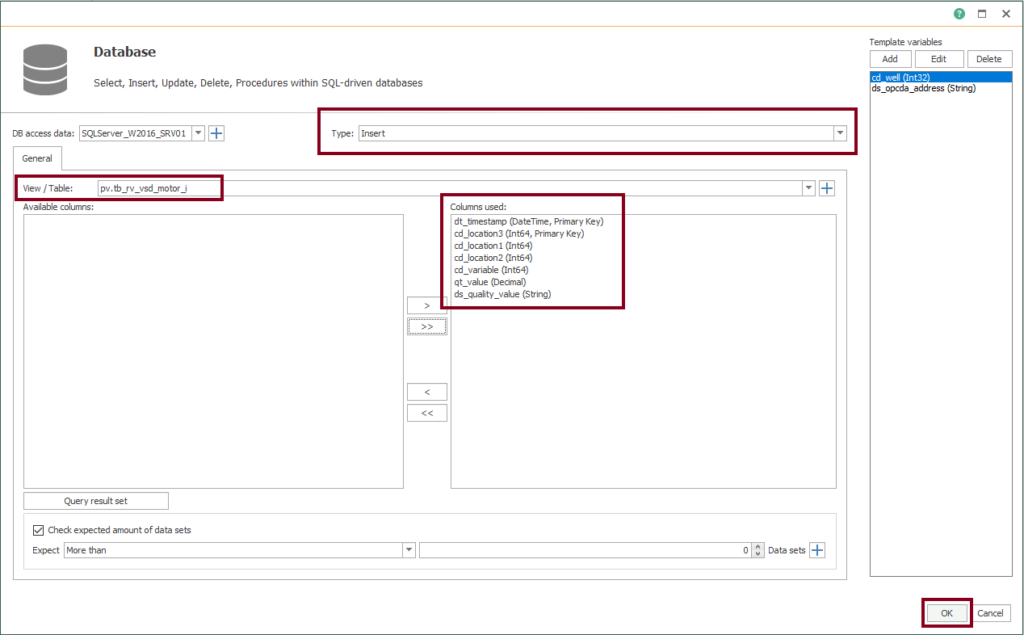
- Edit the INSERT operation and make sure it looks like this:
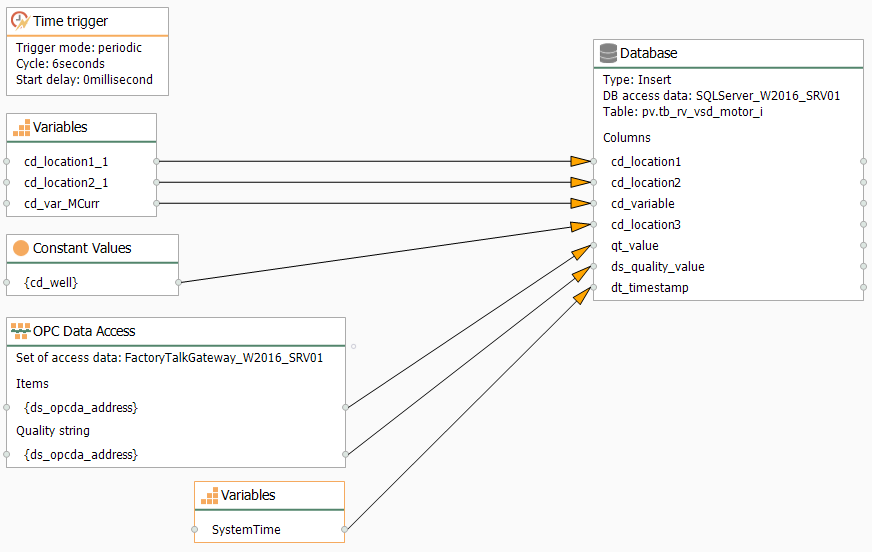
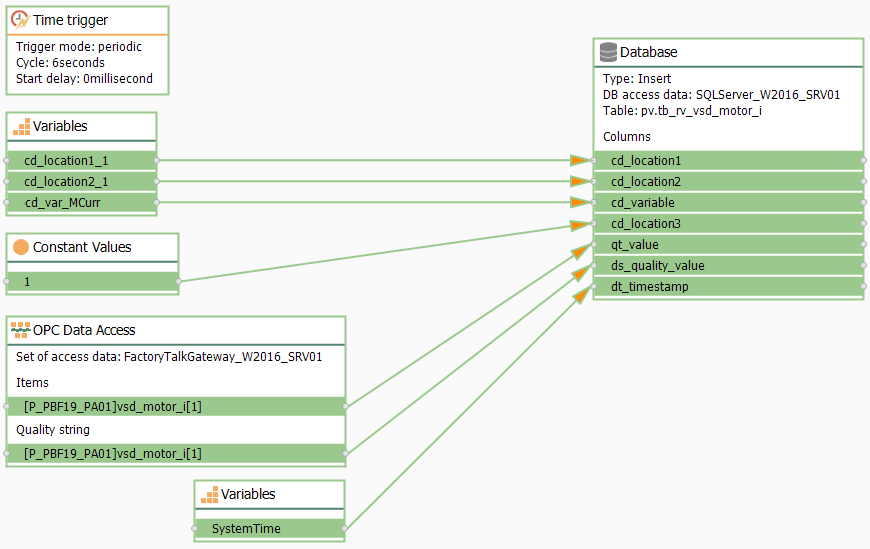
- Make sure to link blocks as shown here to complete your second template:
Working with Instances from Templates
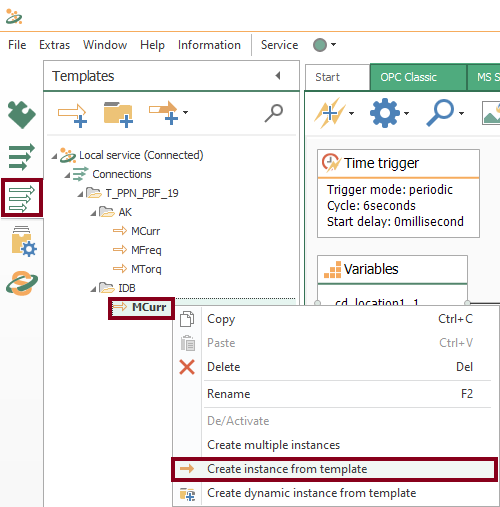
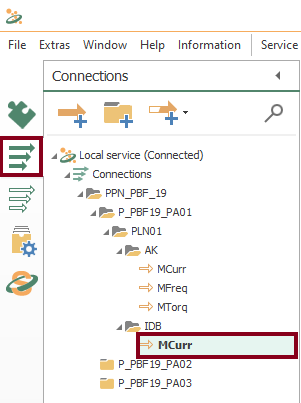
- With your second template, a new instance is required now. Start creating it using the contextual menu:
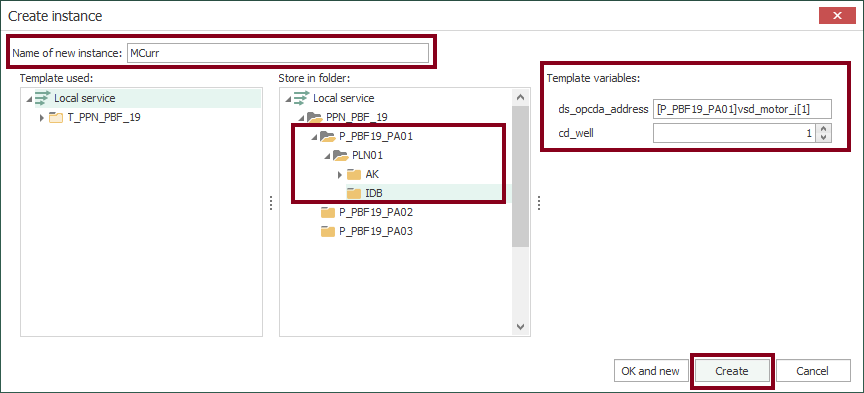
- Check the new instance:
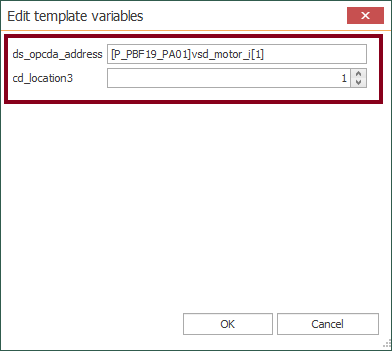
- In the design panel, double-click to check values in template variables according to the actual OPC item and location:

Compile, Save and Publish your OPC Router Project Configuration with OPC Classic and SQL Server
- At this time, you need to compile, save and publish the connection you just created by clicking the “Go productive” button:
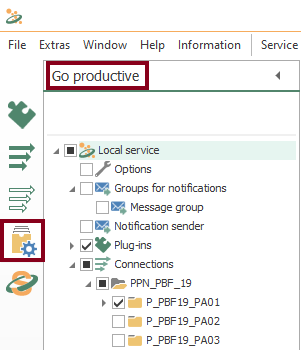

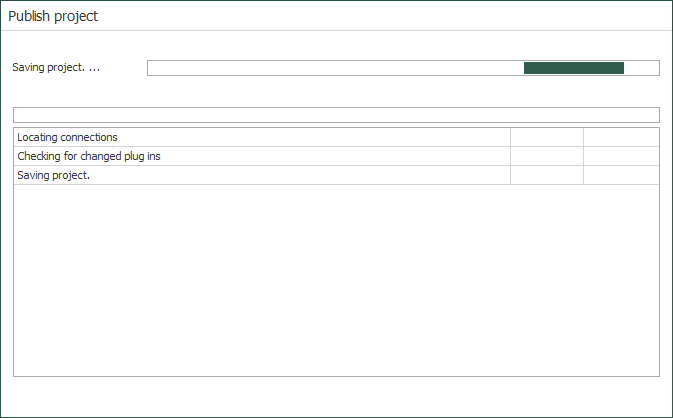
- Meanwhile, the project is saved and published.
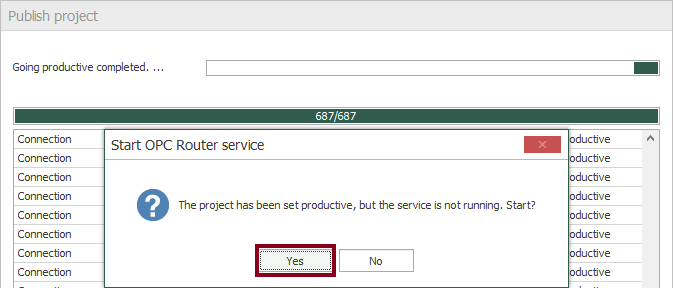
- Press the “Yes” button to start the OPC Router service and run your application.
Check Compiled Connection State
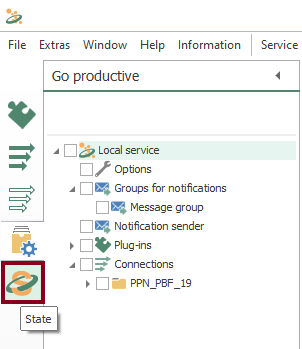
- Finally, you should check the state of your compiled connection by pressing the “State” button:
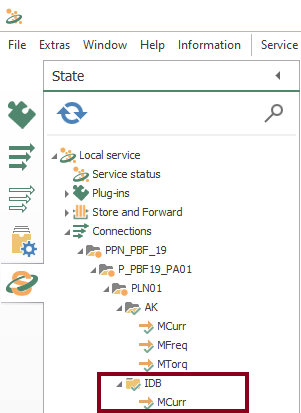
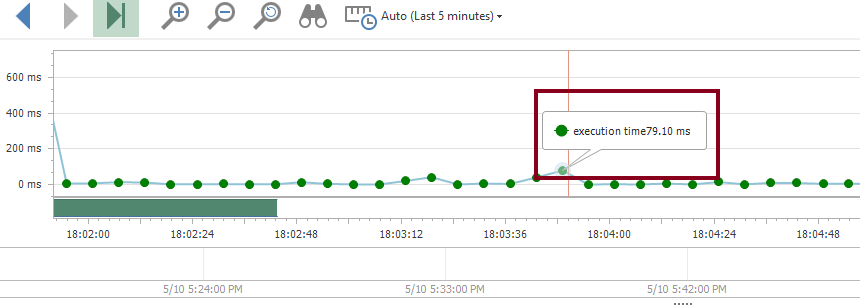
- You should notice an execution time visually (it’s 79.10 milliseconds in this example):
Visualize Online Values
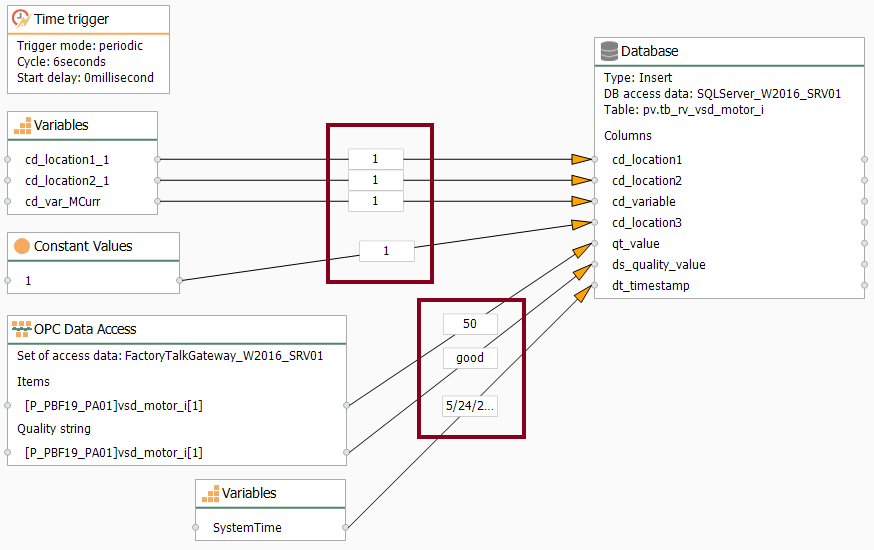
- Also, you can watch live values here:
Verify OPC Router Data Transfer from OPC Classic to SQL Server
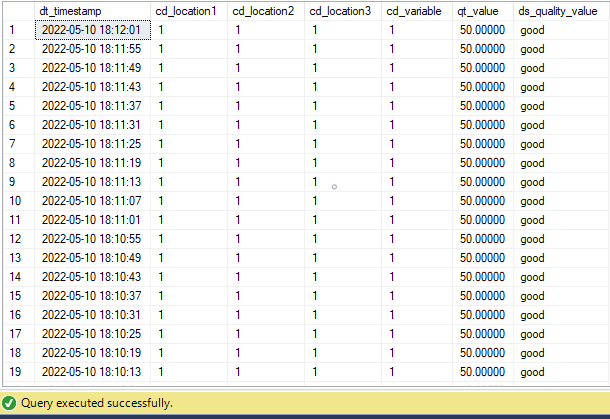
- Additionally, you can verify data transfer within the SQL Server by running SSMS:
Control OPC Router service
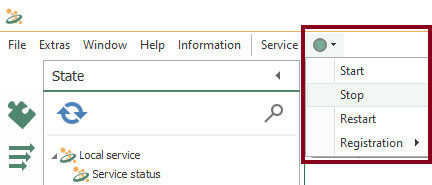
- You are able to start, stop or restart the OPC Router service when needed.
Did you enjoy this OPC Router tutorial with SQL? I’d love to hear from you.
Stay tuned and follow part 3 of this tutorial! 😎
For other articles like this one in English, click here. To see them in Spanish, click here.
