
Following the twelfth part of the OPC Router tutorial, I’m presenting how to run an OPC Router application in a Linux operating system with Portainer on a Raspberry Pi 4. Remember, we’re configuring and running a project for “Papín”, a fictional potato bread factory.
Why an OPC Router tutorial with Portainer?
Because “learning by doing” with examples is fun. Also, this particular functionality can bring us a novel use case: the possibility of running data acquisition applications with the deployment and management of Docker containers through a graphical user interface, which reduces operational complexity and accelerates the adoption of virtualization for industrial automation systems. See below a list of posts that complete this tutorial:
- Getting Started with OPC Router
- Connect an OPC DA server to Microsoft SQL Server
- Connect an MQTT data source to InfluxDB Cloud
- Perform multiple calculations within OPC Router
- Run an OPC Router application with Linux and Docker
- Build a process data simulator with Python, CSV and OPC Router
- Explore basic RESTful web services within OPC Router
- Build a Telegram basic interaction within OPC Router
- Build an SMS basic interaction within OPC Router
- Build a WhatsApp basic interaction within OPC Router
- Build a Teams basic interaction within OPC Router
- Explore advanced RESTful web services within OPC Router
- Run an OPC Router application with Portainer (this post)
Prerequisites
Firstly, you’ll need:
- Installation of Ubuntu Server on a Raspberry Pi post with Docker 📓
- Installation of Portainer on a Raspberry Pi post 📘
- Raspberry Pi 4 🍇
- MicroSD card 💳
- Power supply 🔌
- Ethernet cable ➰
Additionally, you could use:
- Raspberry Pi case 📦
- USB keyboard ⌨️
- USB mouse 🖱️
- HDMI cable ➰
- Monitor 📺
User Story
We want to achieve a few goals with this OPC Router tutorial with Portainer:
- Convert a legacy OPC DA server to OPC UA using a protocol wrapper called “UaGateway”.
- Deploy OPC Router as a Docker container through Portainer.
- Configure OPC UA connections remotely through OPC Router Management.
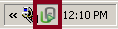
Schematic Diagram
To illustrate this idea better, look at this:
Nodes
For our application, we’ll be using four nodes:
- A virtual machine with some legacy software installed and the UaGateway protocol wrapper.
- A Toshiba workstation with Ubuntu for deploying the OPC Router Docker container through the Portainer web UI.
- A Raspberry Pi 4 with Ubuntu Server, the place where the OPC Router Docker container will be running.
- A Dell workstation with Microsoft Windows 10 installed, where the OPC Router Management tool runs.
The Data Source
- Firstly, make sure to check the OPC topic “P_PBF19_PA03” for 1756-L61 controller through RSLinx Classic Gateway OPC DA server.

- Also, make sure the UaGateway is running and linked to that topic with the “UaGateway@localhost” protocol wrapper.
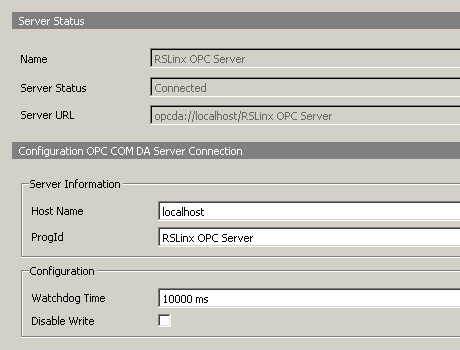
- Test “UaGateway@192.168.1.37” remote path as OPC UA source using the UaExpert.
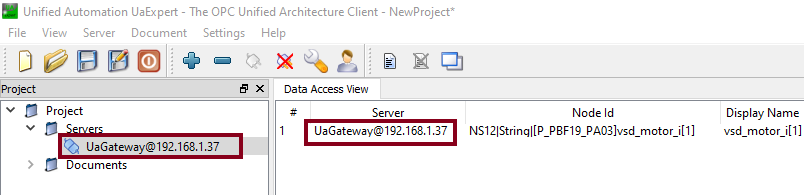
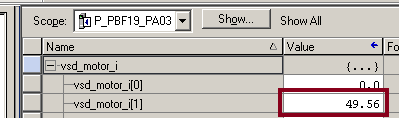
- Look at the current value to be transferred:
Connect to your Raspberry Pi
- On the other hand, make sure your Raspberry Pi 4 is powered on and connected to your local network.

- Later, from a remote Windows workstation, access the Raspberry Pi using SSH by running:
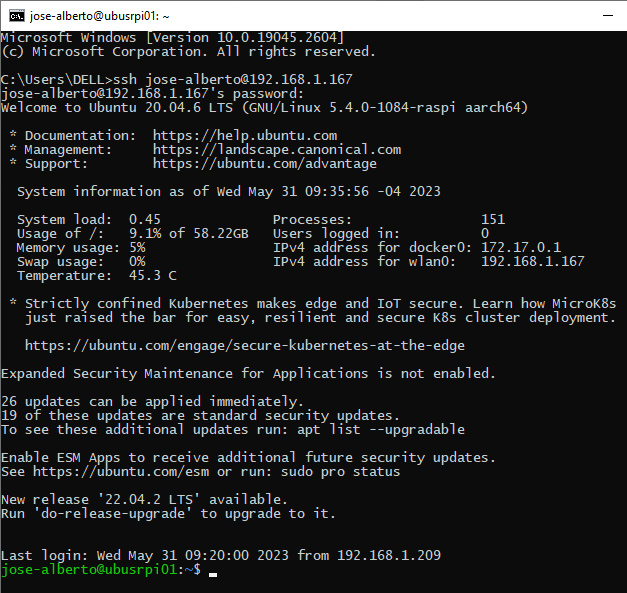
ssh jose-alberto@192.168.1.167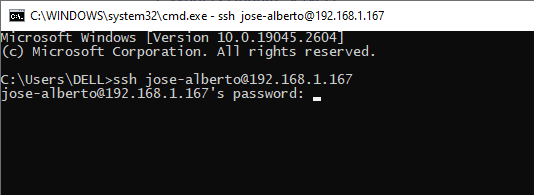
- Following this, check the system output and watch that some updates can be applied immediately.
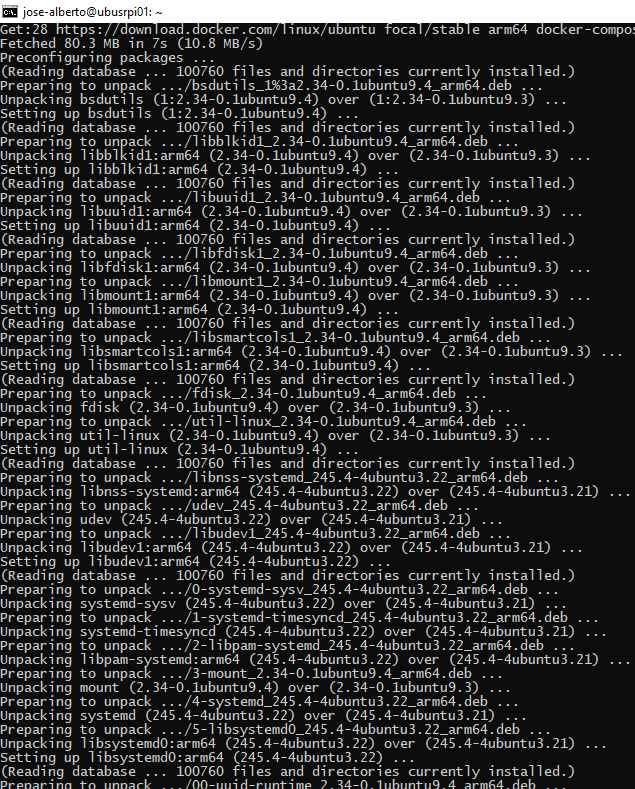
Update and upgrade Ubuntu Server
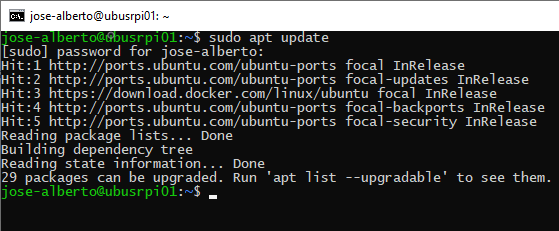
- After that, update the software packages list by running:
sudo apt update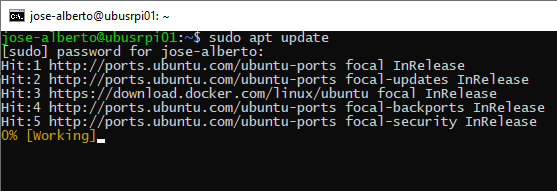
- At this point, upgrade your Ubuntu distribution by running:
sudo apt upgrade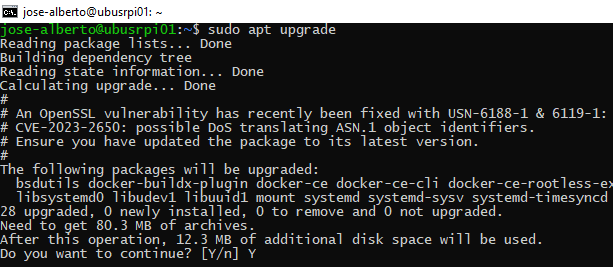
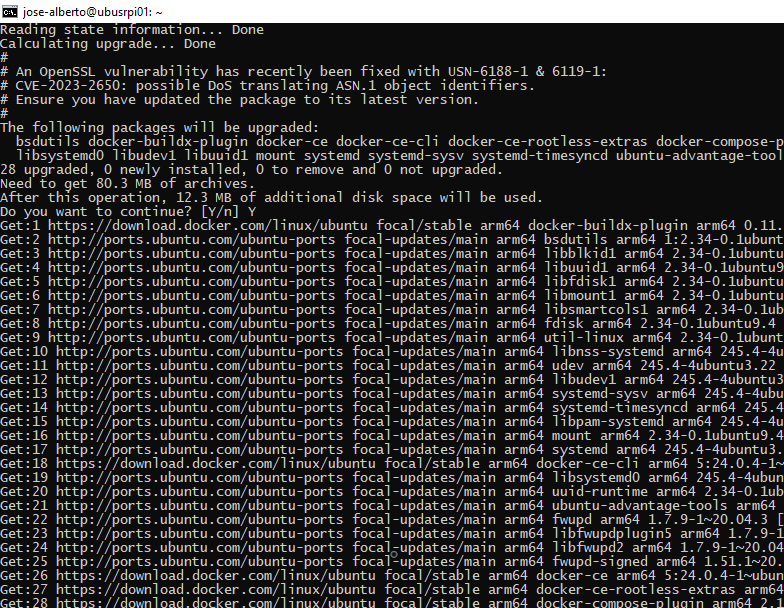
- Meanwhile, wait for the preparing, unpacking and installing of software packages.
Working with Portainer
Now, let’s start managing the OPC Router Docker containers:
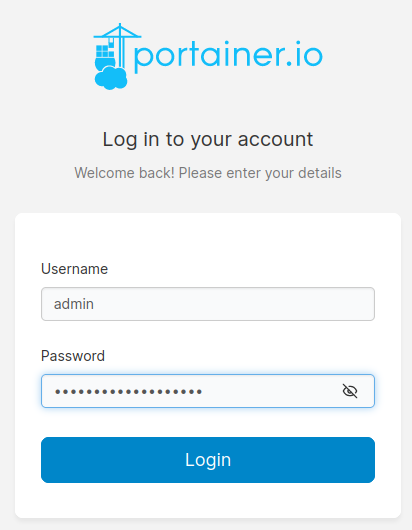
Log in to Portainer
- Firstly, go to your Toshiba workstation with Ubuntu.
- Open a web browser and type your Raspberry Pi’s IP address with the Portainer port (9000):
http://192.168.1.167:9000/
- Then, enter your credentials and press the “Login” button.
Review your local Docker environment
- At this time, you can verify the status of your local environment:
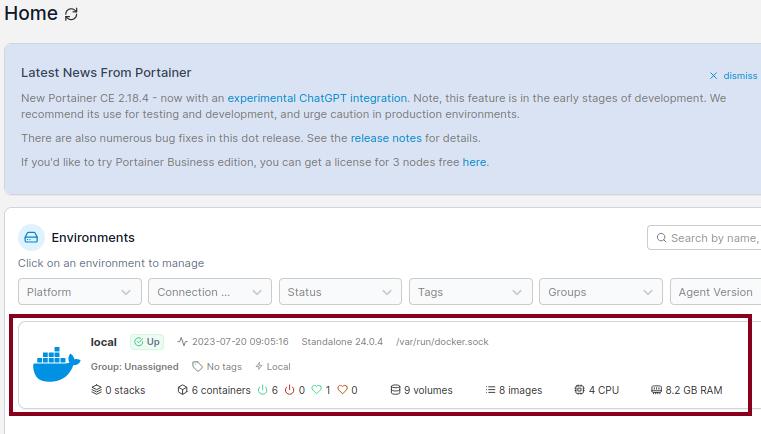
- Then, inspect the local environment by clicking on the tag:
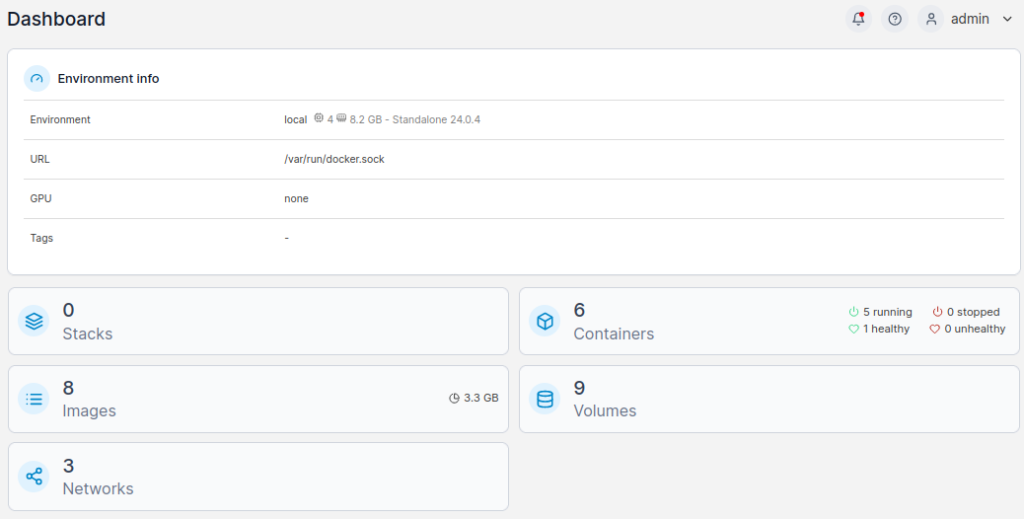
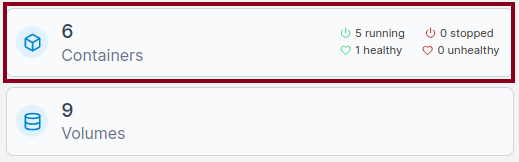
- Of course, watch the summary from the Docker dashboard:
List containers
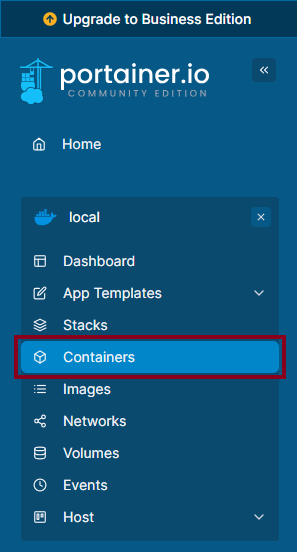
- At this point, click “Containers” to list all Docker containers in your environment:
- Following this, watch the window with the list of Docker containers:

Remove container
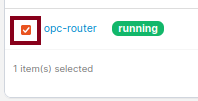
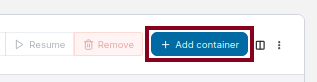
To start from scratch, let’s remove the “opc-router” container.
- Firstly, mark the checkbox of its row.
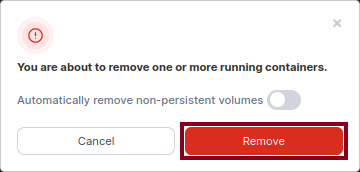
- At this time, press the “Remove” button to proceed.

- So, see the warning and confirm the action by clicking the “Remove” button.
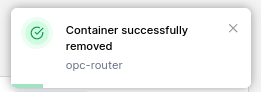
- At the end, watch the proof message.
Download and deploy the right Docker container
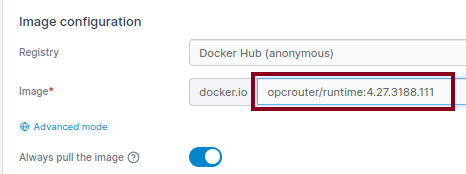
At this point, there is a situation that we need to address. At the time, not all “opcrouter/runtime” images work with a Raspberry Pi 4. With this in mind, we did a process of “trial and error” in order to make sure that a specific version works well. After that, we’re going to pick the recent enough version “4.27.3188.111”.
- After that, go back to the container list and click the “Add container” button:
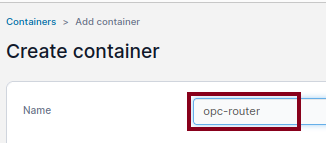
- Since this, type the name of your new container.
opc-router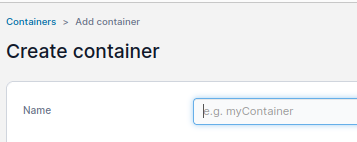
- Given that, enter the name of the image to download.
opcrouter/runtime:4.27.3188.111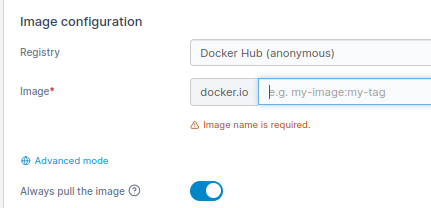
- To begin the network ports configuration, press the “publish a new network port” button.


- At this point, make sure to set the ports shown below.
Port1-Host = 51515 | Port1-Container = 27017 (MongoDB)
Port2-Host = 49420 | Port2-Container = 49420 (OPC UA Server)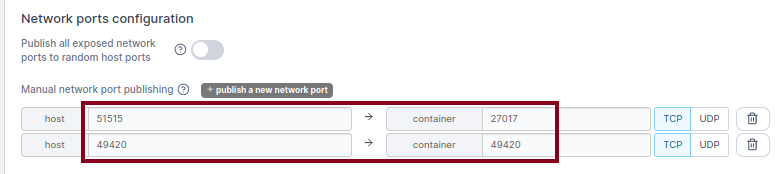
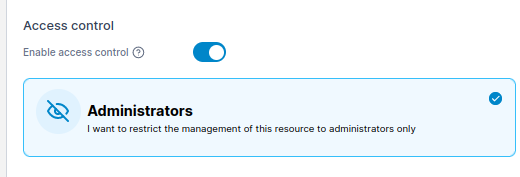
- Also, make sure to enable the proper access control in the container.
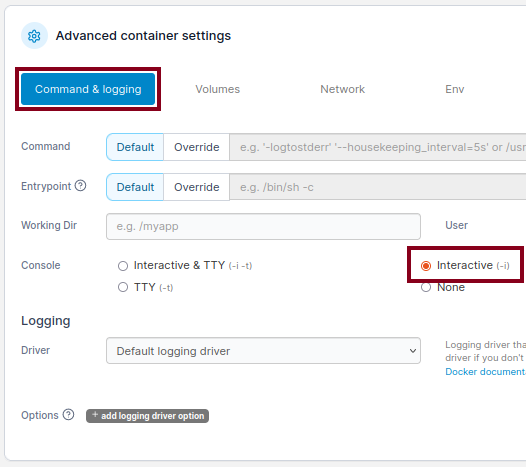
- In the “Advanced container settings”, click the “Command & logging” tab and set the “Interactive” option.
- At this point, click the “Volumes” tab and the button below to start mapping.
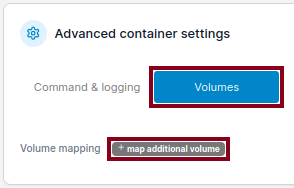
- In order to map the first volume for the database, set these values:
Volume1-Container: /data/db [Bind]
Volume1-Host: opc-router-opc-router-db [Writable]
- After that, map the second volume for the security certificates:
Volume2-Container: /root/.dotnet/corefx/cryptography/x509stores/ [Bind]
Volume2-Host: opc-router-opc-router-cert [Writable]
- Following this, click the “Env” tab to set the environment variables.

TZ=America/Caracas
OR_DATABASE_USERNAME=opc-router
OR_DATABASE_PASSWORD=opc-router
OR_DATABASE_ENABLE_TLS=true
MONGO_INITDB_ROOT_USERNAME=opc-router
MONGO_INITDB_ROOT_PASSWORD=opc-router
MONGO_ENABLE_AUTHENTICATION=true
MONGO_ENABLE_TLS=true
OR_I_ACCEPT_EULA=true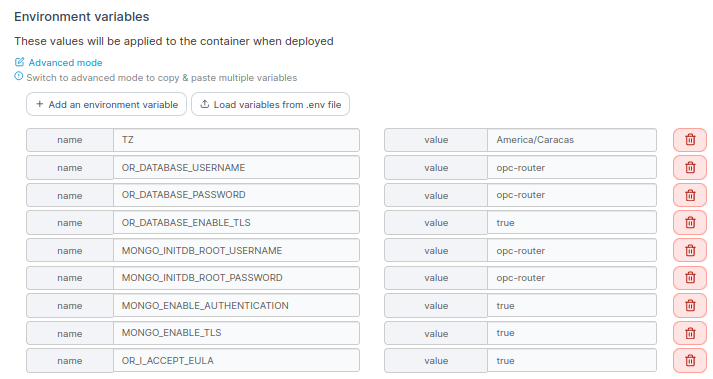
- At this instant, set your “Restart Policy” to “Unless stopped”.

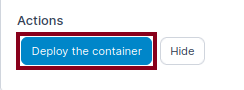
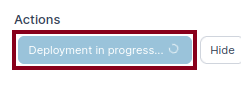
- In order to proceed, press the “Deploy the container” button.

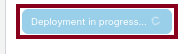
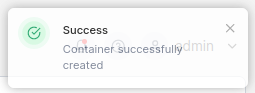
- As a result, check the creation of the new container.


Create a new Docker container using an application template
Do you think this OPC Router tutorial with Portainer could be even easier? Yes, I think so. We’ll do just that with the use of a Portainer application template.
- To begin with, go to “Settings”.
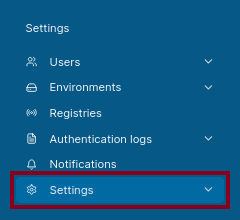
- At this point, watch the “Settings” page.

- Then, locate the “App Templates” section.
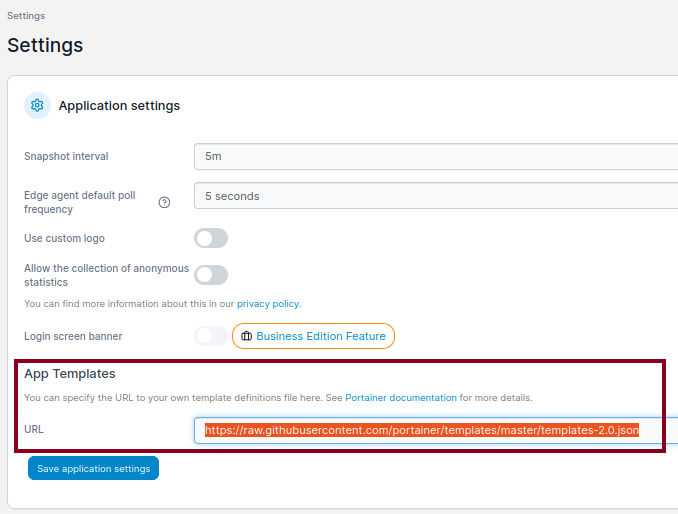
- Accordingly, replace the default URL with the supplied below and press the “Save application settings” button to store changes.
https://raw.githubusercontent.com/joseamaita/portainer-templates/rpi4/templates-2.0.json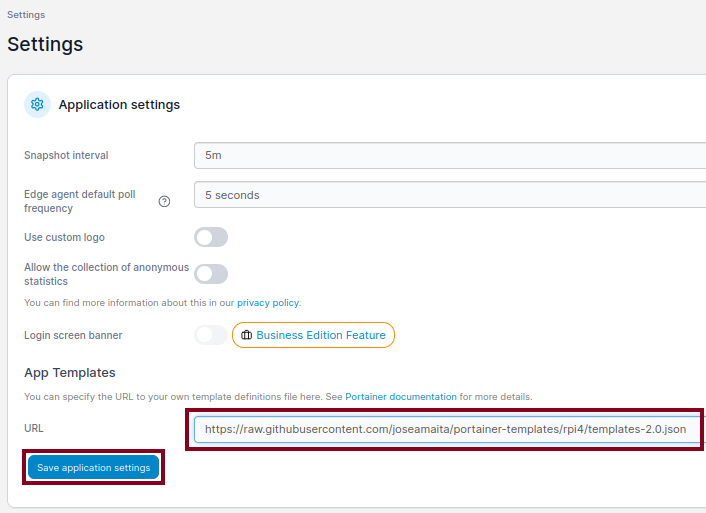
- Of course, wait for the update.

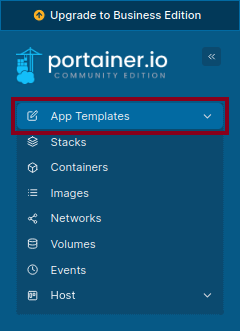
- Then, go to the “App Templates” section.
- Meanwhile, watch the page with the list of all application templates.
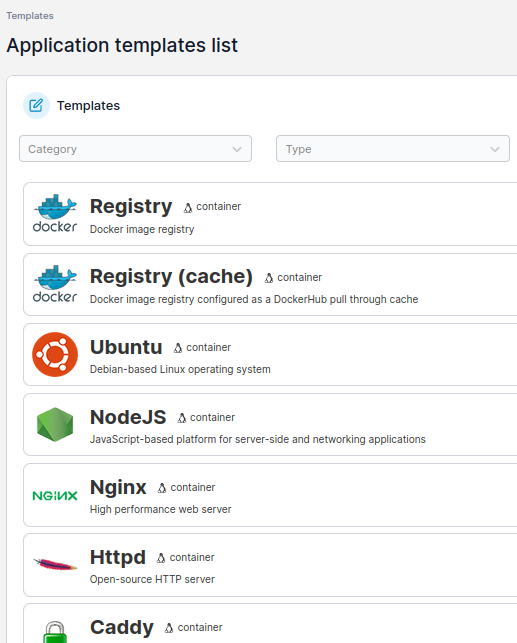
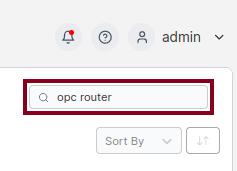
- Type in “opc router” in the search box.
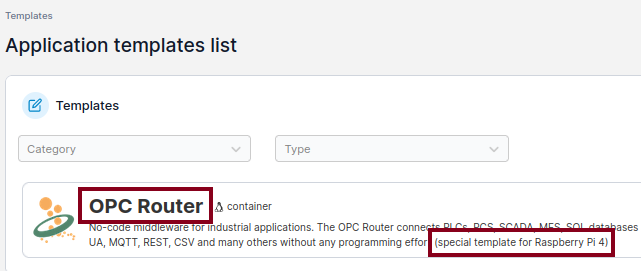
- At this instant, make sure you have the special template for the Raspberry Pi 4. When you do, click on the title of the template.
- Prepare yourself to type some basic information.
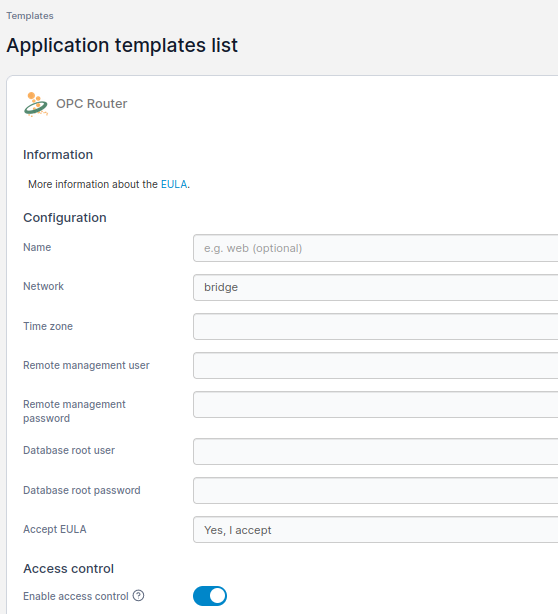
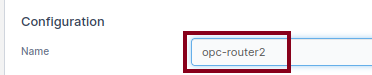
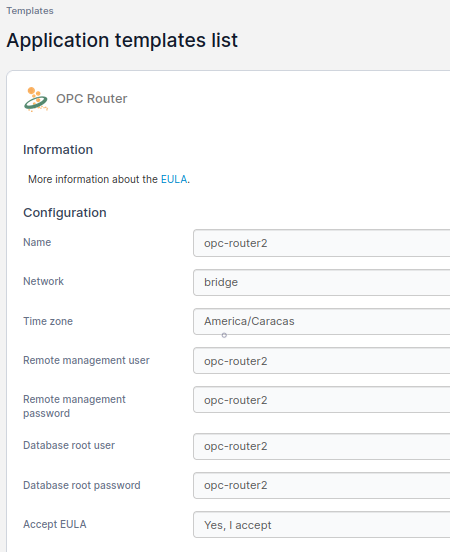
- Again, type the name of your new container.
- After that, choose your desired network interface.

- Then, enter your required time zone.

- Following this, enter the credentials for the remote user.


- Also, type the credentials for the database user.


- Accept the End User License Agreement (EULA) by selecting “Yes, I accept”.

- You should see something like this:
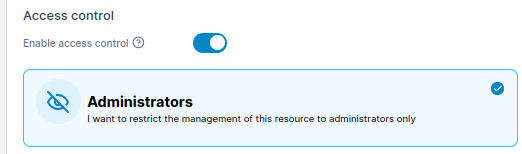
- Also, make sure to enable the proper access control in the container.
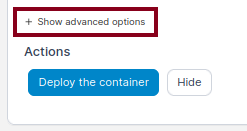
- Press the “Show advanced options” to continue.
- Then, set the ports shown below.
Port1-Host = 51515 | Port1-Container = 27017 (MongoDB)
Port2-Host = 49420 | Port2-Container = 49420 (OPC UA Server)
- Also, set the volumes shown below.
Volume1-Container: /data/db [Bind]
Volume1-Host: opc-router2-opc-router-db [Writable]

Volume2-Container: /root/.dotnet/corefx/cryptography/x509stores/ [Bind]
Volume2-Host: opc-router2-opc-router-cert [Writable]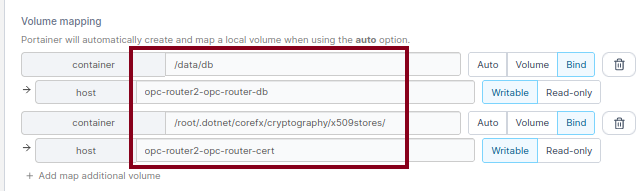
- Press the “Deploy the container” button to proceed.
- Watch the confirmation dialog.
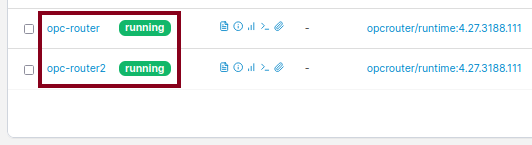
- Lastly, make sure both OPC Router Docker containers are running.
Prepare the OPC Router configuration
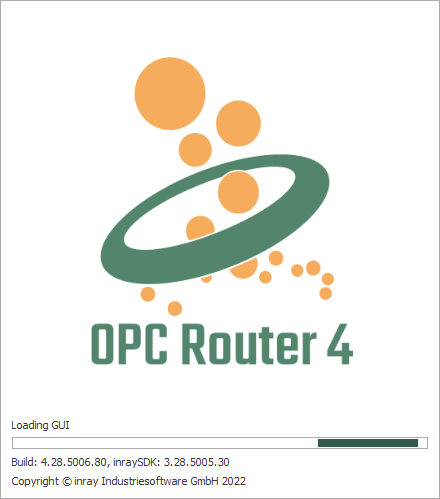
- On the other hand, run OPC Router Management.
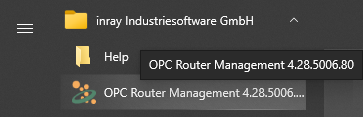
- Then, wait for the OPC Router 4 GUI to load.
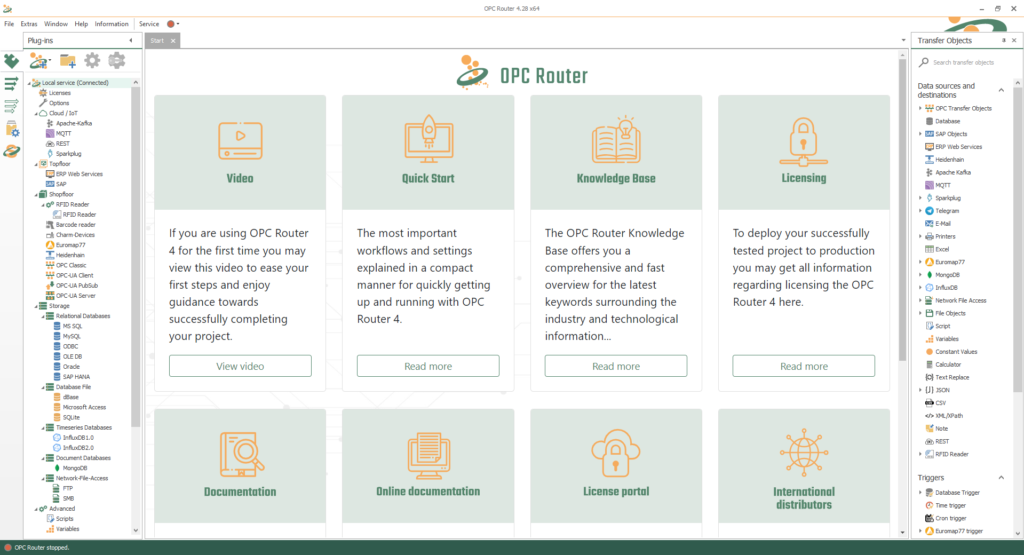
- At this time, you should see something like this in the Start tab:
Update OPC Router service for Docker
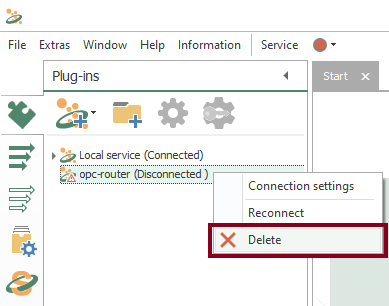
Remove old connection
- In this case, select the connection you want to remove.
- Now that you did that, right click and choose the “Delete” option.
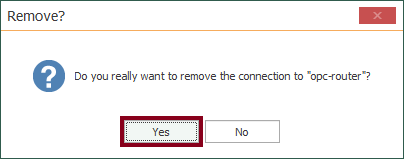
- At the end, press the “Yes” button to confirm.
Create new connections
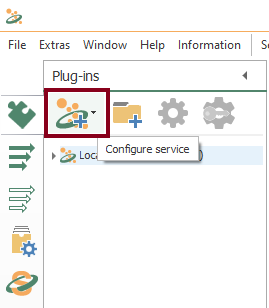
- To begin with, go to the “Plug-ins” section to configure the OPC Router service.
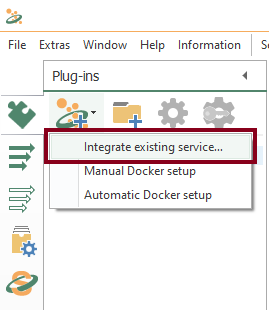
- Following this, choose “Integrate existing service…”.
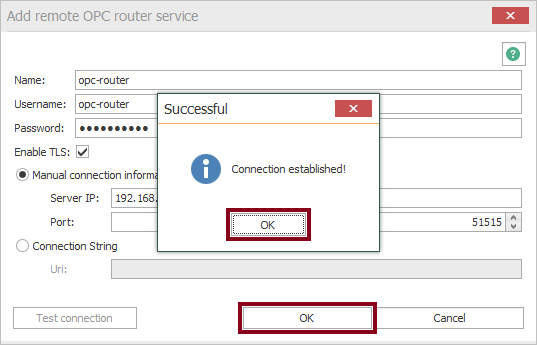
- Then, enter the required information and press the “Test connection” button to test connectivity to the first Docker container.
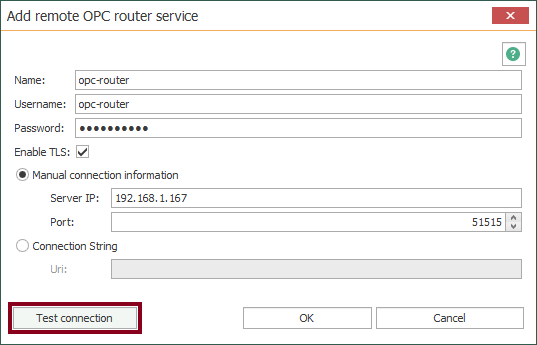
- At this point, press the “OK” button twice to confirm the valid connection.
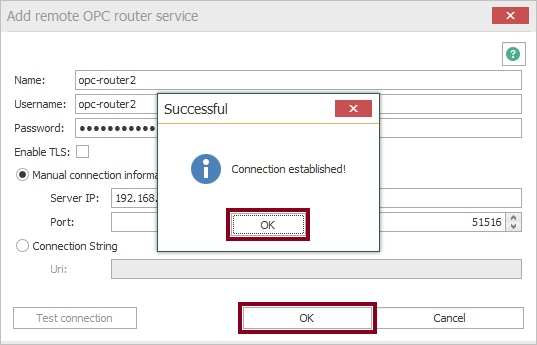
- Analogous to the first container, choose “Integrate existing service…”.
- Then, enter the required information and press the “Test connection” button to test connectivity to the second Docker container.

- Lastly, press the “OK” button twice to confirm the valid connection.
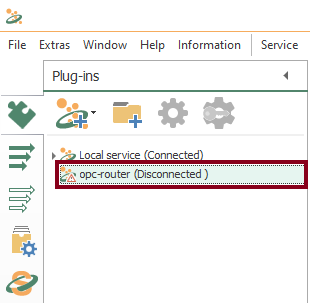
- At this point, see the pair of integrated connections.
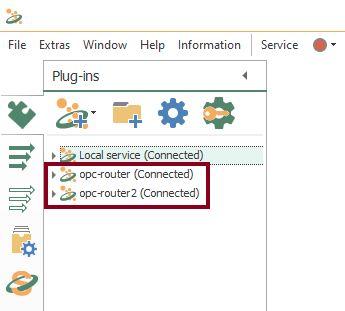
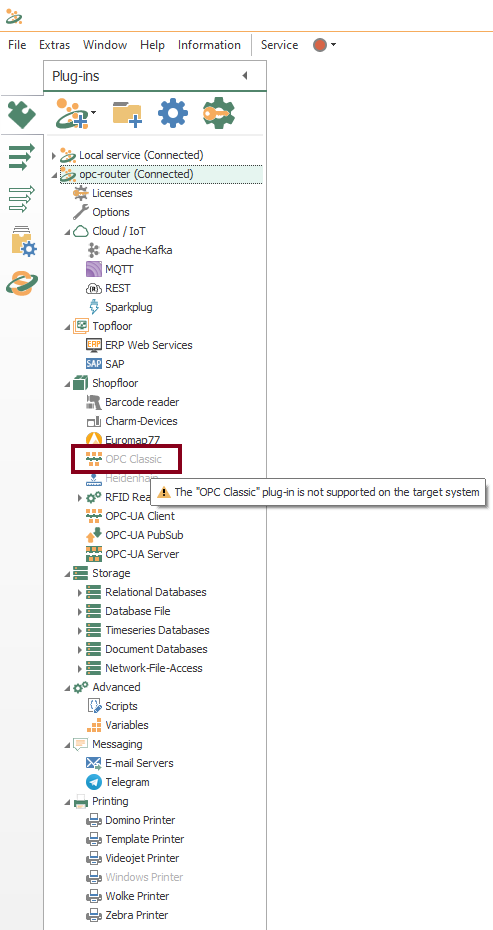
- Now that you did that, you’re ready to add plugins and transfer objects to run on your Raspberry Pi 4. Notice that some plugins are not supported on the target system because only works on Windows.
Working with OPC Router and OPC UA
Knowing your Plugins
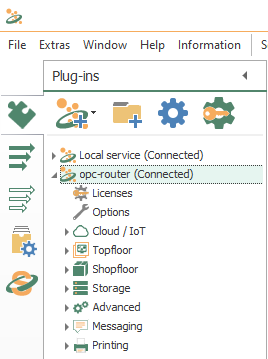
- To begin with, the configuration of OPC Router starts with your licensed plugins in the Raspberry Pi 4. There are several categories such as “Cloud / IoT”, “Topfloor”, “Shopfloor”, “Storage”, “Advanced”, “Messaging” and “Printer”.

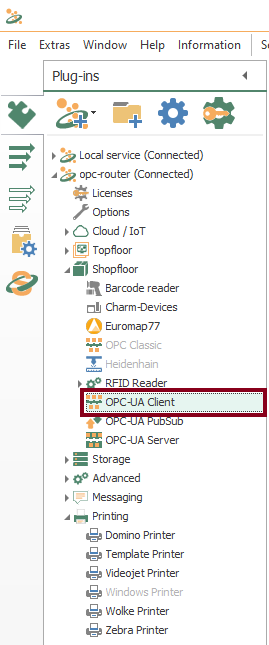
- On this occasion, make sure to notice OPC-UA Client.
Knowing your Transfer Objects
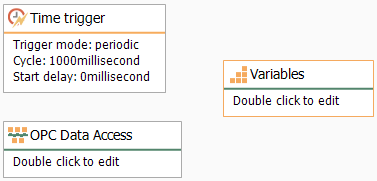
- At this point, we’re going to need three (3) transfer objects to solve our use case:

- Specifically, make sure to notice OPC Data Access, Time trigger and Variables.
Configuring your Plugins
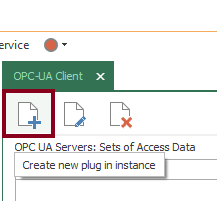
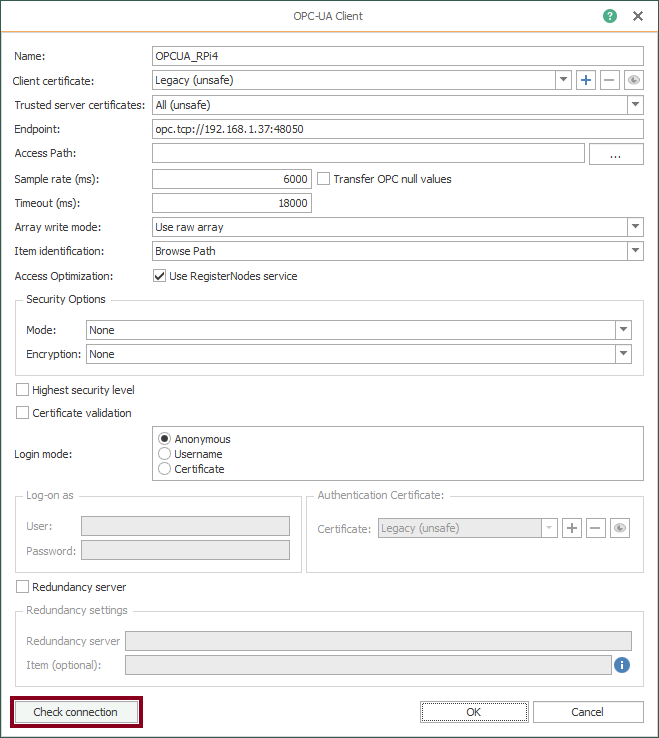
- Now, let’s start creating a new plug-in instance with OPC-UA Client (double click on the object):
- At this time, define a new OPC-UA Client connection for our system:

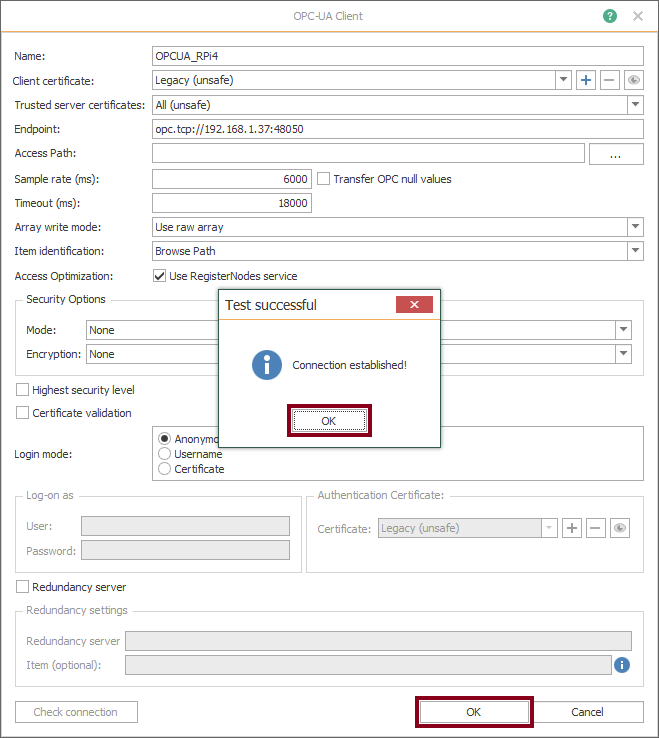
- Then, press the “Check connection” button to test connectivity to the remote protocol wrapper:
- Press the “OK” button twice to confirm the valid connection.
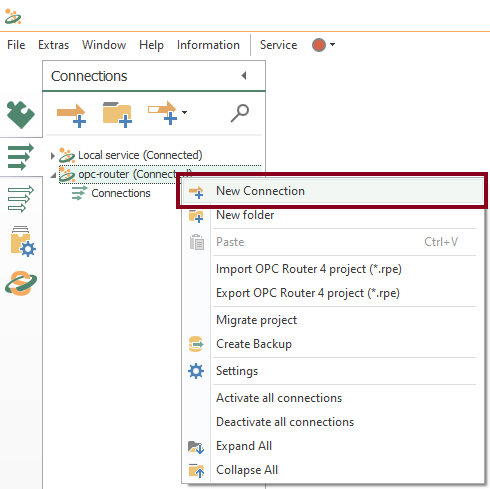
Creating your Connection
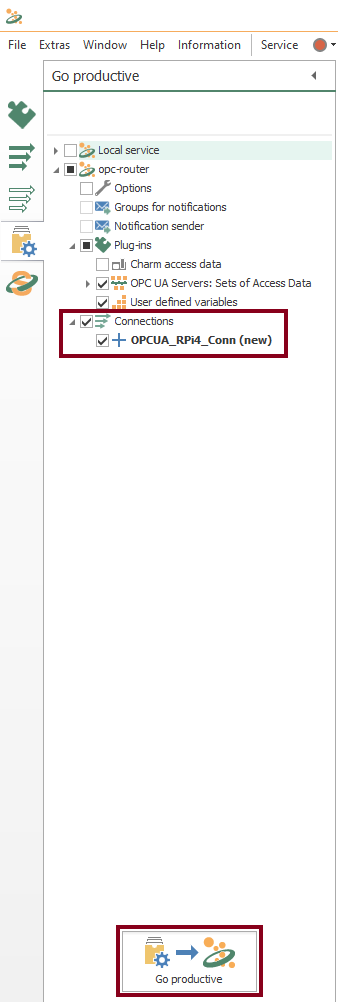
- To begin with, let’s create our connection as “OPCUA_RPi4_Conn“:
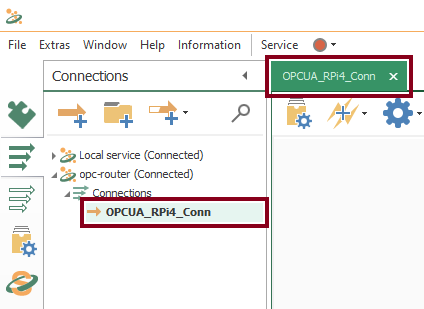
- Watch an empty design panel so you can start building your connection:
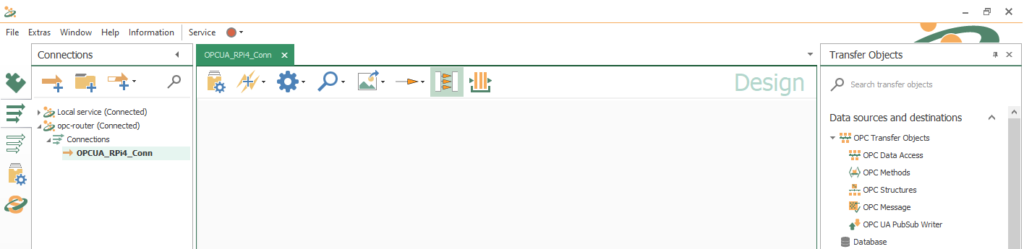
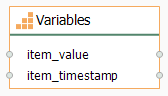
- Then, drag and drop these three blocks as shown here:
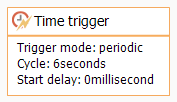
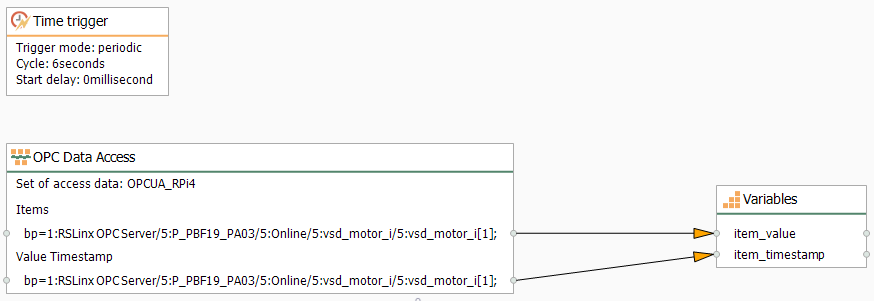
- Edit the Time trigger block and set a periodic transfer of six seconds:

- Confirm the Time trigger block:
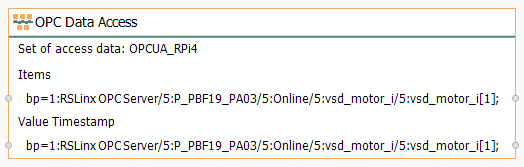
- Edit the OPC Data Access block and add the tag to your remote variable:
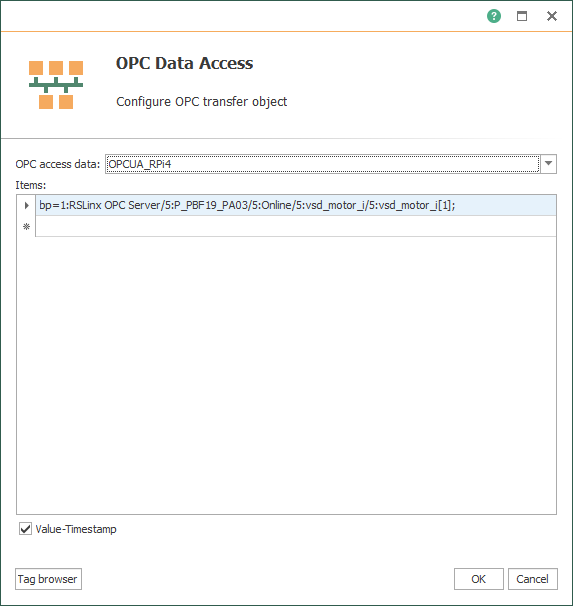
- Confirm the OPC Data Access block:
- Following this, edit the Variables block and add these two global variables:
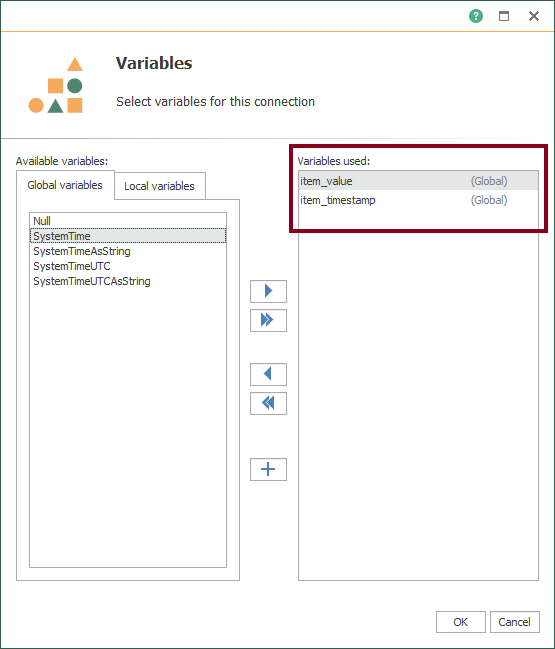
- Confirm the Variables block:
- At the end, make sure to link blocks as shown here:
Compile, Save and Publish your OPC Router Project Configuration to the Raspberry Pi 4
- At this time, you need to compile, save and publish the connection you just created by clicking the “Go productive” button:

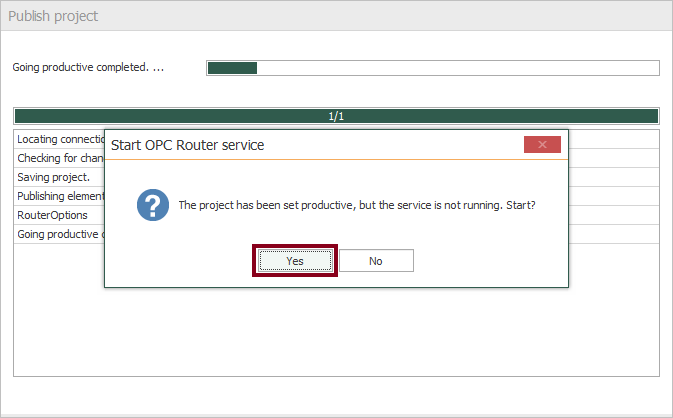
- Meanwhile, the project is saved and published.

- After that, press the “Yes” button to start the OPC Router service and run your application.
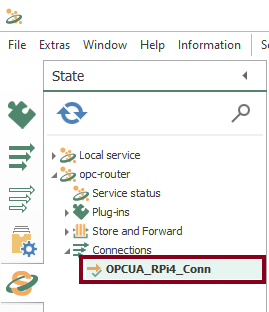
- Lastly, see the active connection in the left panel:
Visualize Online Data
- Also, you can watch the live values here:
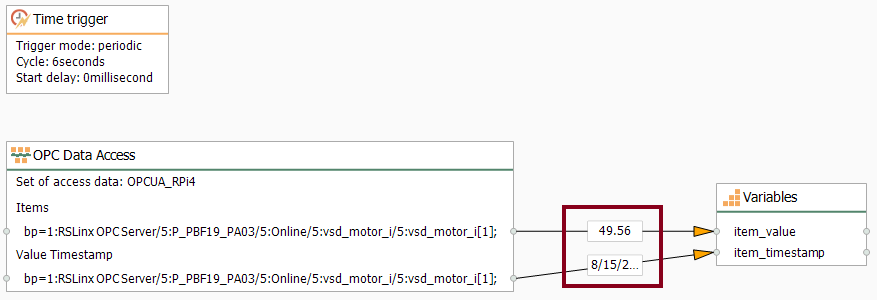
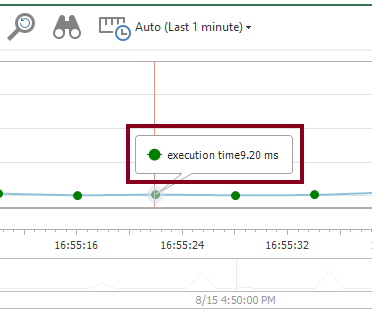
- At this point, you should notice an execution time visually:
Conclusion
To summarize, you can run an OPC Router application with Portainer easily. With the help of the GUI, you can create, start, stop, and delete containers with just a few clicks. In addition to that, we show you how to change legacy OPC data to the new OPC UA format.
Did you enjoy this OPC Router tutorial with Portainer? I’d love to hear from you.
Stay tuned and follow part 14 of this tutorial! 😎
For other articles like this one in English, click here. To see them in Spanish, click here.