Following the sixth part of the OPC Router tutorial, I’m presenting how to connect web applications to industrial automation systems via the REST interface. Remember, we’re configuring and running a project for “Papín”, a fictional potato bread factory.
Why an OPC Router tutorial with REST?
Because “learning by doing” with examples is fun. Also, this protocol can offer us fascinating use cases: the capacity to create, read, update and delete information from industrial automation systems through the implementation of web-enabled applications, which it’s a perfect option when we want to integrate different types of modern technological solutions. See below a list of posts that complete this tutorial:
- Getting Started with OPC Router
- Connect an OPC DA server to Microsoft SQL Server
- Connect an MQTT data source to InfluxDB Cloud
- Perform multiple calculations within OPC Router
- Run an OPC Router application with Linux and Docker
- Build a process data simulator with Python, CSV and OPC Router
- Explore basic RESTful web services within OPC Router (this post)
- Build a Telegram basic interaction within OPC Router
- Build an SMS basic interaction within OPC Router
- Build a WhatsApp basic interaction within OPC Router
- Build a Teams basic interaction within OPC Router
- Explore advanced RESTful web services within OPC Router
- Run an OPC Router application with Portainer
Considerations
From this point on, we must download and install OPC Router v4.27.5016.75 or later to make this feature work appropriately. Also, OPC Router Config was renamed to OPC Router Management.
Prerequisites
Firstly, you’ll need:
- Google Chrome, Mozilla Firefox, or Microsoft Edge web browser 🌐
- Postman application 📧
- Microsoft SQL Server database 🧱
- Schematic diagram 📝
- OPC Router Management application 💻
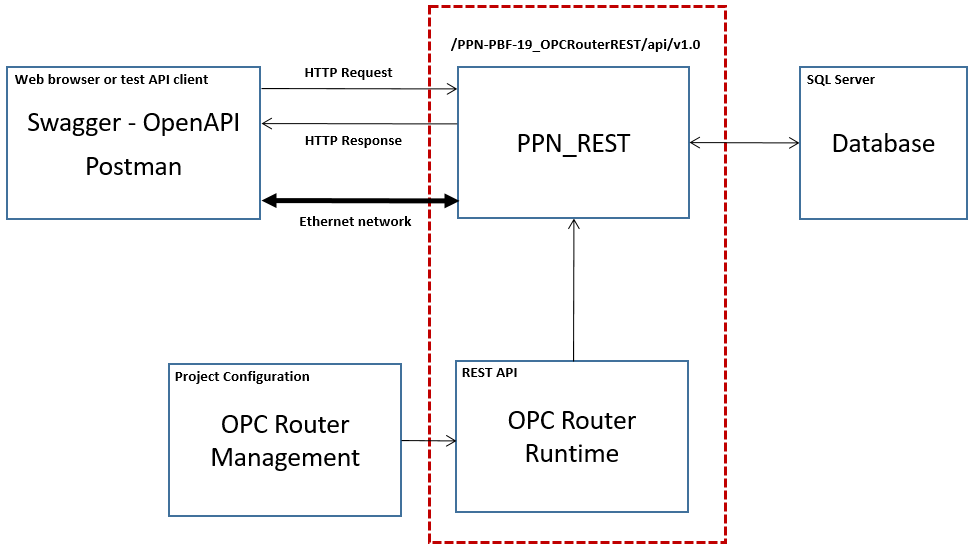
Schematic Diagram
To illustrate this idea better, look at this:
What is REST?
Recently, REST (the acronym for REpresentational State Transfer) has emerged as the standard architectural design for web services and web APIs. Consists of a software architectural style for data exchange between distributed hypermedia systems.
The characteristics of a REST system are defined by six (6) design rules:
- Client-Server: There should be a separation between the server that offers a service, and the client that consumes it.
- Stateless: Each request from a client must contain all the information required by the server to carry out the request. In other words, the server cannot store information provided by the client in one request and use it in another request.
- Cacheable: The server must indicate to the client if requests can be cached or not.
- Layered System: Communication between a client and a server should be standardized in such a way that allows intermediaries to respond to requests instead of the end server, without the client having to do anything different.
- Uniform Interface: The method of communication between a client and a server must be uniform.
- Code on demand: Servers can provide executable code or scripts for clients to execute in their context. This constraint is the only one that is optional.
What is a RESTful API?
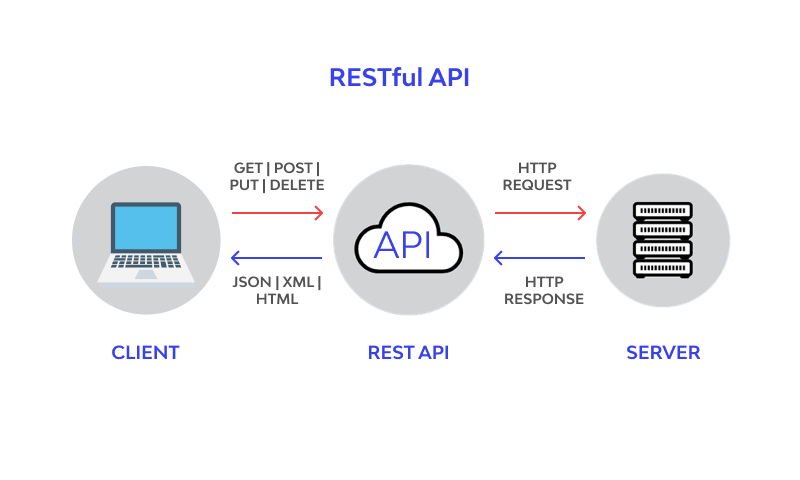
The REST architecture was originally designed to fit the HTTP protocol that the World Wide Web uses. So, a REST API (or REST Application Programming Interface) is the respective implementation of the REST architecture of a concrete system. It’s then also referred to as a RESTful API or RESTful web service.
The main idea of RESTful APIs is the notion of resources, which are represented by URIs (Uniform Resource Identifier). The clients send requests to these URIs using the methods defined by the HTTP protocol (basic actions like reading, creating, updating or deleting), and possibly as a result of that the state of the affected resource changes.
The HTTP request methods are typically designed to affect a given resource in standard ways:
| HTTP Method | Action |
|---|---|
| GET | Obtain information about one or more resources |
| POST | Create a new resource |
| PUT | Update a resource |
| DELETE | Delete a resource |
In short, the interface defines resources and any associated parameters that describe the resource. For the RESTful API of a system, the provider usually provides API documentation in which all resources and their parameters can be viewed.
The REST design does not require a specific format for the data provided with the requests. In general data is provided in the request body as a JSON blob, or sometimes as arguments in the query string portion of the URL.
Use of REST in the industrial automation world
When it comes to coupling systems, REST almost always plays a key role. Especially in connection with web-enabled systems, REST is one of the leading standards for system integration. But make no mistakes: although a modern technology, the concept behind REST is tried and tested. Connecting systems via REST is simple and effective due to its simple design. And because it is stateless, it is easy to scale. In the industrial sector, REST is used in many domain areas.
Designing a simple REST API
The task of designing a web service or API that adheres to the REST guidelines then becomes an exercise in identifying the resources that will be exposed and how they will be affected by the different request methods.
For our “Papín” factory, the first thing to do is to decide what is the route prefix URL to access this service. For example, we could expose this service as:
/PPN-PBF-19_OPCRouterREST/api/v1.0We have decided to include here the scope of the application and the version of the API in the URL. For the scope, it’s useful to provide a namespace that separates this service from others that can be running on the same system. Including the version in the URL can help with making updates in the future, since new and potentially incompatible functions can be added under a new version, without affecting applications that rely on the older functions.
The next step is to select the resources that will be exposed by this service:
| HTTP Method | Resource Name | Resource Action |
|---|---|---|
| GET | /GetMessage1 | First basic integration test (“Hello, World!”). |
| GET | /GetMessage2 | Second basic integration test (time-series data point). |
| GET | /LastMCurrPln01 | Most recent value of MCurr in PLN01. |
| GET | /LastMTorqPln02 | Most recent value of MTorq in PLN02. |
| GET | /LastMSpdPln03 | Most recent value of MSpd in PLN03. |
| GET | /LastValueLoc{location}{variable} | Most recent value of any available variable in any specific location. |
Working with OPC Router, REST and SQL Server
Knowing your Plugins
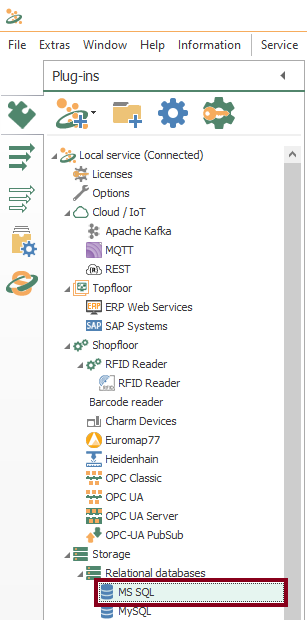
- To begin with, the configuration of OPC Router starts with your licensed plugins. There are several categories such as “Cloud / IoT”, “Topfloor”, “Shopfloor”, “Storage”, “Advanced”, “Messaging” and “Printer”.
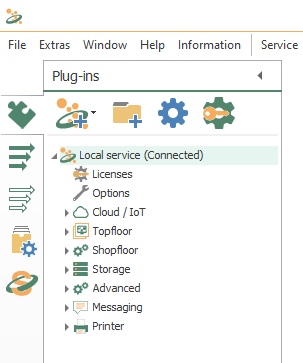
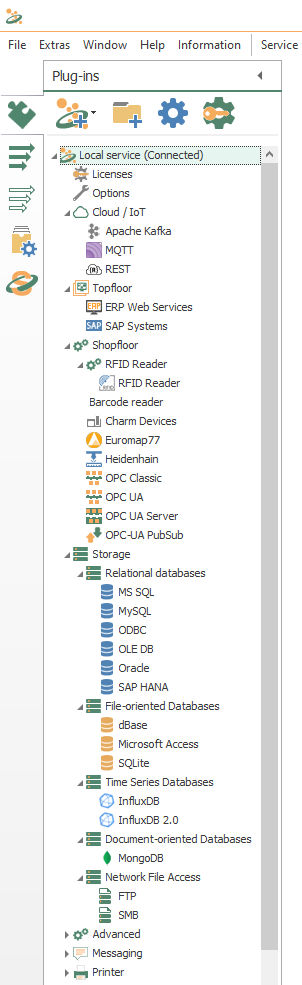
- Make sure to notice REST and MS SQL.
Knowing your Transfer Objects
- At this point, we’re going to need four (4) transfer objects to solve our use cases:
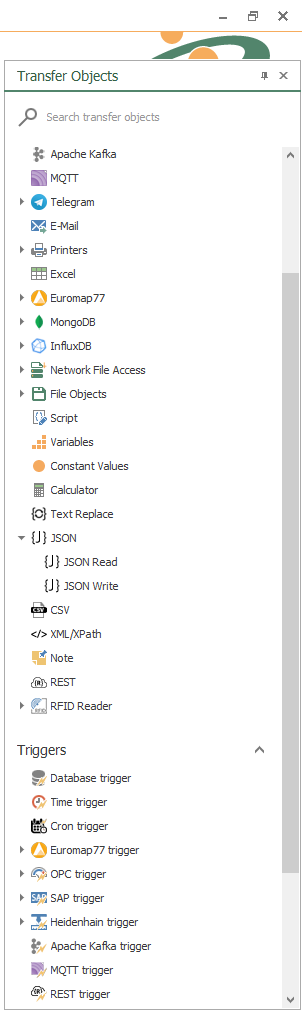
- Specifically, make sure to notice REST trigger, JSON Write, Constant Values and Database.
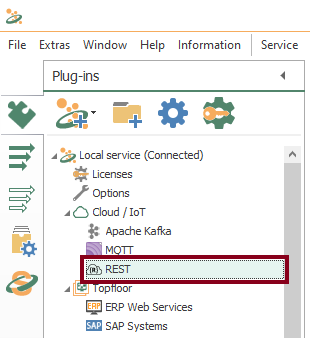
Configuring your Plugins
- Following identification, OPC Router needs to configure every licensed plugin. Let’s start creating a new plug-in instance with REST (double click on the object) and the REST APIs tab:
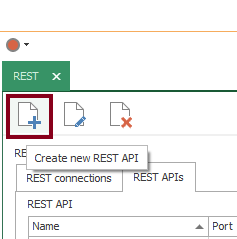
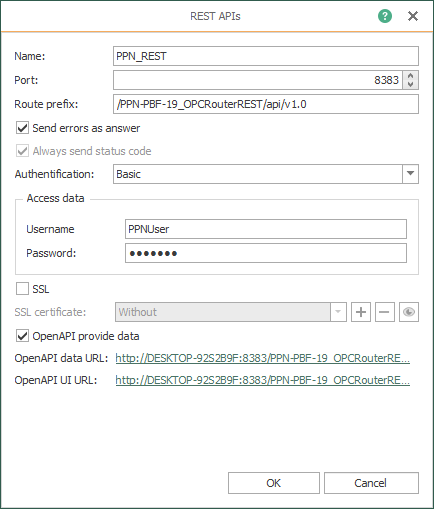
- At this time, define a new REST API for our system:
Checking your Plugins
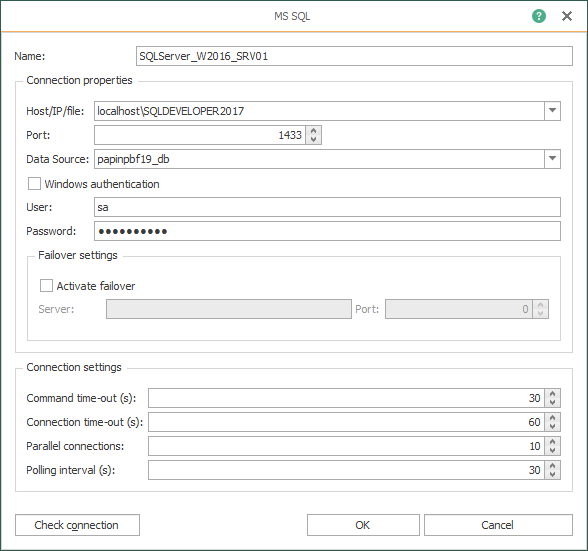
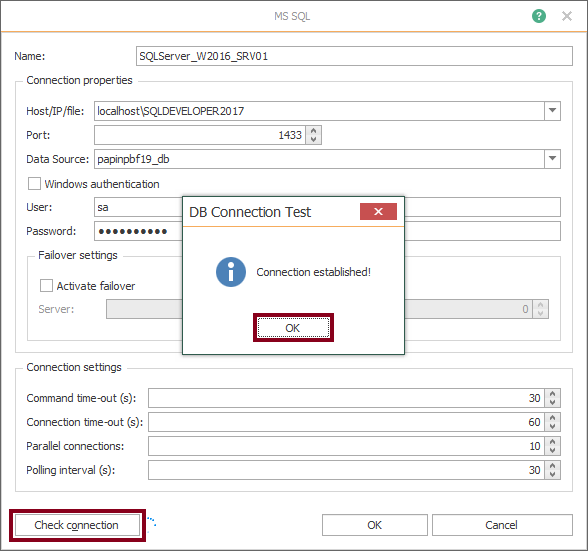
- Following identification, OPC Router needs to configure every licensed plugin. Let’s check the plug in instance with MS SQL (double click on object):
- Then, check the local Microsoft SQL Server database storage and press the “Check connection” button to test connectivity.
Working with Folders and Connections
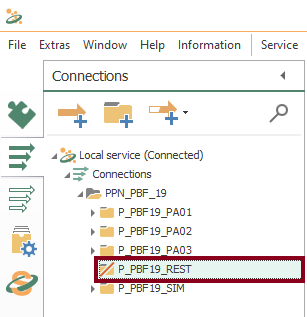
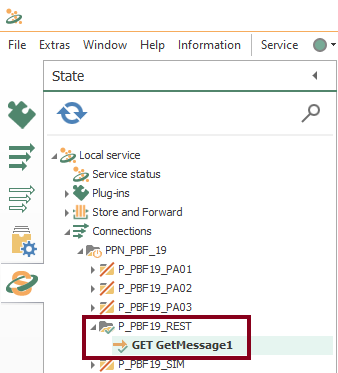
- Create a “REST” folder to arrange your resources better. For example, name P_PBF19_REST to your main connections folder.
Create your First Basic Test Resource
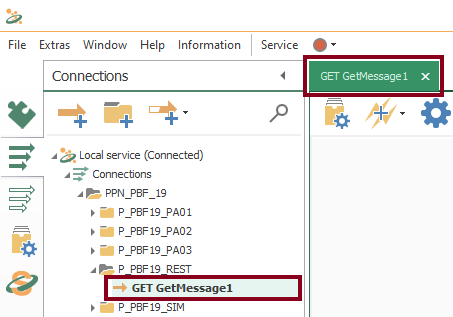
- To begin with, let’s create our first basic resource as “GET GetMessage1“:

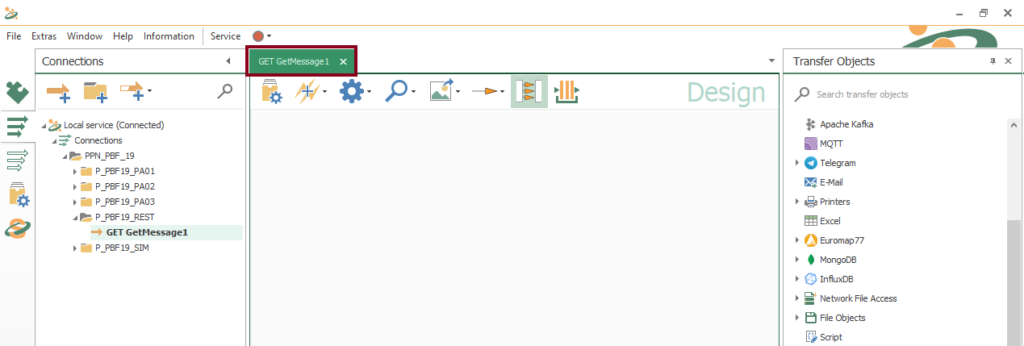
- Watch an empty design panel so you can start building your connection:
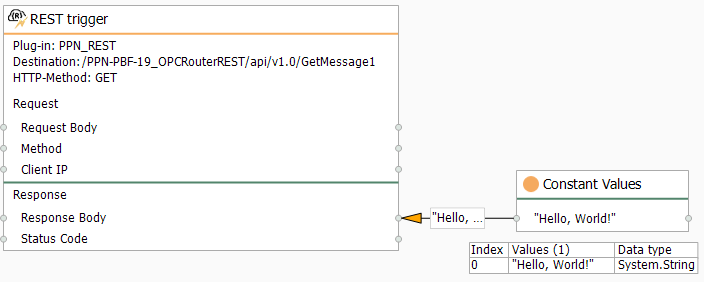
- Then, drag and drop these two blocks as shown here:

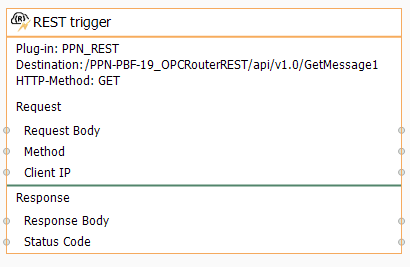
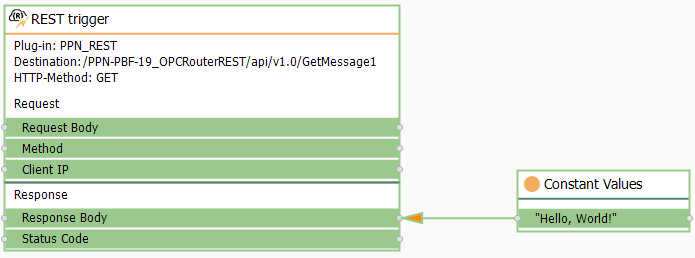
- At this point, edit the REST trigger block and make sure it looks like this:

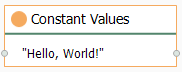
- Following this, edit the “Constant Values” block with a fixed “Hello, World!” message.

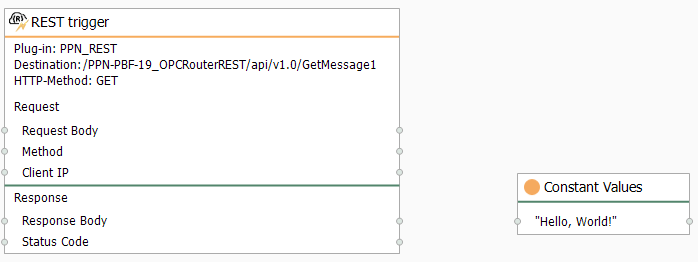
- At this instant, make sure both transfer objects look like these:
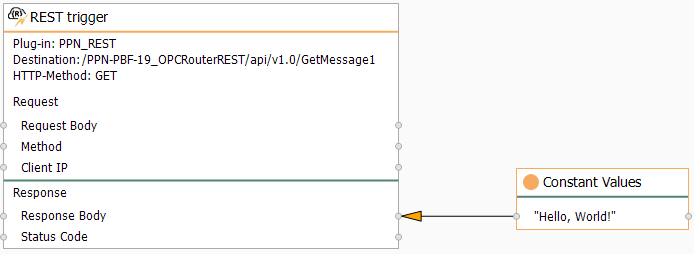
- Finally, make sure to link blocks as shown here to complete your first basic integration test:
Compile, Save and Publish your OPC Router Project Configuration with REST
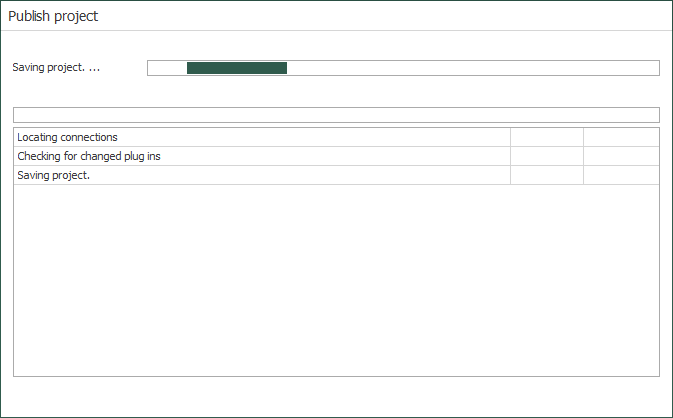
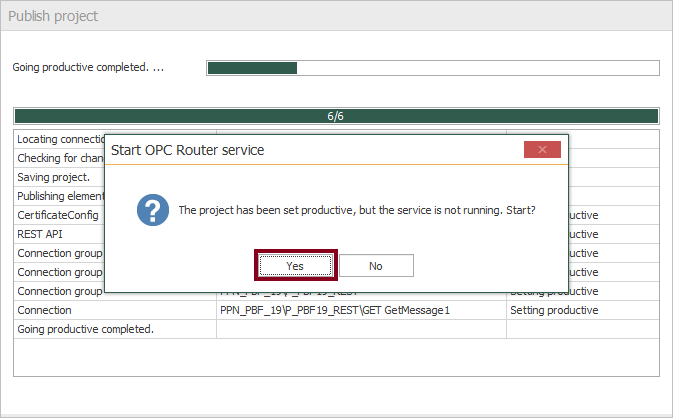
- At this time, you need to compile, save and publish the connection you just created by clicking the “Go productive” button:
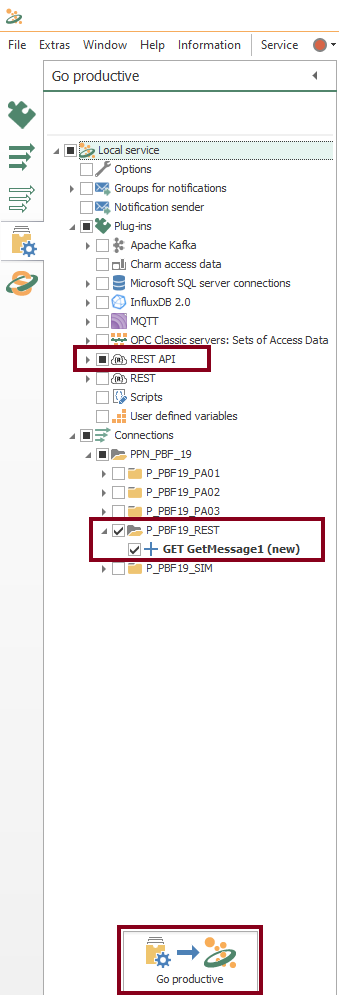
- Meanwhile, the project is saved and published.
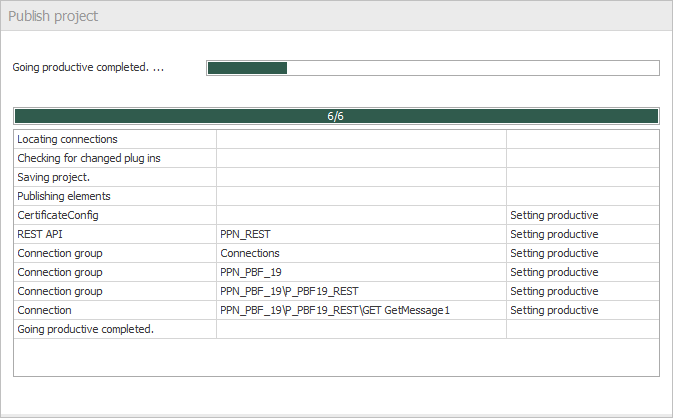
- After that, press the “Yes” button to start the OPC Router service and run your application.
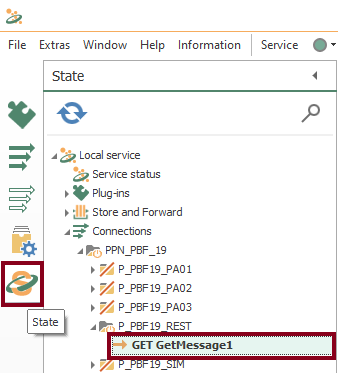
- Lastly, watch the connection state:
Test HTTP requests with Swagger and Postman
Swagger

Swagger is a set of open-source tools built around the OpenAPI Specification (previously known as the Swagger Specification) that can help you design, build, document and consume REST APIs. The major Swagger tools include:
- Swagger Editor – browser-based editor where you can write OpenAPI definitions.
- Swagger UI – renders OpenAPI definitions as interactive documentation that lets your users try out the API calls directly in the browser.
- Swagger Codegen – generates server stubs and client libraries from an OpenAPI definition.
- Swagger Editor Next (beta) – browser-based editor where you can write and review OpenAPI and AsyncAPI definitions.
- Swagger Core – Java-related libraries for creating, consuming, and working with OpenAPI definitions.
- Swagger Parser – standalone library for parsing OpenAPI definitions.
- Swagger APIDom – provides a single, unifying structure for describing APIs across various description languages and serialization formats.
Postman

There are various tools for quick and easy testing of REST interfaces. One of the best known is Postman. Postman is an API platform for building and using APIs, which simplifies each step of the API lifecycle and streamlines collaboration so you can create better APIs.
API testing with Swagger
.To start testing with the Swagger framework, do this:
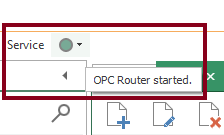
- Firstly, make sure the OPC Router service is running:
- In the REST API “PPN_REST”, copy the link from the OpenAPI UI URL. For example, you should see something like this:
http://DESKTOP-92S2B9F:8383/PPN-PBF-19_OPCRouterREST/api/v1.0/openapi/index.html?url=%2fPPN-PBF-19_OPCRouterREST%2fapi%2fv1.0%2fdata.json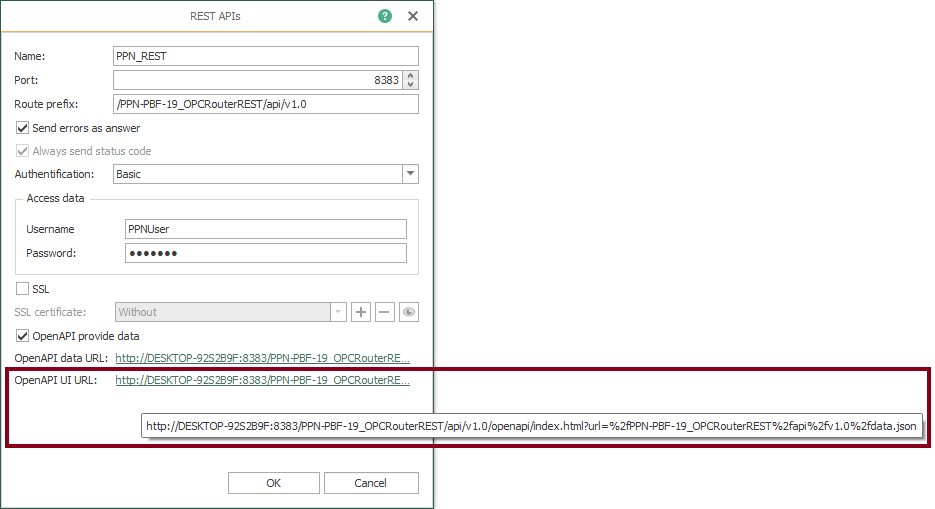
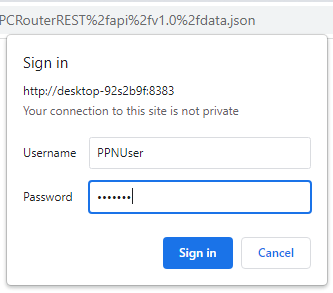
- At this instant, open a web browser and enter the copied OpenAPI UI URL in a new tab:

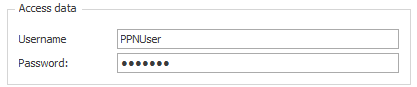
- When prompted, enter your stored credentials:
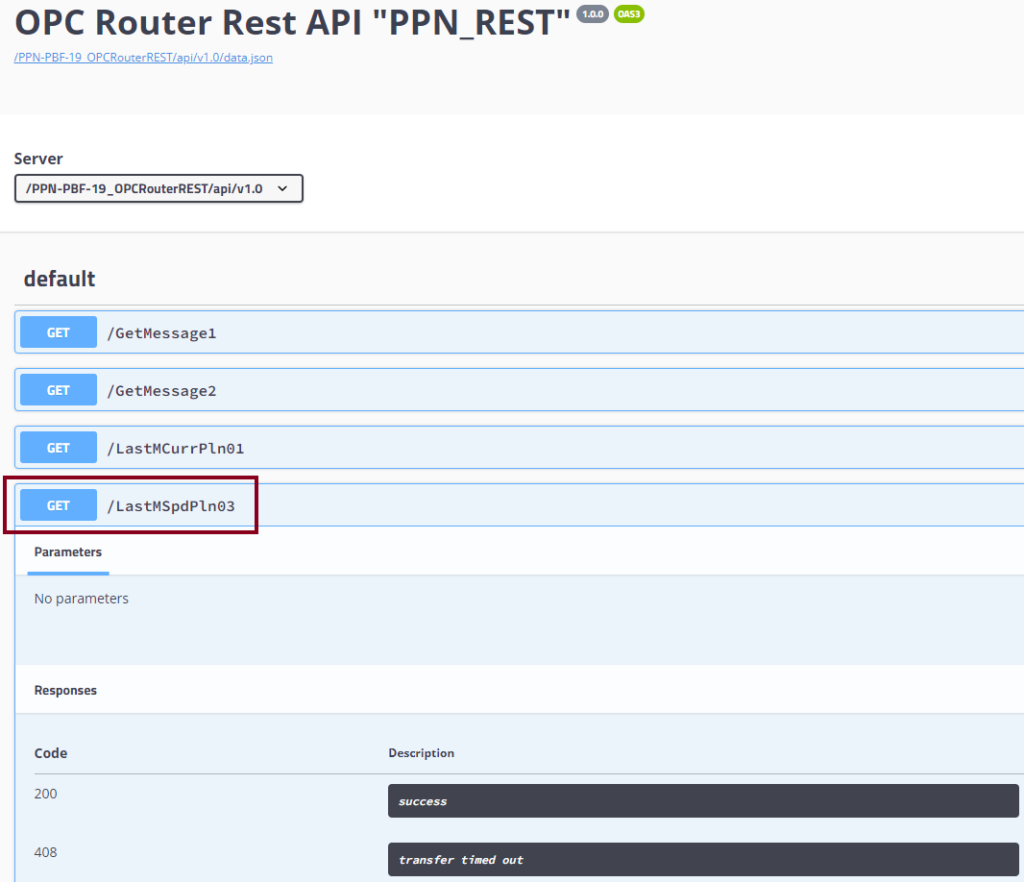
- Simultaneously, notice the Swagger main page:
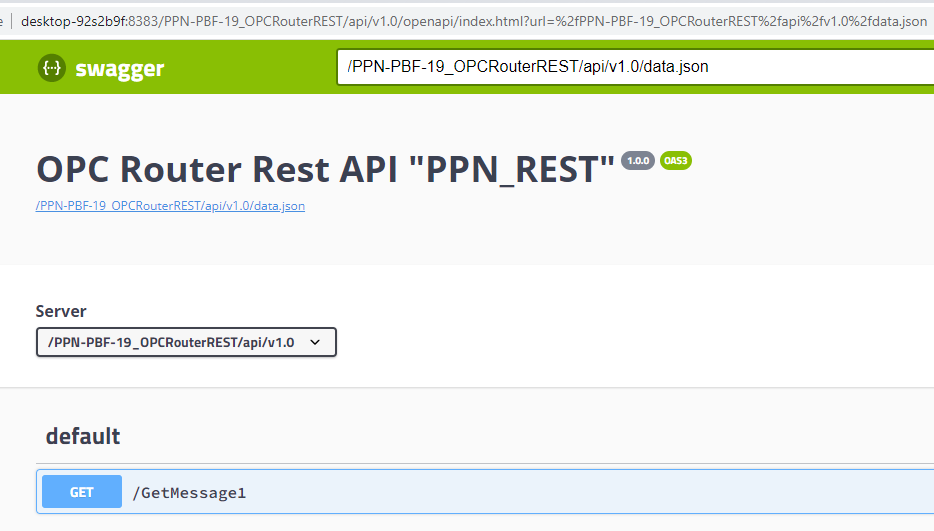
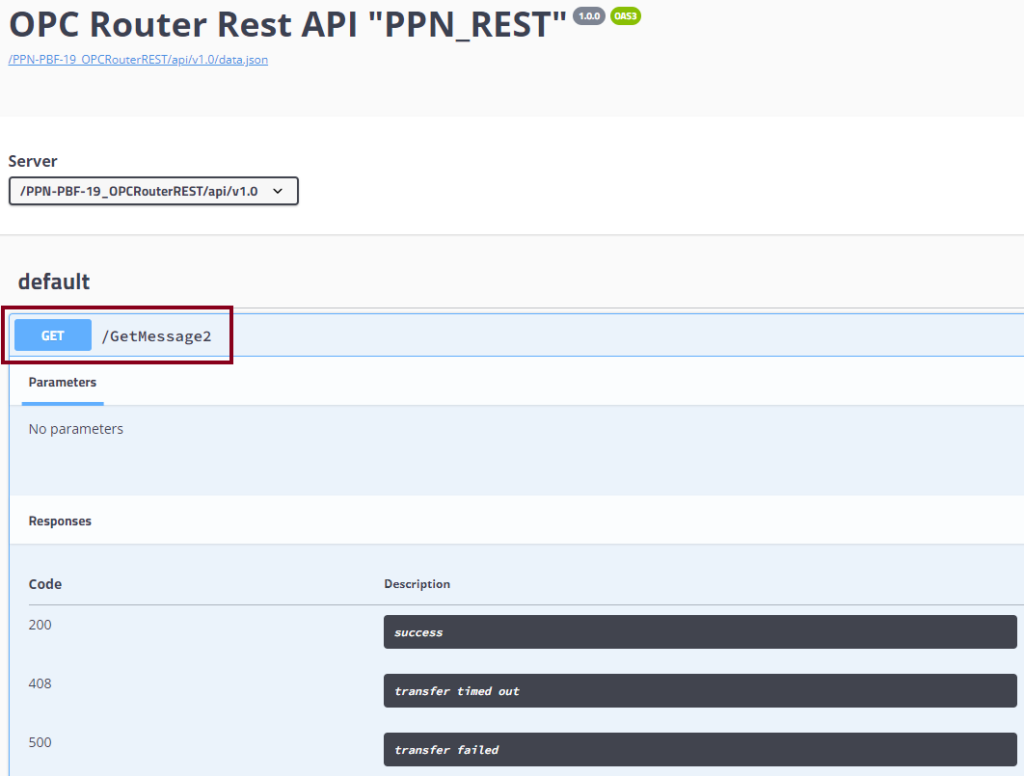
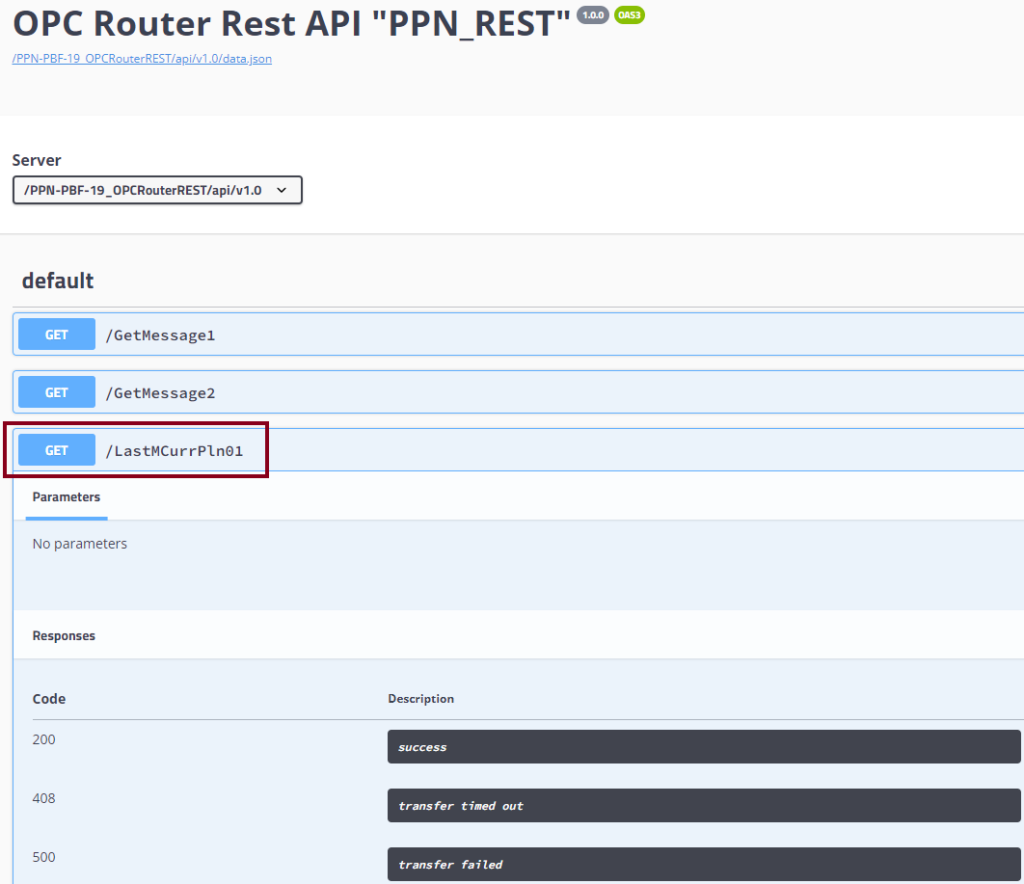
- Following this, click the resource “/GetMessage1” to display its options:
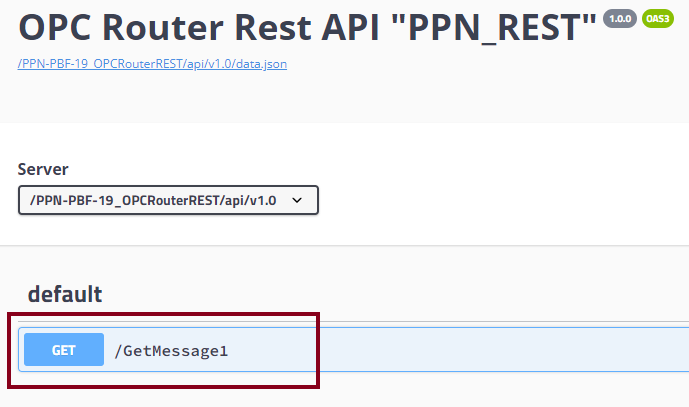
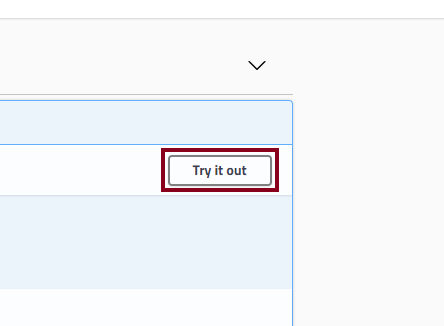
- Then, press the “Try it out” button to begin the test:
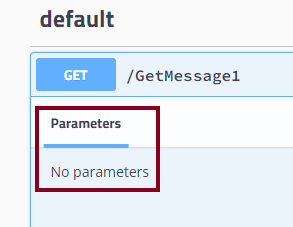
- Subsequently, watch the resource takes no parameters:
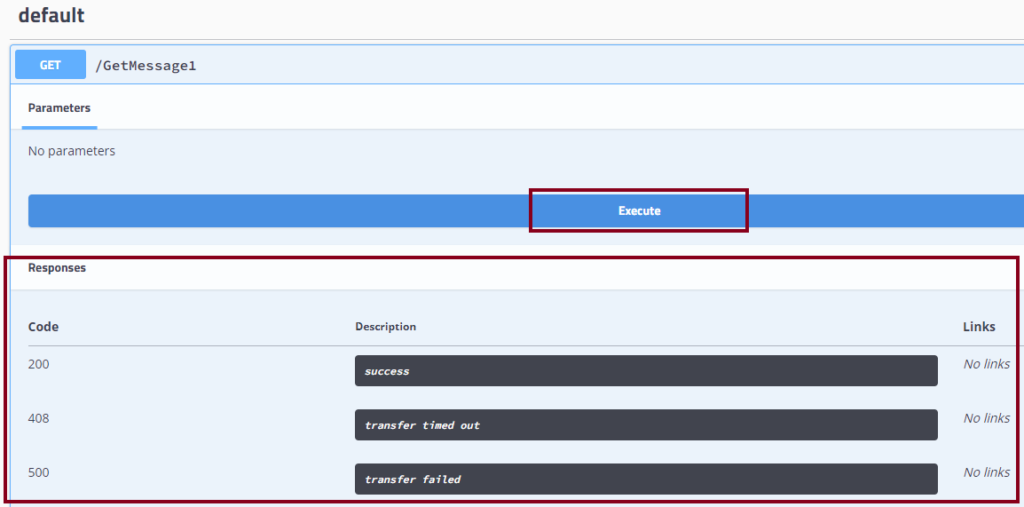
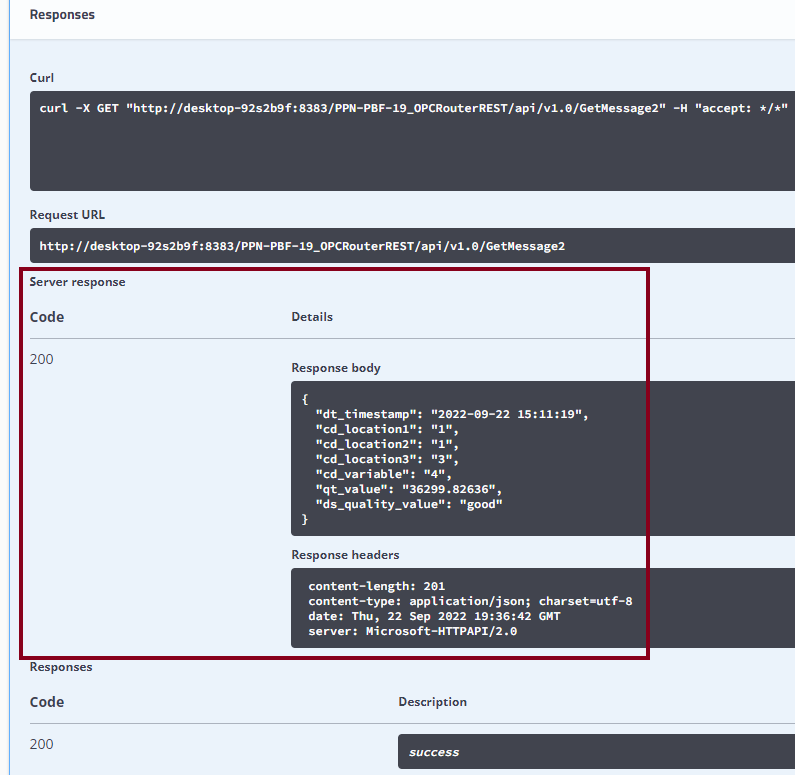
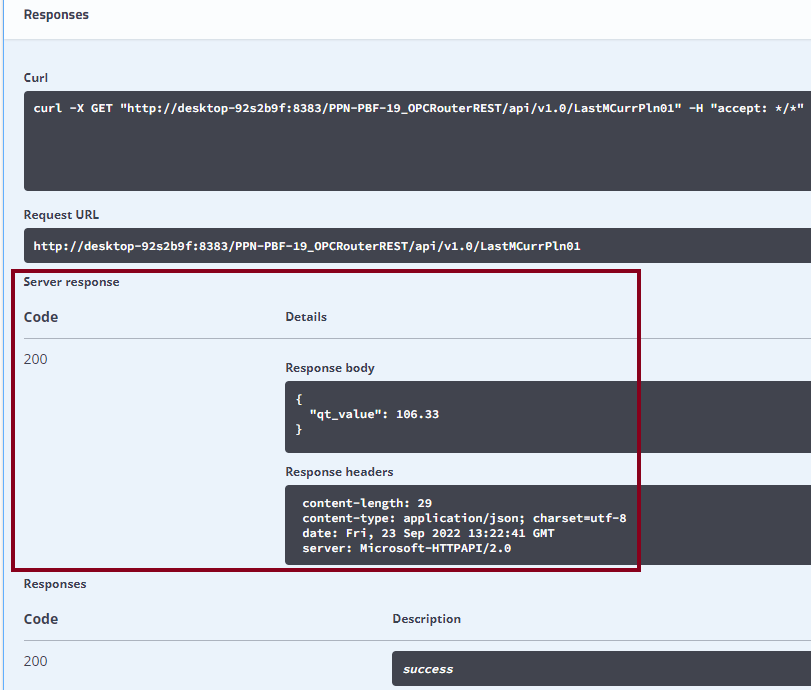
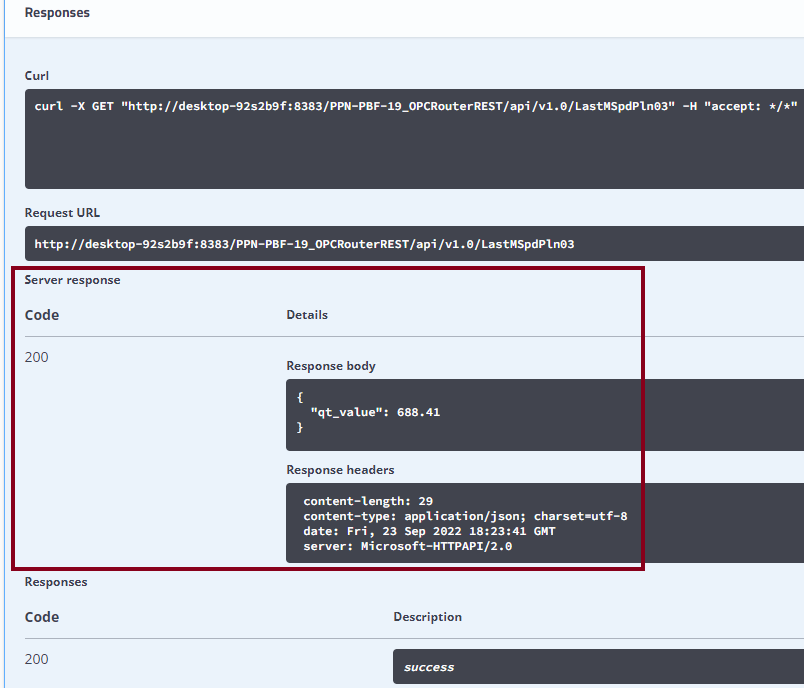
- After that, press the “Execute” button and prepare for the response:
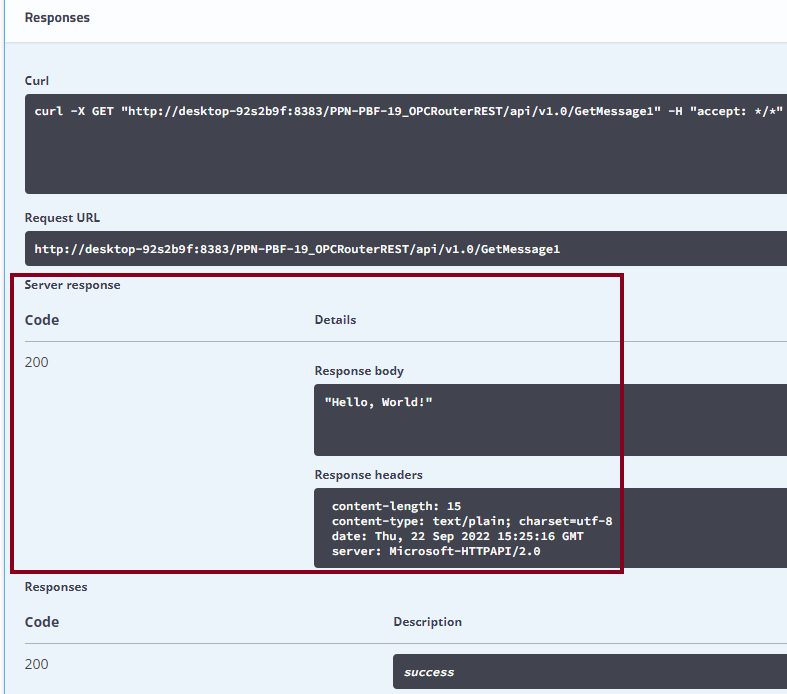
- At this instant, watch the response went successfully.
- Lastly, go back to OPC Router and check the connection.
API testing with Postman
In order to start testing with Postman, do this:
- Again, make sure the OPC Router service is running.
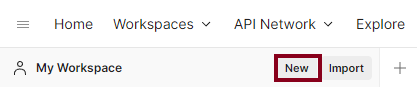
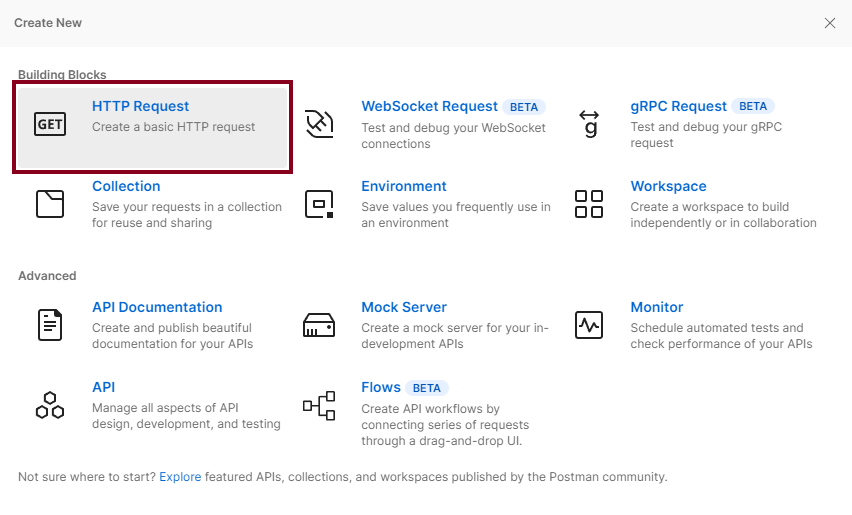
- At this instant, run the Postman desktop application.

- Then, create a new HTTP request by pressing the “New” and “HTTP Request” buttons.
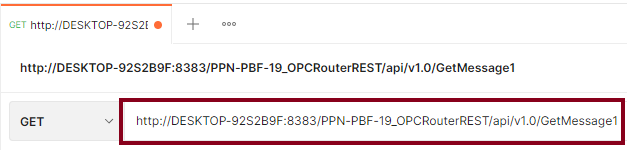
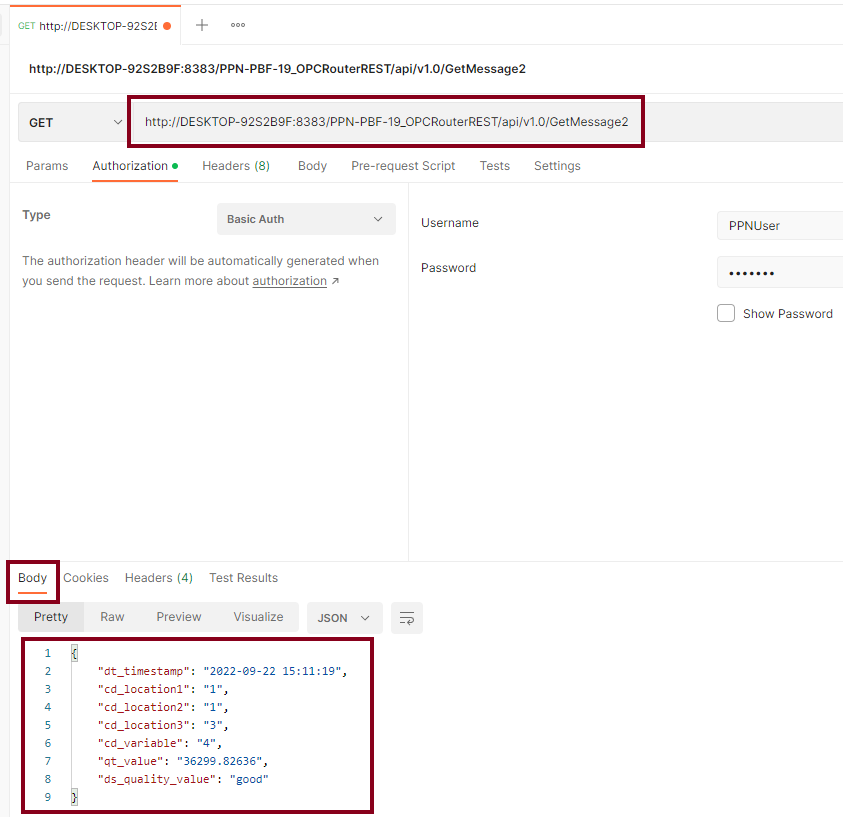
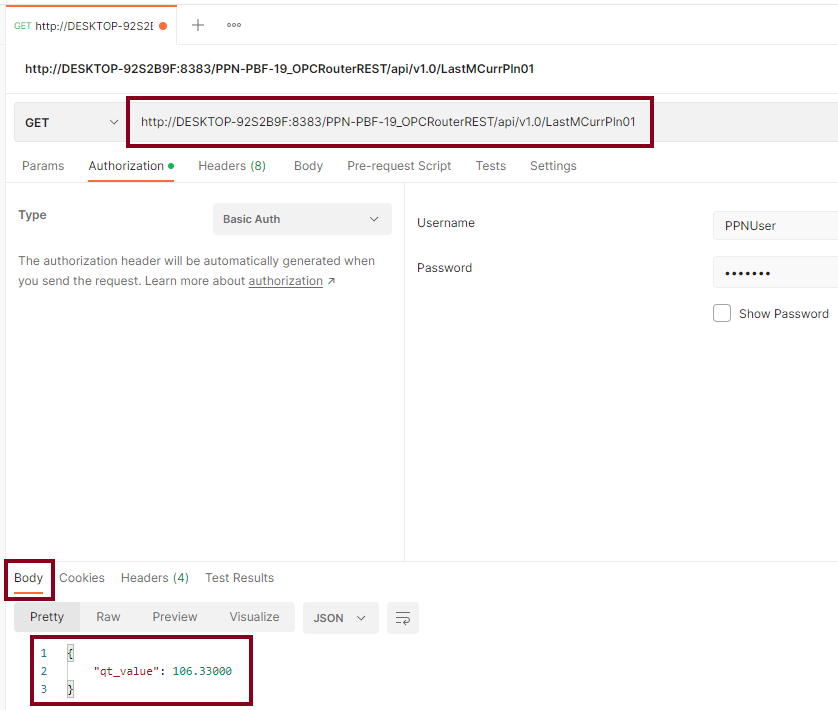
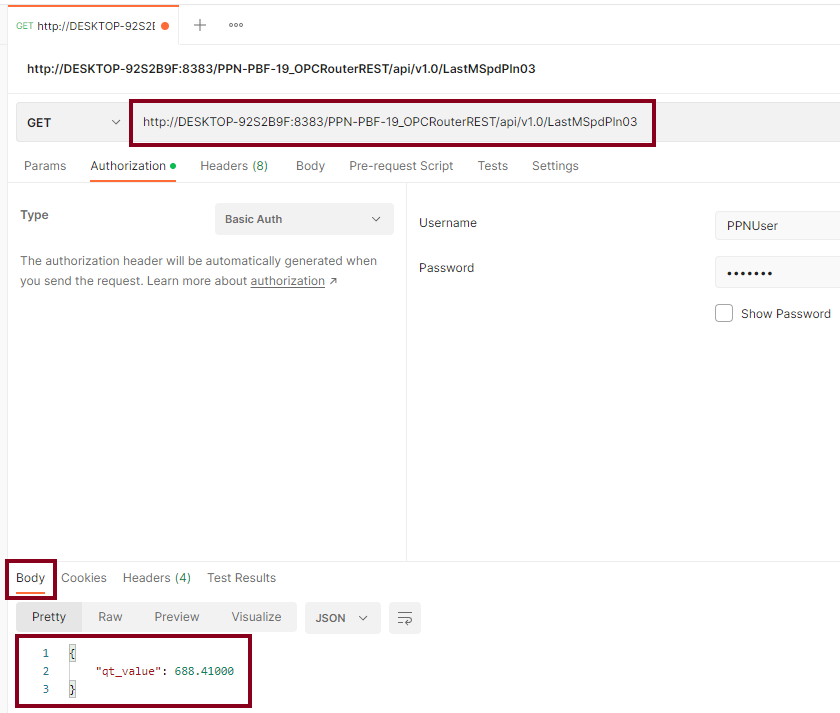
- With this in mind, enter the request URL:
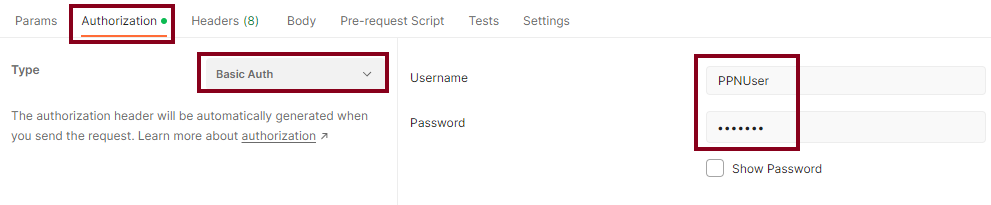
- Change to the “Authorization” tab and enter the appropriate credentials:
- Press the “Send” button to test the HTTP request against the REST API.
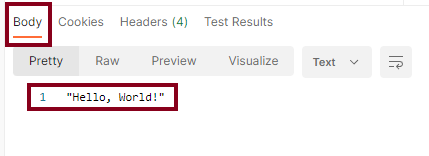
- Finally, verify the successful response:

Creating Other Resources
/GetMessage2
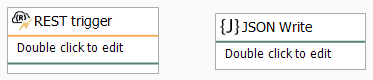
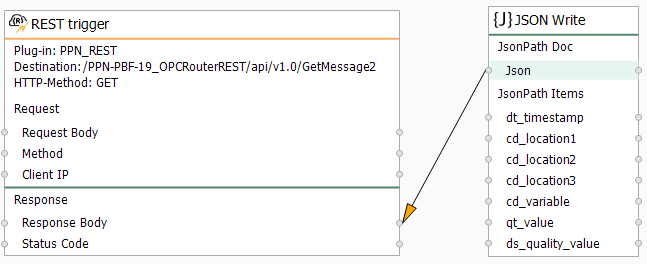
- Now, let’s create our second basic resource as “GET GetMessage2“. Repeat the same procedure as with “/GetMessage1”, but change the “Constant Values” block for a “JSON Write” block.
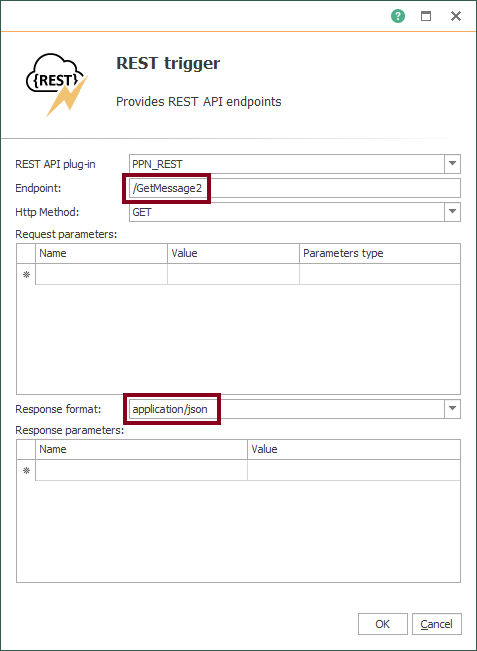
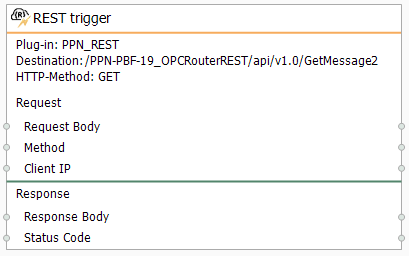
- After that, edit the REST trigger block to include the new URL endpoint and the JSON response format:
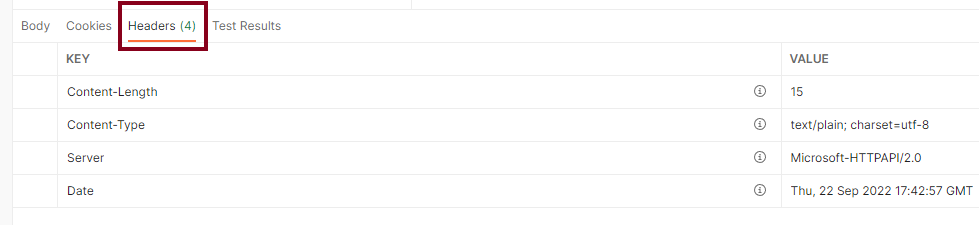
- Following this, edit the “JSON Write” block with a fixed time-series data point.
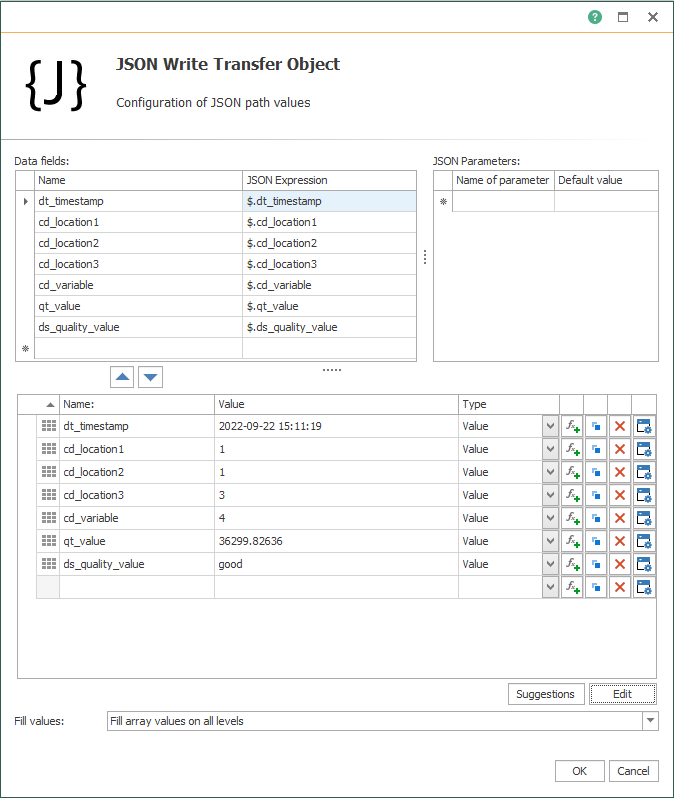
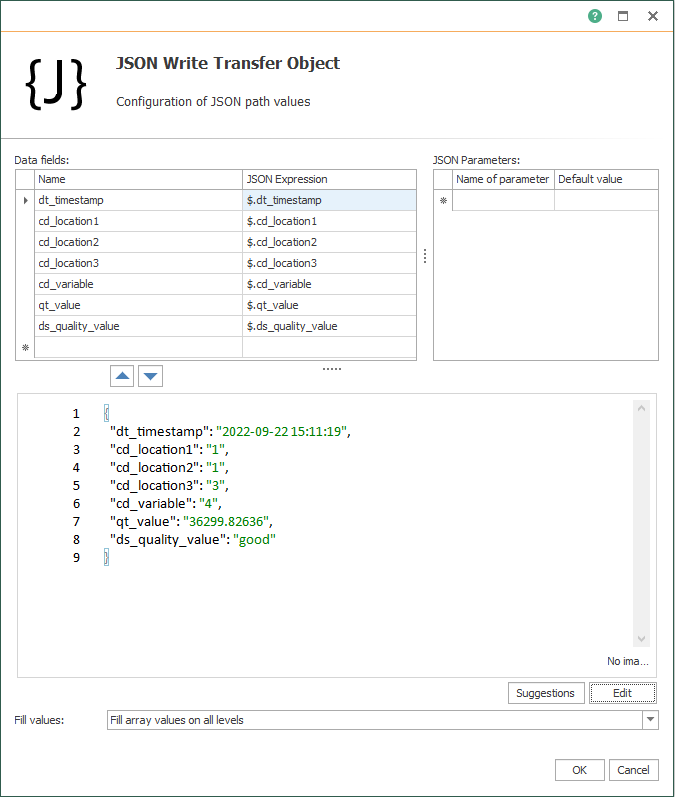
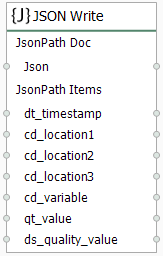
- Specifically, make sure both transfer objects look like these:
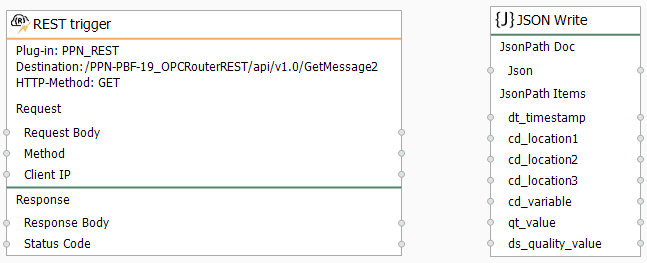
- Finally, make sure to link blocks as shown here to complete your second basic integration test:
- Repeat the section “Compile, Save and Publish your OPC Router Project Configuration with REST” to apply changes.
- Later, test the API with Swagger.
- Additionally, test the API with Postman.

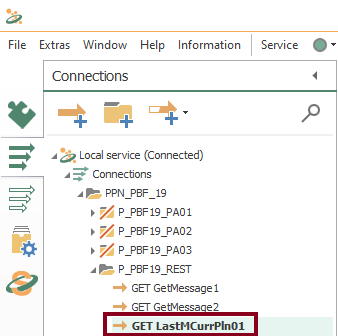
/LastMCurrPln01
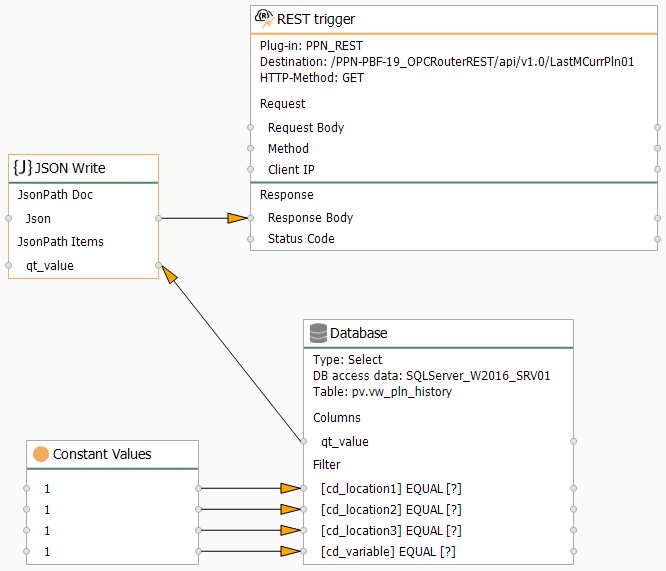
- Let’s create the resource to return the most recent value of MCurr in PLN01 as “GET LastMCurrPln01“:
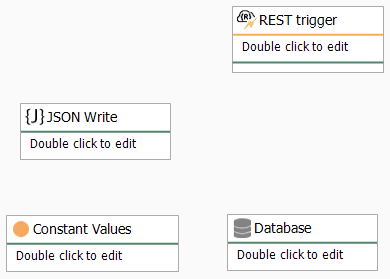
- Then, drag and drop these four blocks as shown here:
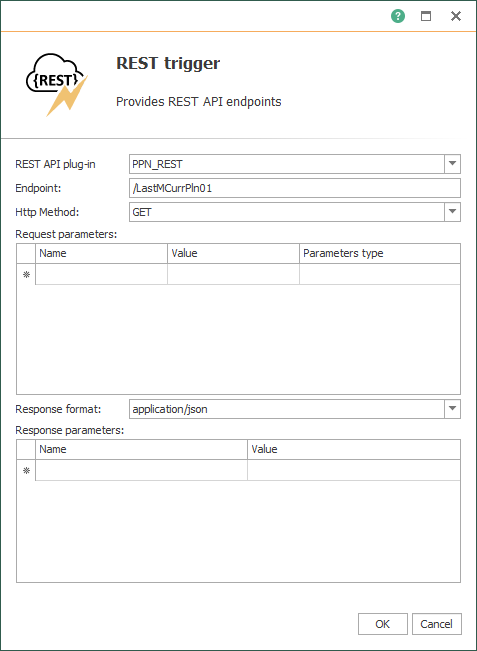
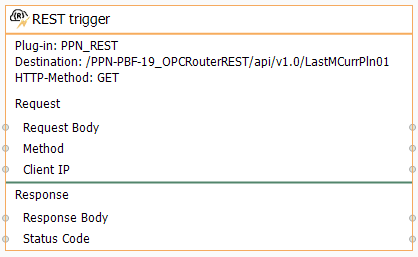
- After that, edit the REST trigger block to include the new URL endpoint and the JSON response format:
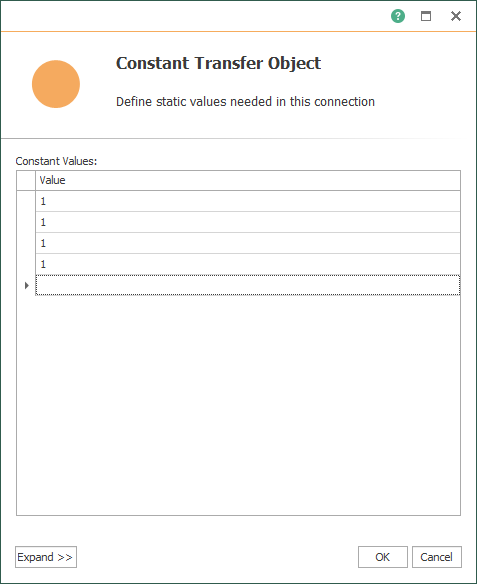
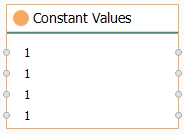
- At this point, edit the “Constant Values” block with a fixed location for PLN01 and the appropriate variable code:
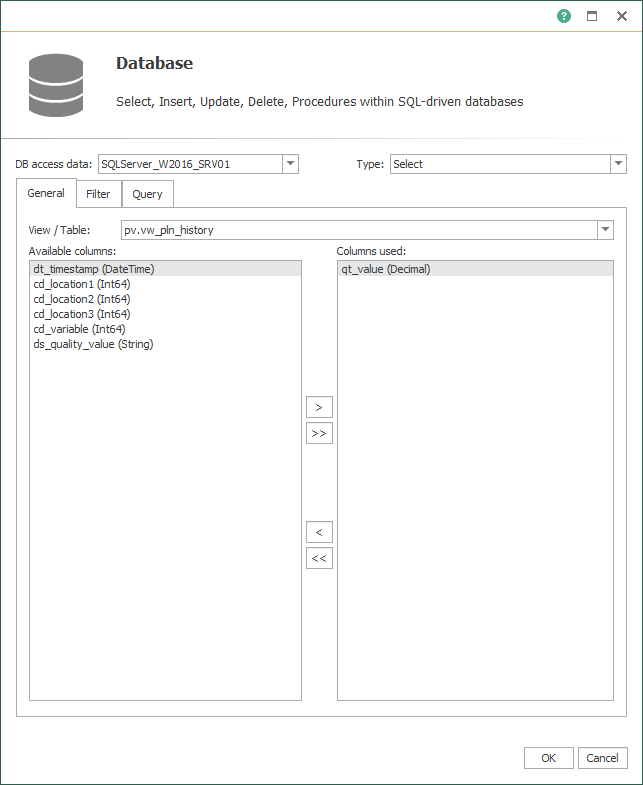
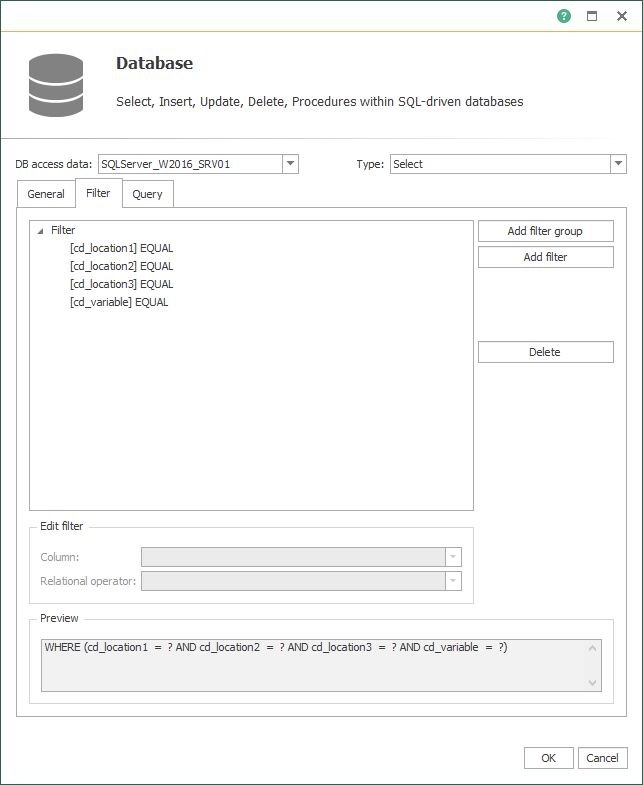
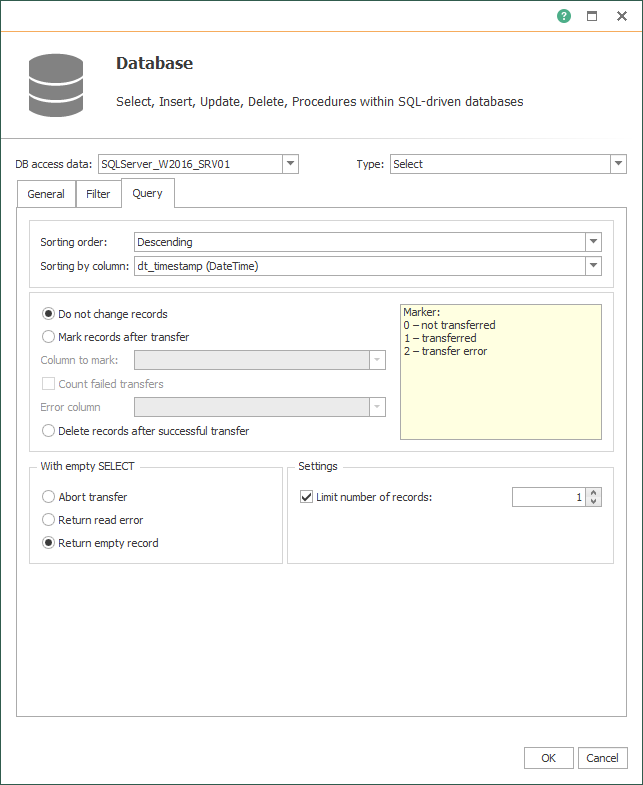
- Furthermore, edit the Database block and make sure it looks like this:

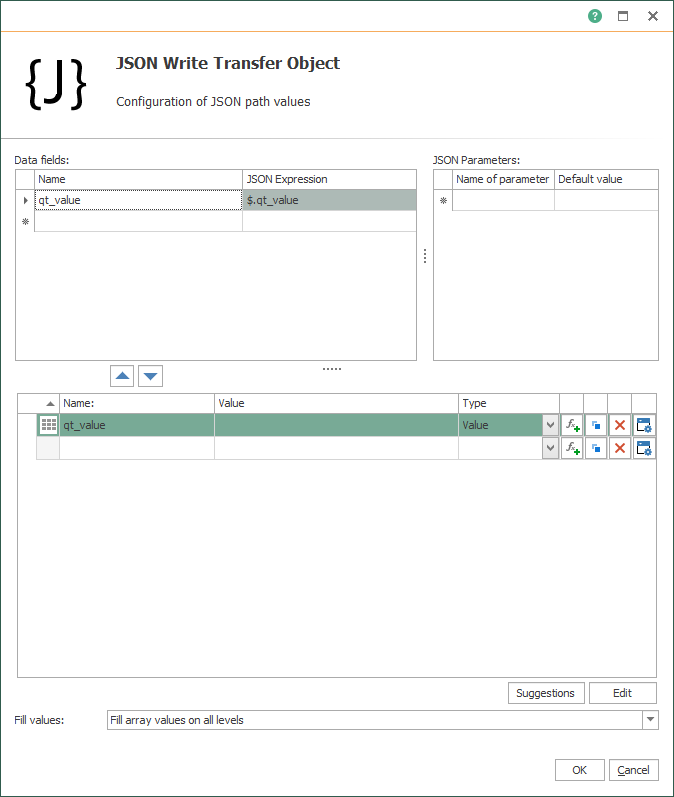
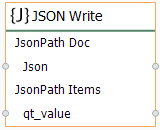
- Also, edit the JSON Write block:
- Then, make sure all transfer objects look like these:
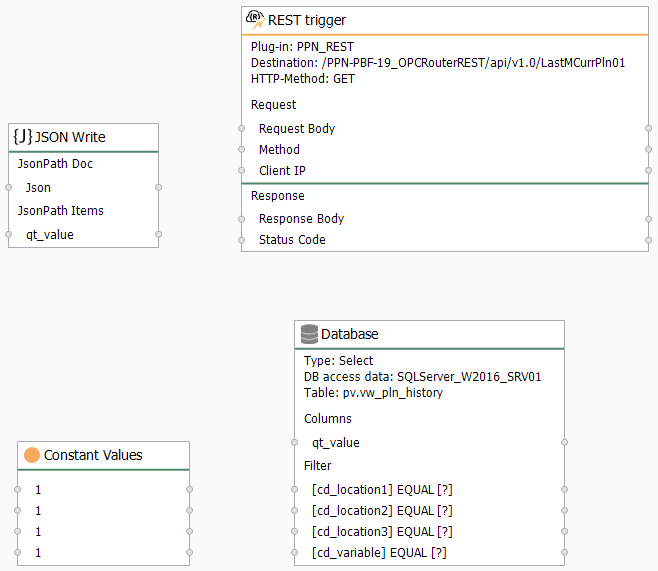
- Following this, make sure to link blocks as shown here to complete your third resource:

- Repeat the section “Compile, Save and Publish your OPC Router Tutorial Project Configuration with REST” to apply changes.

- At this point, test the API with Swagger.
- Moreover, test the API with Postman.

- Lastly, check the most recent value for MCurr in PLN01 within SQL Server:

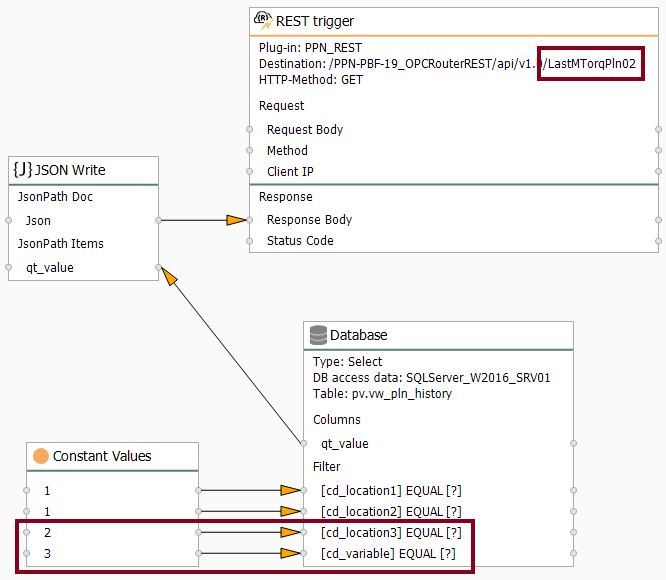
/LastMTorqPln02
- Let’s create the resource to return the most recent value of MTorq in PLN02 as “GET LastMTorqPln02“. Repeat the same procedure as with “//LastMCurrPln01”, but change values for “cd_location3” and “cd_variable” within the “Constant Values” block, along with the appropriate URL endpoint within the “REST trigger” block.

- Repeat the section “Compile, Save and Publish your OPC Router Tutorial Project Configuration with REST” to apply changes.
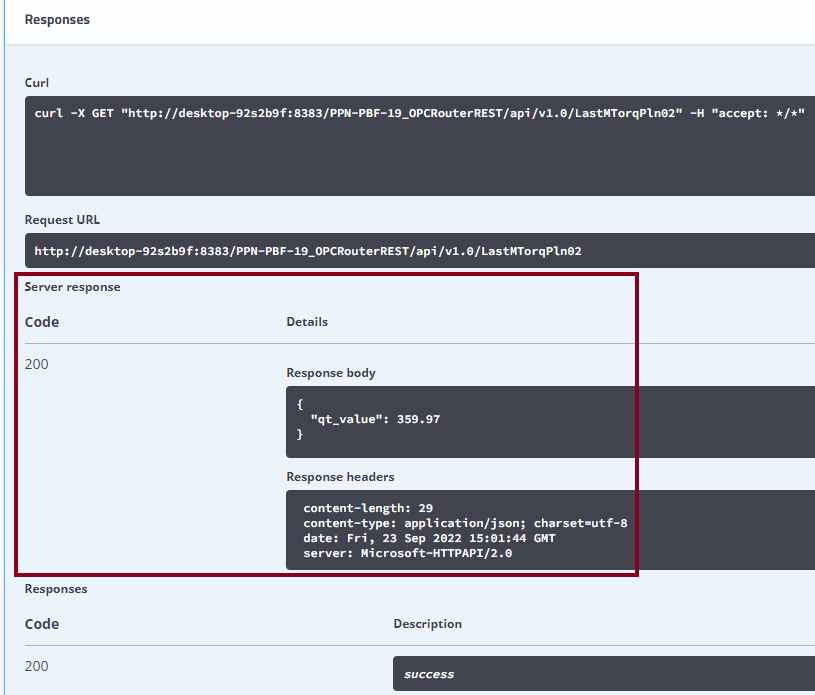
- Also, test the API with Swagger.

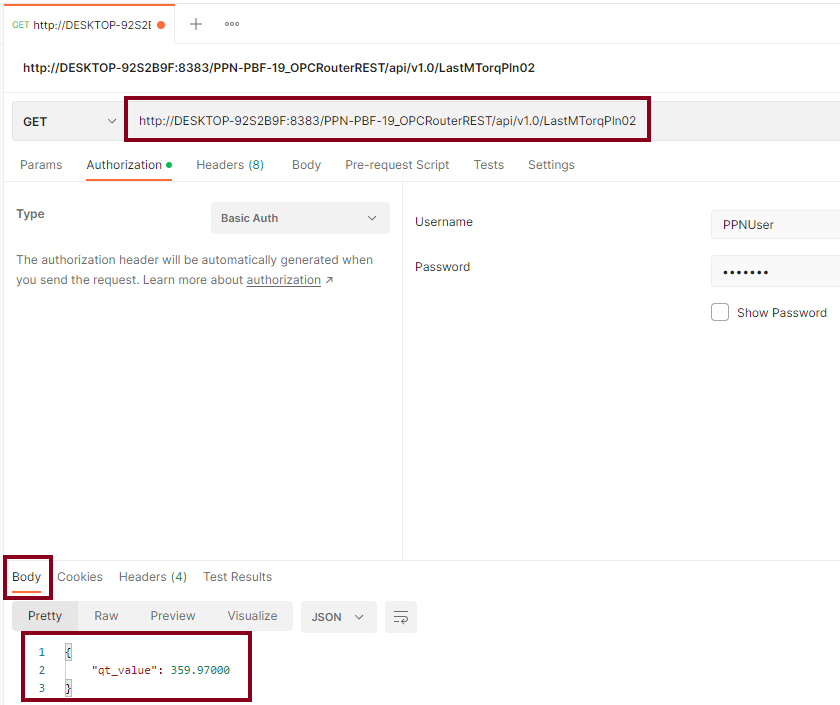
- Additionally, test the API with Postman.

- Lastly, check the most recent value for MTorq in PLN02 within SQL Server:

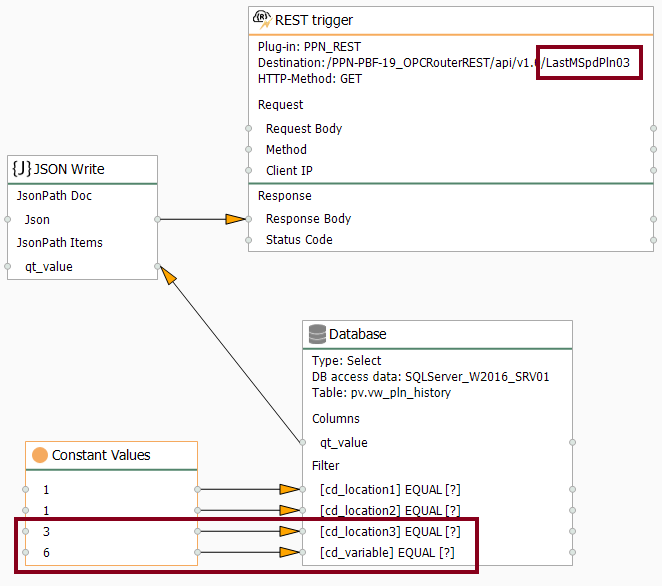
/LastMSpdPln03
- Let’s create the resource to return the most recent value of MSpd in PLN03 as “GET LastMSpdPln03“. Repeat the same procedure as with “/LastMTorqPln02”, but change values for “cd_location3” and “cd_variable” within the “Constant Values” block, along with the appropriate URL endpoint within the “REST trigger” block.

- Repeat the section “Compile, Save and Publish your OPC Router Tutorial Project Configuration with REST” to apply changes.
- Additionally, test the API with Swagger.
- Test the API with Postman.

- Finally, check the most recent value for MSpd in PLN03 within SQL Server:

/LastValueLoc{location}{variable}
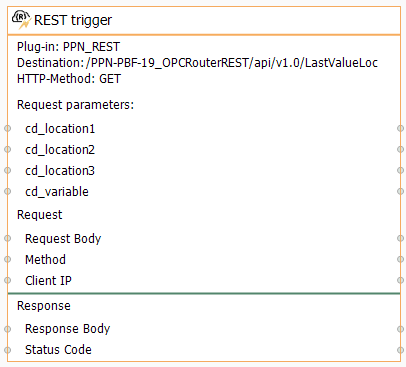
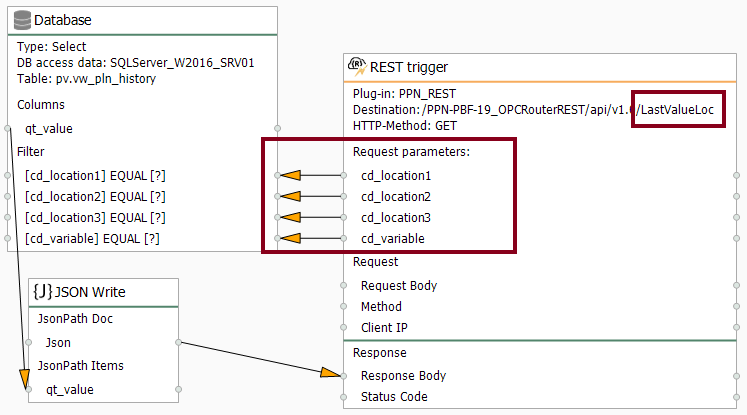
- Let’s create the resource to return the most recent value of any available variable in any specific location as “GET LastValueLoc“. The new thing to do here is to add request parameters “cd_location1”, “cd_location2”, “cd_location3” and “cd_variable” within the “REST trigger” block, along with the appropriate URL endpoint.

- Edit the REST trigger block to include the new URL endpoint and request parameters:

- Then, make sure to link blocks as shown here:
- Compile, save and publish.
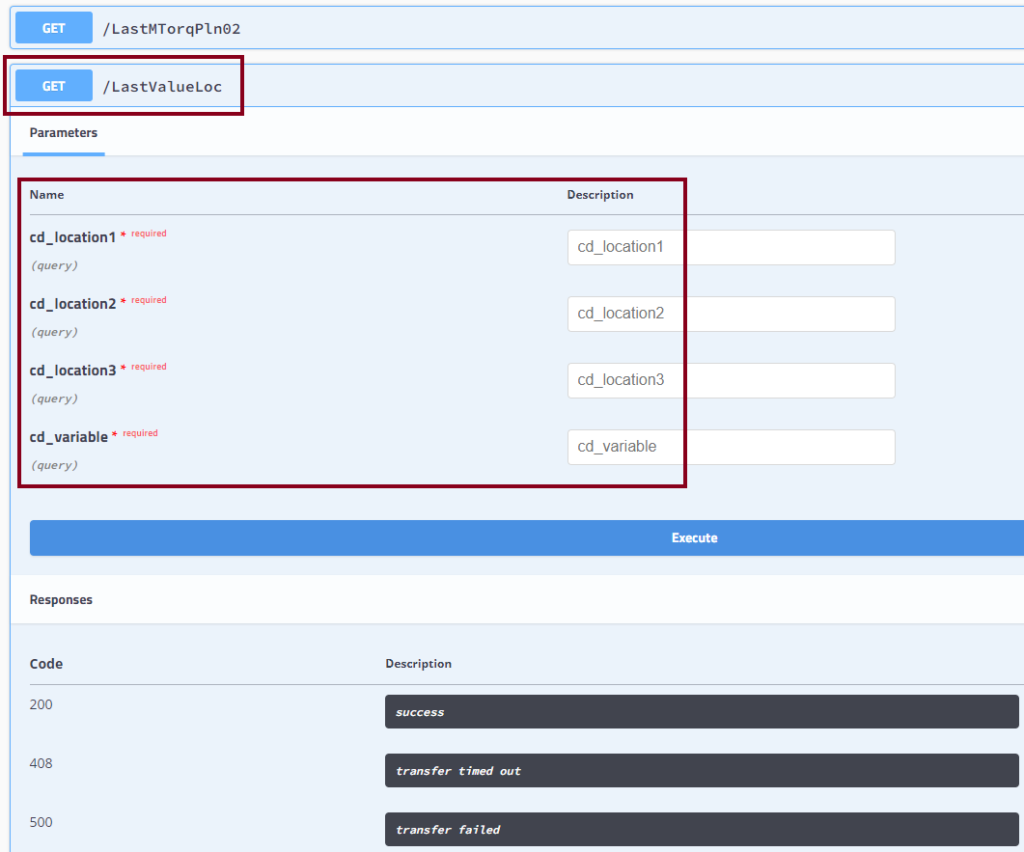
- Also, test the API with Swagger.
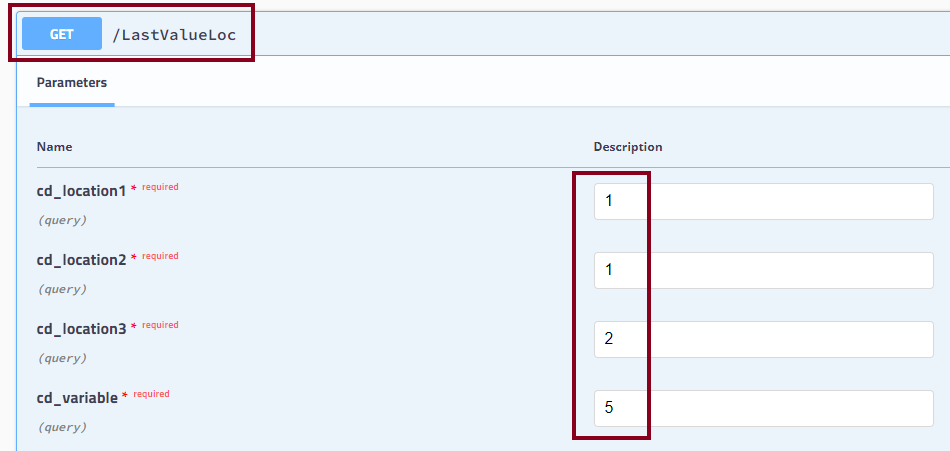
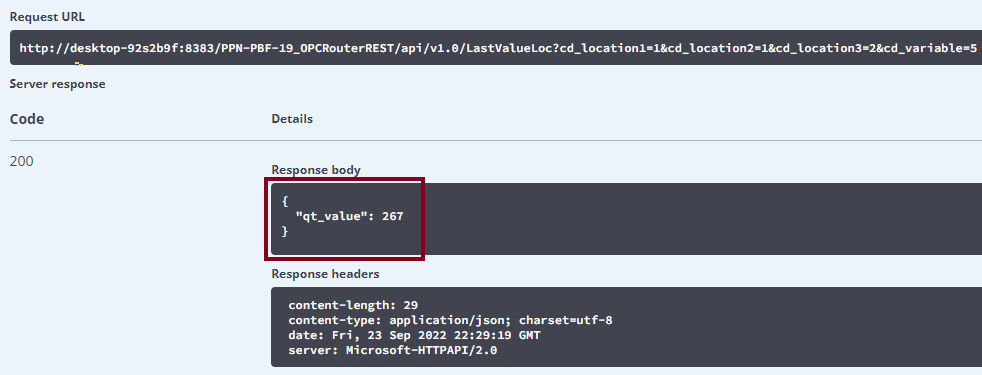
- Finally, get the most recent value of MVolt in PLN02:

Did you enjoy this OPC Router tutorial with REST? I’d love to hear from you.
Stay tuned and follow part 8 of this tutorial! 😎
For other articles like this one in English, click here. To see them in Spanish, click here.
A very comprehensive explanation.
Indeed! 😎
Comments are closed.